How to cut gypsum tiles to resemble bricks
A fundamental point for many is how to cut such tiles. In fact, everything is very simple, because it is plaster, it is to saw with an ordinary hacksaw, whether for wood or metal. They sawed it slightly and broke it. nothing complicated. The edges are processed with ratfil or a knife.
When I started making seams, at first everything went fine, but later my glued tiles began to become clogged with glue and thus get dirty. I saw this moment, but unfortunately I didn’t immediately. The photo shows what this leads to. But I realized my mistake and corrected myself. After that, things went like clockwork for me. Poem, try to avoid similar mistakes, but you will always have time to “mess up”.
But if you have snow-white brick-like gypsum tiles and you use snow-white glue on a gypsum base, then there will be nothing terrible about this at all. When drying, the glue becomes inconspicuous on light-colored gypsum tiles, without spoiling its appearance, which has been tested more than once.
THE COST FOR LAYING DECORATIVE TILES CAN BE FOUND ON THIS Page
And the very last thing. Try not to stain the tiles with glue at all. Since on some types of gypsum tiles, due to the peculiarities of their texture, after it dries it will be problematic to clean it. Work with unsullied hands. And again I repeat that the glue can be any kind of tile.
Stone-like gypsum tiles: texture and structural variations
Stone -look gypsum tiles are an elegant and stylish coating, easy to install and ideal for decorative cladding of premises. The tiles are made on the basis of gypsum polymer components and are a high-quality imitation of natural analogues.
An example of a decorative plaster coating to look like stone
How to make gypsum tiles
It is possible to make gypsum products at home. The process does not require special equipment or devices. To prepare you will need:
- building gypsum;
- lime;
- PVA glue;
- water;
- plasticizers.
The cost of homemade gypsum tiles will decrease significantly if plasticizers are replaced with citric acid.
Mix the composition using a drill or construction mixer. Prepare a mixture of paste-like consistency and pour it into silicone or polyurethane molds. Gypsum hardens quickly, so the mixture is made in portions for one pour according to the number of molds.
To remove bubbles from the mixture, use a stiff brush. You can also place filled forms on a vibrating table.
The solution is left to harden in a room without through air movement at room temperature.
The hardening time in the mold is up to 30 minutes, then the tile is removed from it and left to dry completely for up to 10 hours. After which the elements are ready for use.
You can give the desired color to the product in two ways:
- the finished product is coated with acrylic paint;
- a coloring powdered pigment or dye is added at the stage of preparing the gypsum mixture.
Design of a flight of stairs
Finishing with gypsum tiles to look like stone.
Gypsum stone has gained popularity due to the variety of forms, ease of its manufacture and processing.
READ Chainsaw Chain Sharpener
But does it make sense to produce stone from gypsum yourself for cladding in a house?
Profitability of gypsum products in the presence of molds.
Maybe such calculations affect the market value of gypsum products. Their prices remain high. Although I don’t consider the very idea of making gypsum products on site a utopia. Thus, some teams are engaged in the production of gypsum fillets directly during the renovation of apartments.
Production of gypsum stucco on site.
Artificial stone countertop for the bathroom
Stone Profi specialists are engaged in the production of a wide range of products from artificial or natural stone of various types for furnishing home interiors in St. Petersburg and the Leningrad region. We offer individuals and legal entities high-quality and durable countertops and bathroom sinks (washbasins), made to order at manufacturer prices without intermediaries. A wide range of colors and textures will allow you to quickly choose the optimal solution for creating an exquisite individual interior in any style, from classic to modern or avant-garde.
Bathroom countertop cost
Natural marble
Price from 9000 rubles per sq.m.
Natural granite
Price from 5000 rubles per sq.m.
Elite natural onyx
Price from 25,000 rubles per sq.m.
Quartz agglomerate STILL-STONE
Price from 5200 rubles per sq.m.
Quartz agglomerate Smartquartz
Price from 5200 per sq.m.
Quartz ceramics UltraTop
Price from 7000 per sq.m.
Quartz agglomerate VicoStone
Price from 5200 per sq.m.
Quartz stone Technistone
Price from 5200 per sq.m.
Quartz stone Caesarstone
Main qualities and advantages
Decorative tiles have unique properties and characteristics:
Coziness and comfort
Disadvantages of gypsum products and ways to solve the problem:
- Water absorption - when exposed to moisture, the material is deformed. To mitigate the risk, the decorative surface is coated with a specialized water-repellent compound. Reception is acceptable for interior decoration.
- Fragility, softness and ductility - they work with tiles carefully, carefully and carefully.
- Low frost resistance - use is limited to dry and indoor areas.
- Difficult to maintain - the textured surface promotes the accumulation of dust; for protection they are coated with varnish.
Gypsum products are easy to cut and machine. Cut the tiles with a hacksaw using a miter box or square, and drill the necessary holes with a drill.
When laying gypsum tiles, the most problematic is the joining of external corners. To ensure a perfect fit, the material is cut with a grinder at an angle of 45 degrees. The resulting edge of the artificial stone is polished. The downside of the technology is noise and large dust formation.
You also have to cut the plaster finish at the junction of walls and floors, at the places where sockets and switches are installed. Curvilinear structures (for example, an arched opening) require shaped trimming. If necessary, the edge is painted.
To reduce costs and the number of cut tiles, before laying:
- mark the surface to be treated;
- unpack the products and sort them by shade, thickness, size.
Making homemade tiles
Joining seams
The presence of seams helps prevent dust and dirt from getting into the gaps between elements and ensures sealing. Seaming is carried out using a special bag or syringe gun. A special cement-based solution is used as a grouting material. This allows you to imitate the laying of natural stone.
When jointing, you need to fill the syringe with the solution and slowly squeeze it out in the direction of the seam. After the solution has set somewhat, press it with a spatula.
It is recommended to fill the joints completely 5 mm from the back of the tile.
You can remove excess mortar after 40–45 minutes, when the grout has hardened a little. You can use a wooden or special metal trowel for this.
Preparation of materials
Installation of gypsum tiles does not require special preparation of the base. It is enough to follow the basic principles:
- the surface should be smooth, without unevenness and wavy bends;
- the base for the tiles must be cleaned and degreased;
- If the surface has pronounced absorbent properties or is porous, it must first be primed.
The adhesive for installation must be prepared according to the instructions for use indicated on its packaging by the manufacturer. It is important that when applying an adhesive solution to a wall or other surface, care must be taken to ensure that it fills all microcracks. However, a large amount of adhesive solution can create a “cement joint”. It is best to use a notched trowel to apply the solution.
Pay attention to the amount of prepared glue. You should not knead it too much, as you may not have time to use it before the end of its usefulness. It is worth considering that facing corners takes a little longer than when working on a wall.
Laying gypsum tiles
Gypsum-based tiles are used for interior decoration and cladding of room surfaces. This material has a number of advantages over analogues:
- ease;
- fire resistance;
- wear resistance;
- quality of decorative properties;
- thermal insulation and noise insulation qualities;
- environmental friendliness.
This material has additives created on the basis of modern technologies. It is a tool for implementing decorative solutions, as it repeats the texture of natural stone. Laying gypsum tiles does not require special skills; even a beginner can do it. The main thing is to familiarize yourself with the basic principles of installation of this material.
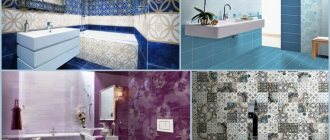
Tile in the interior
Design variations using decorative finishes are limitless:
- finishing of niches - they will be organically filled with stone or brick ;
- cladding of stoves and fireplaces - fire-resistant tiles are ideal;
- decor of staircases;
- design of ventilation ducts.
READ How to Cut a Hole in Glass
To make the finishing look more advantageous, avoid frontal lighting. Light shades of the material visually increase the space.
Key points for laying gypsum tiles:
If there are corner elements - cladding, it is better to start with them. But first check how different they are in height from ordinary elements. The difference in size can reach 2-3 mm. Due to the bead expanding towards the back of the product, the discrepancy can be even greater.
All such details can be revealed after tiling an inconspicuous area up to 50 cm high. In general, the entire proposed plane needs to be drawn into 30 - 50 centimeter horizontal segments (by level). This makes it possible to tie to these lines and maintain horizontal laying. Otherwise, a crook may appear.
cut gypsum decorative stone with a fine-toothed hacksaw. and finish it with a grater and sandpaper. This is the only advantage of gypsum stone.
How to cut gypsum tiles?
| home 01 foundation 02 floor 03 walls 04 windows 05 ceiling 06 roof 07 systems 08 materials 09 bath structure 10 tools 11 finishing 12 garage 13 dacha 14 law 15 dictionary 16 question/answer 17 photo 18 |
READ Why does a chainsaw cut crookedly in one direction?
In the process of finishing the wall surface with gypsum tiles, many people wonder how to cut . This is due to the fact that the material has a plastic structure, unlike artificial stone and the like. But this feature of gypsum polymer tiles can even be called an advantage, because it is possible to use tools of significantly lower hardness.
saw gypsum-based finishing materials:
- hacksaw for metal;
- hand saw for wood;
- an angle grinder with a diamond disc.
Cutting complex elements and subsequent processing of edges
If it is necessary to bypass an outlet, switch or other protruding elements, an excess area is marked on the tile, which is easily trimmed off with an ordinary chisel, and the edges are smoothed with fine-grain sandpaper. Shaped cutting of the ends is performed along the contour of the texture.
tiles can also be drilled well with standard metal or wood drills. But for better quality work, it is better to use a carbide-tipped tool. You can change the size or shape of the hole using a hand router.
Gypsum tiles do not always have perfectly straight edges, which affects the quality of installation and makes it much more difficult. To quickly adjust one element to another, you will need to remove a layer of a certain thickness. This is done using a chisel, and the place from which it was removed is carefully cleaned with sandpaper.
Artificial stone processing
Natural building materials have always been valued in construction and renovation. But their sometimes exorbitant price does not attract everyone. Therefore, a replacement for natural stone – artificial – appeared on the market.
What are they made from?
The raw materials for the production of artificial stone for finishing can be: concrete, gypsum, ceramics, porcelain stoneware, acrylic, etc.
If we consider the most popular types of interior items - countertops for kitchen units or sinks, then they are made only from acrylic, quartz, polyester and marble.
Acrylic artificial stone is considered more common. Most of the products in the store are made of acrylic stone. The most common also include quartz agglomerate.
Acrylic stone processing
Acrylic stone has good resistance to mechanical stress. Due to this quality, it has become the most popular for interior decoration.
If necessary, make a hole in countertops, sinks, use a drill, screwdriver, or grinder. You can choose ordinary drills - for metal, without special functions, since acrylic stone is easy to handle. If there is a need to drill large holes, it is recommended to use tubular drills. It is worth remembering that the surface of acrylic material is glossy and drills can slide on it. Therefore, to avoid defects you need to be careful.
If you need to cut out a certain part or make curves, use stone cutting machines, always together with a coolant. In enterprises, cutting can be done using a laser. When using it, interestingly shaped parts are obtained. There are also circular saws that can also be used to cut acrylic stone. At home, there is an option to even use tile cutters and manual and electric jigsaws.
Diamond line is used for cuts. If you don’t have one at hand, then the work can be done with a hacksaw, having first selected the right blade.
Gluing acrylic stone occurs in several stages. First you need to adjust the seams using professional tools and only then start gluing.
The stone is also polished using a special device - a grinding machine. Depending on what result you want to get (what type of surface), the required disk is selected. Keep in mind that this is a very dusty job, so you need to be thoroughly prepared for sanding.
If you treat acrylic stone competently and tastefully, it will delight you for a very long time.
Processing of quartz agglomerate
Quartz stone is also widely used in interior design and decoration. After processing it, interesting and individual things are obtained.
The most interesting processing of quartz agglomerate is cutting and bending.
Bending - this process speaks for itself. During operation, the material bends and takes on a variety of shapes, as a result you can get a rare tabletop or bar counter.
Waterjet cutting is cutting in which the material does not heat up and further destroy it. Due to this advantage, many craftsmen and specialists resort to this method. This method is in demand not only in the processing of artificial stone, but also other materials. Another advantage of the method is the cutting width, it does not exceed 1 mm, which has an economical effect on cutting the material and a wide range of possibilities for creating unusual shapes.
Polyester resin processing
Tabletops and bar counters made of resin look very interesting and unusual.
As the name implies, the material is made of polyester resin with the addition of a hardener and various fillers for long service and good operation. When manufacturing resin parts, dimensional changes may occur at the final stage. Therefore they are cut. This is the basic and most important processing method.
Artificial marble processing
Artificial marble began to be produced quite a long time ago, for the purpose of interior decoration. It was made either from plaster or cement.
The final product undergoes several sanding steps. Fine, wet grinding is performed with a grinding machine; only the attachment is changed. Sand until a completely smooth and glossy surface is obtained. In addition to grinding, polishing is used. This type of processing is similar to polishing. The surface is also rubbed with a special material until it shines. The material can be a steel spoon or a pebble stone.
You can cut artificial marble with a regular grinder, even at home. Basic rules when cutting marble: you need coolant and a protective mask. You will need a protective mask when cutting dust starts flying. It is harmful to humans and should not be breathed.
There are also special machines for engraving. They are equipped with professional cutters that allow you to make an inscription or any other engraving on artificial stone without creating unnecessary scratches or defects.
Summing up
Of course, natural stone will always look great in your kitchen, bathroom, etc. But why overpay for appearance when there are analogues that are almost impossible to distinguish from natural stones. One cannot even consider their performance properties to be worse. They can serve you just as long without losing their original appearance.
There are currently not many varieties of artificial stone for the production of countertops, bar counters, and sinks, but they are similar in processing principles.
Directions for use
Before laying gypsum tiles, you need to familiarize yourself with a number of important features of the material.
It is good because it can be used on almost any surface. It can be glued to any surface that cannot be deformed under external influence of temperature and humidity level: tiles, concrete and others.
- The material is not applicable for installation on materials that deform under the influence of the external environment: wood, chipboard, plywood, fiberboard, and so on;
- Gypsum-based tiles
- Do not allow glue to get on the front side. Moreover, it should not be allowed to dry out, because... it will harm the appearance;
- The seam opening requires special attention. The solution should not get on the front side;
- It is necessary to observe the temperature regime during installation. The air in the room and the base for installation must have a temperature in the range from 10 to 40 degrees;
- Seam jointing cannot be done earlier than 24 hours after installation.
To install gypsum tiles you can use:
- silicone based sealant;
- cement tile adhesive;
- It is also possible to lay tiles on gypsum plaster.
Laying decorative stone
The work must be carried out by a qualified worker.
The prepared surface should be considered a facade consisting of concrete blocks, foam concrete, aerated concrete, brick or a base covered with a plaster composition.
If the facade of the building is sheathed with wood, sheet iron, or insulated with expanded polystyrene, installation of facade slate, decorative brick or other facing stone should be carried out only after preliminary preparation of the surface.
Before starting installation, it is recommended to moisten the surface and working side of the stone with a paint brush, otherwise the wall and facing stone will dry out the mortar before it has time to set. If the cladding is carried out in rainy weather, there is no need to wet the surfaces.
Light artificial stone (decorative brick Petrovsky, Klinkerny, Byzantium, facade slate Demidovsky, Vorontsovsky, Sayany) can be glued both from bottom to top and from top to bottom. It does not slip off the adhesive layer if it has been sealed with the right amount of water. For example, when facing a wall only to a certain height, it is more convenient to work from top to bottom, then whole stones will go to the top and subsequent rows, and cut stones to the bottom row.
Laying the stone from top to bottom avoids getting the adhesive on the finished masonry, which is extremely important. Removing drops of glue from the surface of the tile should be done in a timely manner - before they dry completely. Otherwise, the use of special chemical compounds will be required.
Heavy artificial stone (artificial slate Alps, Niagara, Riphean, decorative brick Old brick) should be glued from bottom to top. In this case, usually at the level of the first row, strictly according to the level, a starting strip (a metal profile for drywall) is attached to the wall, which serves as a stop. After completion of the work, the starting bar is removed (and sometimes left).
To obtain incomplete stones, broken facing stones are used, or whole ones are cut. You should adjust the size and sharpen the stones with a grinder (a diamond or a specialized stone disk), but you can use wire cutters and even an ax. It all depends on what size you need to shorten the stone to. The cut side of the tile can be tinted, so it will be less noticeable as a fresh cut.
Use adhesive designed for laying natural and artificial stone. Make the solution following the manufacturer's instructions. Apply the adhesive solution to the prepared wall with a smooth spatula with a layer thickness of approximately 0.5 cm. Level the adhesive with a notched trowel (recommended tooth height 4-6 mm). Apply the same layer of glue to the back of the stone. The glue should cover the entire surface of the stone. The thickness of the adhesive layer for light cladding is usually 6 mm, for heavy cladding 10 mm. Using a vibrating motion, press the tile firmly into the adhesive.
The adhesive consumption for light types of tiles is 3 kg. per sq.m., glue consumption for heavy types of artificial stone is 6 kg. per sq.m.
There are two main methods of gluing facing stones: with jointing and without jointing. When laying “with jointing”, the stones are glued at a distance of 1-2 cm from each other. To maintain equal intervals between individual tiles, wooden wedges or a special lining cord are laid, then all seams will be the same width. After the adhesive mortar has set, the seams between the stones are filled with joint mortar and sealed with a special tool - jointing.
In cases of frequent contact of stone with water (use on fountains or when water constantly flows from the roof onto the facade), for additional protection and increase the service life of the decorative stone, it is recommended to cover the lined surface with a water repellent.
Advantages and disadvantages of each method
Each of the tools has its own characteristics. So, tckb sawing gypsum tiles with a hand saw for wood, its ends will have a low class of surface cleanliness (roughness), and sometimes unevenness. The reason for this is the large teeth of the blade.
In terms of cut quality, it is better to use a hacksaw for metal - the edges will be smoother, so the need for subsequent processing is minimal. But this process takes much more time.
How to cut gypsum tiles if speed is important? For cutting, it is more advisable to use a grinder with a diamond blade. But it also has its drawback - increased dust content due to the processing of gypsum polymer tiles with power tools at high speeds.
When using manual cutting methods, it is recommended to additionally use a miter box - a rectangular, usually wooden tray with special slots (straight and at an angle of 45°) on the sides for a more even cut.
How to cut stone with a grinder?
Selecting a disc for cutting stone
The diameter of the circle directly determines how thick the material can be cut, as well as how powerful the grinder will be.
For example, disks with a diameter of 76 mm , used in cordless angle grinders. The cutting depth when using them is approximately 20 mm, and if you take into account grinding, then this option is not suitable even for cutting granite tiles (15-20 mm). Plus, don't forget about versatility.
Discs with a diameter of 115 mm are a more common option. This is the minimum size for network angle grinders (angle grinders, or, in common parlance, grinders). The cutting depth when using such a disk is 25-30 mm. They can cut facing tiles without any problems. It is also suitable for artistic cutting of marble and granite. However, due to the relatively small depth of cut, it can hardly be called universal.
The most popular option is a cutting disc for an angle grinder with a diameter of 125 mm . This option combines the best qualities: the cutting depth is 35 mm, which allows them to work with both facing tiles and slabs up to 30 mm thick; Great for artistic cutting; The weight and size allows you to comfortably work with this disk for a long time “in weight”.
In addition to those listed above, there are less popular cutting discs with a diameter of 150, 180, 200 mm, etc. But I would like to highlight a cutting disc with a diameter of 230 mm . These are used by professionals and are suitable for long-term work. They are indispensable in the manufacture of ritual products: the cutting depth is 70-80 mm, allowing them to be used to make unique shaped monuments.
Choosing the required grinder
When we have decided on the disk, we need to choose the most suitable angle grinder.
By power
The first thing you should pay attention to when choosing an angle grinder is power. The main thing to understand here is that the rule “the more, the better” does not work for this tool. Increased power leads to an increase in the price and weight of the angle grinder. Therefore, before choosing an angle grinder, you need to decide on the appropriate diameter of the cutting disc.
Optimal power of an angle grinder for different diameters:
- 115 mm – 750 W;
- 125 mm – 1100 W;
- 180 mm – 2000 W;
- 230 mm – 2200 W.
Because When working with stone, heavy metal discs are used; you can take an angle grinder with a small power reserve. For example, for a diameter of 230 mm, an angle grinder with a power of up to 2500 W is suitable.
By number of revolutions
Typically, the manufacturer selects the optimal rotation speed, depending on the diameter of the disk:
- 115 mm – 12000 rpm;
- 125 mm – 11000 rpm;
- 180 mm – 8000 rpm;
- 230 mm – 6000 rpm.
The above parameters are optimal for cutting work. For grinding work, 2–6 thousand revolutions are required. If you need a universal tool, you can purchase an angle grinder with adjustable speed.
Extra options
Because When working with stone, a lot of dust is generated, it makes sense to choose an angle grinder with dust protection. Although people's reviews say that an angle grinder without dust protection is also suitable if you clean it on time.
The following options are more related to increasing the safety of the tool in order to avoid accidents:
- Starting current limitation . Reduces the load on the engine by smoothly increasing the speed when turning on the tool. This extends the life of the machine and enhances safety - there will be no sudden jerks when turning on, and accordingly the grinder will be easier to hold in your hands.
- Overload protection . Prevents engine damage when the disk jams by reducing the load. This avoids strong jerks when jammed.
- Engine brake . Allows you to stop the disc faster after turning off the tool. This reduces the risk of injury to other people if the worker, for example, turns off the machine and leaves it somewhere.
Operating rules
- It is necessary to have protective equipment: a casing, goggles or a closed mask, thick gloves;
- When processing stones, it is necessary to ensure dust extraction if the work is not carried out in the open air. A special respirator is also required;
- It is necessary to have a work suit of the appropriate size.
Advantages of gypsum
Various building mixtures are made based on gypsum, both for interior and exterior use. Dry gypsum is added to many putties, plasters and glues as an excellent binding component. This material is added to many finishing and building materials because it has the following advantages:
- external attractiveness;
- low weight, which is combined with high strength;
- creates effective insulation of heat and noise;
- it can be used to make attractive, unique products for interior and exterior decoration;
- environmentally friendly and safe material for human health;
- fungi and mold do not settle on it;
- is a vapor-permeable, breathable material;
- very easy to process, it can be applied to any type of surface;
- With the help of accessible, extraordinary tools, you can easily change the shape of gypsum products.
READ Chainsaw Shtil 260 stalls at idle
Varnish coating for gypsum tiles
Due to its many advantages, tiles
Using a special coating for tiles, you can create an individual design
Here is an incomplete series of positive properties of Astra aleb and products made from it:
However, gypsum also has serious disadvantages that impose restrictions on the use of selenite tiles:
- hygroscopicity (the ability to accumulate moisture from the environment);
- low moisture resistance (destructs with prolonged direct contact with water);
- low resistance to impact (even a light impact will leave a chip or shell on the surface).
If you initially planned to have a light coating, you need Honor to ensure that the varnish gives some darkening
These disadvantages make selenite tiles unsuitable for exterior finishing work and cladding of rooms with high humidity and, especially, open contact with water.
By using modern technologies for additional processing of gypsum tiles, it is possible to minimize these disadvantages and successfully use gypsum finishing not only in dry rooms, but also in rooms with seasonal humidity fluctuations.
How and how to make a hole
To process a material such as artificial stone, you can use the same tools as when working with concrete products. The tool used for drilling the hardest materials can be successfully used for drilling all its varieties. This is usually done with one of the following:
- Hammer;
- Drill;
- Screwdriver;
- Bulgarian.
The grinding machine is used to drill special diamond bits, the design of which allows them to be used by wrapping it around a shaft to secure the disc. The crown is set at right angles to the hammer body.
Drills or core bits are selected based on the size of the hole required and the hardness of the material used. They typically have carbide tips with wick solder, diamond coating, or soldered diamond segments.
READ How to Cut Skirting Corners Without a Miter Box
Clamps are used to secure the material. To cool the cutting edge of the tool and the stone itself, apply dry and drill with water. In addition, water clears the well of silt, leaving the edge of the drilled hole smoother. Dust from wet drilling is much less.
To drill with water at home, make a plastic bath around the drill site or put on a rubber ring to which water is added. When using a template, water can be added directly to it, sealing the cracks with regular tape. Sometimes you just add a little water from a plastic bottle.
Artificial stone can sometimes have a polished surface that makes it difficult to see the markings of the scythe line. In this case, paper construction adhesive tape glued to its surface will help. It shows the bevel lines clearly even if you draw them in pencil.
Coloring rules
Coating of products with coloring compounds is carried out according to certain rules:
- The parts must be well dried according to the manufacturing technology.
- After purchase, the elements must be aged at home. It takes at least 1–2 days for the stone to reach a balance of temperature and humidity.
- If previously treated products are painted, they are pre-polished. This is very difficult to do, especially when the products are already on the walls.
- Impregnations are used according to the recommendations that each manufacturer indicates on the label. Some are applied before painting, others after. Some options are not compatible with coloring compounds.
You should know! There is often advice about using varnish to make the coating shine, but this is not always appropriate. This effect can weaken the feeling of naturalness.
Under terracotta
The technology is almost identical to the previous version, but the coating composition is shellac varnish and rosin, which are diluted in industrial alcohol.
After a certain period of time after applying the composition, the surface becomes similar to terracotta.
What does the market offer us?
Now we will try to consider the main models of equipment that can and should be used in a home business for the production of cut granite or sandstone. There are several general criteria, following which you can choose the best option:
- Multifunctionality. We are talking about the mobility of using equipment: stationary or portable. If a stationary machine is easy to transport, then this definitely makes it more functional and useful;
- Technical side. The scope of its application depends on how technologically high-quality the machine is. So, using a professional machine, you can cope with cutting granite, marble, tiles or cobblestones. You also don’t have to worry about the safety of the saw blade, since the device will supply coolant on time.
Let's consider budget models of machines that have a water supply and saw blade diameters over 60 cm:
- VK-1, VK-2. Machines for cutting stones, which include a table top and a saw mechanism. The diameter of the saw in such equipment is 120 cm, which is more than enough for any work. This machine can be considered the most suitable for a new stone cutting business. Its cost varies across the market from 1000.
- VK-3. A larger and more powerful device designed for serious and long-term work. More suitable for expanding production. The size of the saw blade allows you to cut stone slabs with diameters up to 300 cm. The cost of models starts from 2000.
How to sell your products?
To run a successful cut stone business, be sure to follow these tips:
The main thing you need to know when starting any business. this is planning. Only with its help can you correctly and effectively allocate resources, calculate costs and predict profits, especially since you will be one of the pioneers in the production of such building material at home.
Sources:
https://remontstroimat.com/kak-prosverlit-mojku-iz-iskusstvennogo-kamnya-v-domashnix-usloviyax/ https://pilomaterialy-spb.ru/rezka/rezka-iskusstvennogo-kamnya-v-domashnih-usloviyah. html https://businessideas.com.ua/business-ideas/rezka-kamnya-v-domashnih-usloviyah
Acrylic varnishes
This type has an acrylic base, with the addition of modifiers, water and special resins. The acrylic composition is not very thick, its consistency is similar to cream, and is used for indoor and outdoor work. Acrylic-based plaster varnish is used as a topcoat because it creates a highly durable layer that is water-repellent. Special additives in this varnish protect stone and tiles from fading and the negative effects of ultraviolet rays.
Improving the performance of gypsum finishes
Manufacturers of alabaster cladding most often offer consumers products that have already undergone a process of improving characteristics and are varnished. The price of such material is higher due to the cost of additional processing. Knowing the optimization technology, you can purchase gypsum cladding without protective treatment, for example, the popular hand-made Monte Alba decorative tiles, and independently improve the properties of the material, and then varnish it. Let's consider what the pre-treatment of gypsum products is before applying varnish, types of varnish compositions and methods of their use.
Sources:
https://mfc04.ru/ukladka-gipsovoj-plitki/ https://795792.ru/plitka/chem-pokryt-gipsovuju-plitku-pod-kamen.html
Cost of cutting natural stone
In this section we will try to describe the cost of these works and understand how profitable they are. The profitability of such production can be calculated using a simple formula that looks like this:
- RP is directly the profitability of production.
- The estimated income you expect to receive.
- Costs for production of stone cutting (purchase of material, depreciation of the machine, electrical, etc.).
It is also advisable to calculate one-time costs for the initial purchase of equipment and materials: the price of equipment and the price of materials Po Pm. Ultimately, all you have to do is add the extra cost for the work and get a net profit.