What does a screwdriver battery look like?
Despite the variety of models of these tools, the battery of all screwdrivers has a similar appearance. It is a plastic box containing many components of the battery. They are attached to each other in a single circuit in such a way that the wiring of the “cans” on both sides is closed to the contacts, which provide power to the screwdriver.
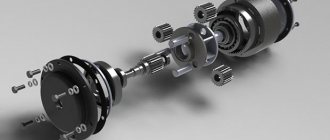
Screwdriver device
All batteries have a primitive structure that even an inexperienced technician with little knowledge of electrical engineering can figure out. In addition to power parts, the unit box often contains:
- thermistor – allows you to control the temperature of the cans during charging;
- thermal switch – automatically opens parts of the circuit in case of battery overheating;
- control and monitoring board (available only for lithium-ion batteries).
The controller is responsible for managing the battery
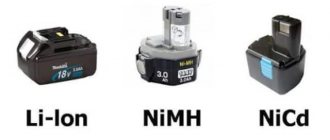
Types of batteries
Table 1. Common types of batteries.
| View, illustration | Description |
| Nickel-cadmium | These batteries are most often found in budget tools because they have a low cost. The devices operate even at sub-zero temperatures and can be stored without charging for a long time. Of the negative characteristics of these batteries, it should be noted: 1. The so-called “memory effect”. This means that if the battery is not fully charged, it stops at this value and will not charge higher the next time. 2. Minimum capacity and about one thousand charge cycles. 3. When the tool is not used, the battery gradually loses charge. 4. Cadmium is a highly toxic substance. Therefore, repairing a battery can be hazardous to the health of the technician. To maintain capacity, the first time (after purchase) this tool is charged for about twelve hours. In addition, during operation it is recommended to discharge it to a minimum, and then charge it again to 100%. |
| Nickel metal hydride | This is also a popular type of battery that does not contain toxic substances. However, it has a higher price compared to the previous option. These batteries do not have a “memory effect”; they do not discharge during storage. The power supply can withstand a large number of charges, but may deteriorate when exposed to cold. Another disadvantage is the need to constantly recharge the device. |
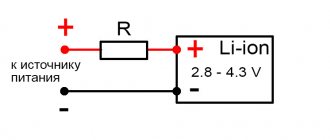
| Lithium-ion | These are powerful, but at the same time expensive batteries. They also do not have a “memory effect”; they are not subject to self-discharge. Their main advantage is considered to be large capacity. However, this type of battery should not be constantly discharged to a minimum. Otherwise, after several such actions, you will have to purchase another power source. Only these devices have a special controller that prevents the following:
|
Note! There is another type of battery - lithium polymer, but they are not used for such tools. They are mainly installed in smartphones and tablet PCs.
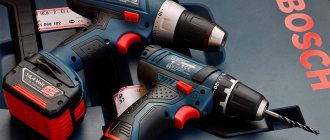
Prices for batteries for screwdrivers
Battery for screwdrivers
List of required tools
Repairing or diagnosing a screwdriver battery is impossible without certain tools and measuring instruments. To restore a battery, you don’t have to buy expensive tools; budget manufacturers are quite suitable.
List of tools required to repair the screwdriver battery:
- Multimeter. A measuring device that allows you to determine direct and alternating voltage, resistance, current, or test a circuit for an open circuit. More expensive models are capable of measuring the capacity of elements, but they are not useful to the home craftsman.
- Flat and figured screwdrivers. An indispensable tool that will come in handy more than once in the future.
- Fitter knife with replaceable blades.
- Soldering iron. A power of 40 W will be quite enough. More powerful models are more expensive, and if handled incorrectly, the element can be damaged.
- Tin and solder. Inexpensive consumables.
Consumables will also come in handy, for example, electrical tape or heat-shrink tubing, household glue, and small pieces of wire.
Problems with the screwdriver
Despite the variety of power sources for batteries, they all have a similar structure, which means they have the same faults:
- breaking the chain connecting the banks;
- loss of charge capacity (one or more);
- evaporation of electrolyte;
- lithium decomposition (only in some batteries).
Main causes of tool failure
A decrease in the capacity of battery cells is a common problem that occurs even with short-term use of the device. The problem is caused by the fact that even when a single charge loses its capacity, the remaining banks can no longer be fully charged. As a result, the time of continuous use of the screwdriver is reduced.
The cause of such a breakdown is the “memory effect” or evaporation of the electrolyte in the batteries, which occurs when they are very hot. However, even such troubles can be dealt with at home, without turning to specialists.
Non-functional elements are restored or replaced with new ones. The second case is relevant for lithium-ion batteries in which lithium has decomposed - in this case, all that remains is to buy a new power source.
It is necessary to detect the faulty battery element, then repair it or buy a new one
The battery on the screwdriver runs out quickly
The problem with rapid self-discharge of the battery is quite common. It consists of fast charging, which occurs in about 20 minutes and the same short operation.
This situation may result from malfunction of the temperature sensor located in the removable battery. This temperature sensor may not be installed this way initially. It must be returned to the place of purchase.
If the battery begins to discharge quickly after prolonged uninterrupted use, which could happen after a fall, you need to get it repaired.
Screwdriver battery repair
Almost any breakdown of the screwdriver battery can be fixed independently. To do this, you will need to know the cause of the malfunction and how to eliminate it.
Detailed battery diagnostics: step-by-step instructions
Step one: you need to charge the power supply to 100%. If we are talking about a nickel-cadmium battery, then it is first discharged to zero to avoid the “memory effect”.
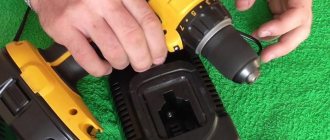
Charging the tool battery
Step two: Next you will need to remove the cover of the plastic block. This is much easier to do if it is fastened with screws - they will have to be unscrewed. However, this cover is often fixed with glue, so you need to take a utility knife and carefully go along the seam, after which you can easily remove the top part with a screwdriver.
The battery cover is held on with screws or adhesive.
Step three: now you have to carefully examine the condition of the internal elements, identify damage: violation of the integrity of the chain, leaked electrolyte, etc.
Any external defects should be carefully examined
Step four: Next, you should measure the voltage level of each can with an Avometer. For nickel-cadmium and nickel-metal hydride sources, the voltage should be about 1.3 V. For lithium-ion batteries, the charge is – 3.7 V. It is recommended to label the voltage level of each battery so as not to mix them up.
After measurements, you can find faulty elements
Step five: now you need to make a load for the battery by connecting a small light bulb to the outputs. The jars should be kept in this form for some time, and then the voltage should be measured again with the device. Then it will be possible to identify a link with a high drawdown.
In this way, it will be possible to determine the degree of voltage drop of each bank
After detecting defective battery cells, you should select the optimal method for restoring them. You can do this in two ways:
- Repair faulty cans with flashing current at a high voltage level or add filtered liquid inside if the electrolyte evaporates. However, such measures will only last for a while, and then the banks will have to be replaced.
- Replacing faulty cans is the best way to solve the problem. If you wish, you can take power sources that have already been used, but are working.
A faulty battery is restored using an additional powerful power source
How to assemble one battery from two
It happens that the optimal way out of a situation where both batteries are “drunk” is a way to assemble one full-fledged battery from two. Using any of the proposed methods, you can disassemble both blocks in order to understand which elements are suitable for further use and which should be discarded.
For this you will need:
- two batteries;
- Charger;
- any thin and flat screwdriver;
- scalpel;
- a piece of sandpaper;
- two wires;
- load resistance (two are possible);
- voltmeter for measuring voltage.
Charging batteries
Before disassembling the blocks, they must be well charged. During subsequent voltage measurements, this is what will make it possible to understand which batteries are “live” and which are not. Before charging batteries, it is recommended to clean the internal contacts of the charger with sandpaper, because any contact resistance may indicate an incorrect charging process.
When you charge both batteries one at a time, pay attention to how quickly they charge. If the battery is charged quickly, and the charge indicator signals the end of the process in just a few minutes, this means that the battery definitely has faulty cells. And of course, when the battery charges too slowly or does not take current at all, you should definitely disassemble it and “test” all the batteries that are inside. Read more about the charging time of the screwdriver battery →
After you charge and disassemble your battery pack, you will see that there are several elements inside it - cans. Their number may vary depending on the voltage level of your instrument. The banks are connected in a certain series. Inside there is a temperature sensor connected to the contact plates.
If the signal from the temperature sensor going to the charger is incorrect, the battery will either be undercharged or overcharged. Both are very undesirable for the battery and negatively affect its performance. It is for this reason that it is strongly recommended to clean the contacts before charging both batteries.
What is the load for?
Let's work with load resistance. As already mentioned, you can take two, with a nominal value of 1 ohm each. If we put them both in parallel, we get a total resistance of 0.5 Ohm. It is not necessary to adhere to these values, but the lower the resistance, the better.
What is the role of load resistors in successfully replacing the battery pack? If we take any electrical appliance and measure the voltage in its battery, we will get a certain value. However, this value will not show how well a particular battery can deliver its energy. If we measure voltage under load, we will have what is called “voltage sag”. This is how you can judge how good or bad the battery is.
We carefully connect the load resistance in the form of two small metal blanks and wires connected in parallel to each other to a voltmeter. This loading method is only acceptable if the output voltage of your battery is no more than 12 volts (safe voltage level).
The wiring is carefully fixed in the “sockets” of the voltmeter with probes, and the voltmeter is set to a constant voltage threshold of 20 volts. This indicator is quite enough to measure U for the entire bunch of elements as a whole and for each element separately, which is especially important.
Measuring voltage
Before measuring the voltage of the elements, prepare a simple pencil with which you will write down the U value given by each battery in the bundle. Since in most cases, “hot” screwdrivers are equipped with nickel-cadmium batteries packed in thick layers of cardboard, it is important to ensure that the batteries are accessible from both sides.
Now all that remains is to turn on the voltmeter (or multimeter) and start measuring. When taking measurements, we hold each battery for five seconds and see if the voltage drops (usually it is normally about 1.2 volts for each battery separately). We record the indicators with a pencil. You cannot keep the probes on batteries for a long time, because the resistance increases, and they may simply burn out.
Practice shows that as soon as one element of the entire bunch fails, it negatively affects the operation of all batteries. If the voltage indicator on any “bank” is 1 volt or less, it has already exhausted its resource. In order to finally verify this, you should check the self-discharge level of each battery in the bundle.
Repeated measurements are taken after 15 minutes. When taking measurements, be sure to compare the primary U indicators with the repeated ones. If it turns out that there are batteries whose voltage, after initial measurements, dropped sharply during repeated measurements, it means that their self-discharge is high, and it is these elements that have completely become unusable.
After the unusable elements have been “calculated,” we disconnect them from the rest using a scalpel, and in their place we put good batteries from a spare battery. So we remake the entire block, assembling two complete ones.
Soldering the cans
Soldering should be done using the spot welding method using a regular aspirin tablet. It is impossible to solder one element directly to another: any heating causes evaporation of the electrolyte and an increase in temperature, which can be critical for the battery.
When disassembling the bundle and soldering, it is important not to lose metal particles, which may be indispensable when soldering the elements together. To be on the safe side, you can take care in advance of how to make blanks for spare plates from bendable metal. The important thing to remember is that the better I solder, the better the battery will perform.
Aspirin produces a lot of pungent fumes, so you should work in a well-ventilated area. The solder is a soft, low-melting compound that has flowing properties. The solder is sprinkled with aspirin powder, so it flows between the plates and connects them securely, and the aspirin helps fix the composition in the right place.
The assembled battery is installed in the case, and the operation of the screwdriver is checked. If the tool works, the reassembled battery is charged as usual and its functionality is checked again. If there is no drop in the tool’s speed, this means that the experiment was a success. Since nickel-cadmium batteries last a long time when used correctly, there is a chance that a new bundle assembled by yourself will not fail, and a battery for a screwdriver made by yourself will work properly.
Features of restoring defective battery elements
Lost capacity can only be restored in the case of batteries that have a “memory effect”. For such purposes, you will need to prepare another (powerful) charging device, where it is possible to control the current and voltage. Next, you need to use this device to influence the banks with sagging voltage.
You can also revive the battery by squeezing it. The essence of the procedure is to dilute with liquid the electrolyte that has evaporated.
Battery restoration: step-by-step instructions
Step one: make a barely noticeable hole in the non-working can (where the negative contact is located) using a very thin drill.
Need to buy a small drill
Step two: use a syringe with a needle to pump out air from the jar through the hole. Then use the same syringe to inject filtered water inside through the hole.
Through a small hole it is convenient to pump out air and introduce liquid (1 cubic centimeter)
Step three: cover the hole with a piece of epoxy resin.
Epoxy resin is an excellent sealant
The versatility of epoxy resin has made it in demand in many sectors of human activity - from mechanical engineering to the manufacture of decorative items and souvenirs. How to dilute epoxy resin with hardener? Read more about the unique properties of ES in a special article.
Step four: then all that remains is to discharge all sources by making an additional load with the same lamp. After which you will need to charge all batteries again.
Charging cycles are repeated several times in a row
Note! The last action allows you to effectively restore the capacity of any battery if the cause of its breakdown is the “memory effect”.
Video - Restoring power supply capacity
How to replace power supplies?
The most effective way to repair a battery is to replace a broken battery. You can purchase a new battery at any electrical store or remove it from another device.
Replacing a damaged can: step-by-step instructions
Step one: it is necessary to disconnect the faulty segment from the general chain. Since they are fixed together with a metal plate, it is better to use metal cutters for such purposes. In this case, it is necessary to leave a tape of the optimal length on each side in order to connect it with a soldering iron without any problems.
The plates on the non-working segment must be cut off near the base
Step two: now, at the optimal distance from other elements, you need to attach the new can to the chain. For such purposes you will need a soldering iron. Just keep in mind that the “minus” is connected next to the “plus” and so on throughout the chain. If the plate is not enough to connect the segments, then it is replaced with copper wire.
You must use a soldering iron to connect the battery parts.
Step three: Now all that remains is to assemble all the parts of the battery according to the same principle as they were located earlier.
Upon completion of the repair, the battery is again placed in the plastic battery box and closed with a lid.
Note! It is advisable to equalize the charges on each bank by charging and charging several times, as we described in the previous instructions. Then you should alternately measure the charge level of the power sources with an Avometer, because they should always remain at the same value.
You should be careful when working with a soldering iron, because the cans must not be overheated.
In exactly the same way, you can repair a lithium-ion battery. In this case, the process is complicated only by the presence of an additional board, which is disconnected before starting the process. Here it is no longer possible to restore faulty banks, so they are replaced.
Prices for rechargeable batteries for screwdrivers
Rechargeable battery for screwdrivers
Replacing faulty batteries
Replacing worn parts is considered the most effective method of restoring the entire battery. Before starting work, you need to purchase serviceable elements, and it is necessary to take into account the dimensional and technical characteristics.
The replacement process itself will not cause difficulties even for an inexperienced tool owner. All you need is a soldering iron and soldering materials. Moreover, in order to protect the battery from complete failure during work, it is necessary:
- try to leave the original ones as connecting plates or use a copper conductor of the same cross-section. This condition is associated with a high charge current;
- soldering should be carried out quickly to avoid overheating of the elements;
- the negative terminal of the battery is connected to the positive terminal of the next element, which corresponds to a series connection of the circuit.
How to convert a screwdriver to a lithium-ion power source?
Often, owners of budget batteries seek to adapt their devices to lithium-ion batteries. Such actions are due to the benefits that result from:
- the tool becomes lightweight, because it requires fewer power segments with the same capacity and voltage;
- there is no need to worry about the “memory effect” (the battery can be charged to any level without fear);
- The time to fully charge the battery is significantly reduced.
In addition, some craftsmen, with certain manipulations, double the capacity of the power source, and therefore the operating time of the screwdriver. Of course, the advantages push users to make such a decision, but we should not forget about the disadvantages.
Many craftsmen are striving to replace outdated nickel-cadmium cans
Negative aspects of rebuilding a screwdriver for a lithium-ion power source:
- high cost of lithium-ion batteries;
- it is necessary to constantly maintain the charge level to 4 V, so a special controller is installed in the box as an addition;
- not all screwdriver bodies are adapted to the dimensions of such batteries;
- The battery does not perform well in cold conditions.
If you nevertheless decide to adapt your device to a new power source, then you must carefully and consistently perform all the steps.
Do not install a lithium-ion battery if you plan to use the tool in cold weather.
How to restore a screwdriver battery at home
Is it possible to reanimate all types of batteries? Nickel-cadmium blocks, which are found in almost all modern screwdrivers, are easier to repair.
The restoration process requires an understanding of the basics of electricity. That is, have school knowledge about the operation of rechargeable batteries.
To work you will need tools and materials:
- screwdriver;
- tester;
- soldering iron;
- tin (with low-corrosive flux).
To resuscitate the battery, a donor will be required. It may be included with the screwdriver, or you may need to find it yourself, for example, by removing it from another old device.
To begin the operation, it is necessary to fully charge (about 6 hours) both batteries and swing it. After this, remove the plastic cover from the restored part using a screwdriver. This procedure must be performed carefully so as not to damage the fasteners. Otherwise, subsequent assembly will require glue, like Moment.
Refurbishment of nickel-cadmium batteries for screwdrivers
The ni cd battery device is manufactured using the same technology, so any battery can be made a donor of this type.
Such devices are separate components - blocks, with a nominal voltage of 1.2 V and an energy capacity of 1200–1500 MA/h. They are found in screwdrivers from Interskol. Each block affects the power, that is, if its value is 12 V, the number of blocks is 10, 14.4 V - 12, etc. After changing the battery, the power may drop for the first time of operation, but then everything will be restored.
Restoring an 18 volt screwdriver battery
18 V is a common power, which corresponds to the presence of 15 blocks. As a donor, you need to choose an electrical device with a voltage of 14.5 V, that is, a 12 V car battery will not work.
How to restore and start a lithium-ion battery
For these types of batteries, you will need to remember where the positive, negative and charging contacts are located. The voltage control board located on the batteries most often fails, or rather, their stabilizers and protective diodes.
The voltage at the battery output is checked, if the value is significantly less than normal, resuscitation is performed.
Second life of batteries in Bosch, Hitachi, Makita screwdrivers
The brands shown come with a lithium-ion battery. To revive them, you will need a soldering iron and sleight of hand, because if you do everything slowly, the service life may decrease, or the battery will completely explode.
All broken or frayed wiring inside the battery must be insulated, for example, with electrical tape or replaced in advance with new ones.
To restore, torn metal elements are soldered - strips that can be taken from old blocks.
To assemble, you need to return the cardboard spacer between the blocks and the board to its place. This will be required to prevent a short circuit. Then the contacts are isolated.
Source: pro-instrument.com
Replacing nickel-cadmium batteries: step-by-step instructions
Step one: first you need to decide on the number of lithium-ion cans and their characteristics. For example, for a standard screwdriver with a voltage of about 14 V, it is recommended to take four segments, which together will give a voltage of about 16 V. It should be borne in mind that after some time after starting to work with the tool, the voltage will drop and the standard value will be obtained. If you want to double the battery power, it is recommended to take eight of these cans.
The number of cans should be chosen at your discretion
Step two: now you have to select the controller board. It must correspond to the total voltage of all elements. On average, the board is designed for current up to 14 A.
Board designed for four power supplies
Step three: now you should disassemble the plastic box for the battery and remove all the old batteries from there. The chain must be cut because only the top contacts are left for connection. You will also need to remove the thermistor, because now the overheating process is controlled by the board.
Only the contacts from the previous battery are left to connect the new power source to the tool.
Step four: now, using a soldering iron, you need to form a single chain of cans, observing the location.
All parts of the battery should be connected one by one.
Step five: now the resulting battery must be placed horizontally in a plastic box.
This is what the arrangement of lithium-ion cans in the box looks like
Step six: now you need to close the lid of the box and install the contacts from the old battery.
You should assemble the battery box
Note! Some instruments, after such adaptation, no longer charge from the previous device, so it is better to first make a new connector.
Video - Replacing Nickel-Cadmium Batteries
Features of storing screwdriver power supplies
In order to preserve the screwdriver battery, it will need to be stored in accordance with certain rules. This applies to cases where the tool is not used often.
As we said earlier, nickel-cadmium and nickel-metal hydride power supplies are characterized by a “memory effect” in the event of an incomplete charge, therefore they are stored only in a discharged state.
Batteries should be stored responsibly
Important point! Any lithium-ion batteries must be stored at 45-50% charge, so they will need to be recharged regularly.
Prices for popular models of screwdrivers
Screwdrivers
Diagnosis of a faulty battery
Before you repair a screwdriver battery at home, you need to find out the cause of its breakdown. Correct diagnosis is 80% of the work done. And this process is not always simple and clear.
Diagnosis of battery faults involves identifying one or more batteries that have failed. The simultaneous breakdown of all batteries is nonsense, occurring once in a century.
Fault detection sequence:
- Fully charge the screwdriver battery pack. A portable power tool is supplied with a special charging socket. In which you need to install the removed battery and give it several hours to fully charge. The end of the charge cycle is indicated by the green indicator on the case lighting up.
Important! The NiCd or NiMH power supply must be completely discharged before charging. Lithium-ion batteries can be charged regardless of the percentage of their capacity.
- Remove the protective battery cover. There are no permanent housings: some manufacturers make bolted fastenings, others use adhesive fastenings. The bolts are easier to deal with - just unscrew them and remove the cover. The glued surface can be carefully cut off with a fitter's knife.
- Carry out a visual inspection. When a battery fails, it usually swells - this is clearly visible to the naked eye. The cause of low capacity may be a burnt wire or jumper between elements.
- Measure the voltage on each bank. Before starting measurements, the multimeter should be turned on to the “Constant Voltage” mode and touch the leads of each element with the probes. There is no need to solder each element.
- Using small cross-section wires, connect a simple 12 V or 24 V car lamp to the screwdriver power source (depending on the rated voltage of the screwdriver battery). Leave the lamp on for 30-40 seconds.
- Disconnect the car lamp from the battery and re-measure the potential difference of each element.
- Determine the element with the maximum drop in capacity and replace it.
- Reassemble the battery in reverse order.
Repairing or diagnosing batteries for a screwdriver can be done with your own hands without much difficulty. This is clearly seen from the above sequence. You just need to have a tool, a minimum amount of knowledge, free time and the desire to do something with your own hands.