Using a drill as a screwdriver
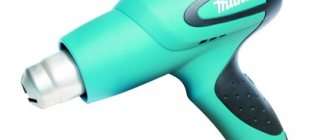
Standard drill
used for drilling holes in a variety of materials - it can be wood, plastic and even metal. There are also grinding and cutting attachments for this tool.
There are several types of drills:
- Manual;
- Pneumatic;
- Electrical.
The principle of operation of the tool is to transmit rotation to a drill or other attachment, due to which it is possible to carry out various types of work - construction, plumbing, finishing, etc. “If I use a drill for such a large number of tasks, can I find other uses for it? " That's probably what many people might think. And the answer is yes, you can expand the list of jobs for this tool and add to it the screwing of screws.
How to use a drill as a screwdriver?
First of all, you need to select the appropriate tool model for your purposes and the type of screws/bolts - bits. They should be installed in place of the drill in the spindle chuck.
Further, if possible, it is recommended to reduce the rotational speed of the mechanism - this will make the work safer, as well as keep the tool and attachments in working condition - at low speeds they wear out less. Some models have speed controllers, while others can be adjusted manually by changing the mechanism or electrical circuit.
For experienced craftsmen, it will not be a serious problem to work with a drill as a screwdriver and at high speeds, but there is always a risk of damaging the bit or screw, cutting off the screw head, “screwing” the material through, etc.
It is also worth considering that drilling tools do not have a splitting clutch (it is responsible for preventing damage to the tool mechanism when the engine suddenly stops), so the necessary work should be carried out carefully. It is recommended to use stronger attachments than for a screwdriver.
Methods for solving the problem
Although such a tool as a screwdriver is the most popular, not every home craftsman uses it once a day. The battery is continuously subject to spontaneous discharge, under the influence of which the internal structure of the product is destroyed.
If the battery does not last for several minutes, the question arises, what should you do with the screwdriver now? They buy the latest battery, but first you need to find it, because only dealers can find the exact design of the power element. The second option is to throw out the screwdriver and buy a new one, the price of which is more than 2-3 thousand rubles (this is a product of average quality). The 3rd option is the most common, however, it immediately requires effort - to convert the product to be powered by alternating voltage.
Read also: Corrugated sheeting weight 1 m2 table
The advantages of the latter option are the following reasons:
- There is no need to constantly recharge the battery, which is very annoying during the operating cycle;
- Nowadays, you can store a screwdriver for as long as you like, without thinking about what it really is, that the battery spontaneously discharges every day;
- Constant torque, which realizes the voltage from the mains.
Among all the advantages, there is only one drawback, which is justified by the need to connect the device to an outlet, so the product will
will be linked to the electronic network.
Comparisons between screwdriver and drill
To begin with, it is worth understanding the distinctive features of these instruments, because although they both perform a rotational movement, their purposes are different.
The most important difference is the rotation speed of the working spindle - the rotation of a screwdriver is much slower than that of a drill. Also, it has no inertia - the tool stops at the same time when the mechanism is turned off. The spindle, when drilling, continues to rotate for some time after switching off.
A drill is a potentially more dangerous tool than a screwdriver, therefore, when working with it, special safety precautions must be observed - safety glasses, in addition to the usual attentiveness, accuracy and caution.
The choice of operating mode is another difference between the instruments under consideration. In addition to the main one, a drill also has an impact mode, while a screwdriver is regulated only by the spindle speed.
As can be seen from the comparison, the drill is less suitable for working with screws and bolts, however, it can be adapted for this task.
Universal drill Screwdriver
Which drill/screwdriver to choose and what to pay attention to
There are several signs by which it is possible and should be selected.
What to choose and how among drills and screwdrivers (DS)? Key parameters: appearance, functionality and the presence of certain modes, customization and controls.
ergonomics
The best work is when it is convenient and comfortable. Therefore, the ergonomics of the motorized motor is one of the first factors in the selection. Already when you take it in your hand, it will become clear whether it is easy for your hand to hold the instrument and whether you can reach the required buttons with one hand.
Work principles
You should always keep in mind that you are going to use the tool for purposes other than its intended purpose, and this comes with some difficulties and limitations.
Basic rules for safe and efficient use of a drill as a screwdriver:
- Follow safety requirements. Handle the tool with care.
- Do not tighten the screws all the way - this can lead to breakage of the tool, bit, or object being screwed. Experienced craftsmen advise to under-tighten the screws a little, and then finish them manually using a screwdriver.
- To securely attach the bit, it is recommended to use extended bits or a specialized bit holder.
- For wooden material, to avoid splitting the wood, it is recommended to first drill holes and only then tighten the screws.
Of course, it is better to use a screwdriver for such purposes, but a drill
will also cope with these types of work.
Pros and cons of using a drill as a screwdriver
Despite the rather forced use of the tool in an area unusual for it, this solution also has some advantages:
- Thanks to an a priori higher number of revolutions and increased speed, the drill
copes with the tasks faster than a screwdriver; - Due to the greater force, it is possible to screw screws into harder and more rigid materials (some metals, etc.);
- The ability to use one tool for a whole range of diverse jobs.
There are also disadvantages:
- Drills, as a rule, are heavier and bulkier - it is not always possible to get into hard-to-reach places;
- Using them as a screwdriver
requires some skill; - The drill is not suitable for thin and fragile materials (plastic, drywall, boards less than 20 mm, etc.), as well as furniture;
- Special safety precautions are required - safety glasses, not tightening screws, avoiding impacts during work, etc.;
- Great wear of the tool (bits and attachments), as well as a significant risk of damage to the screws.
We can conclude that the drill can occasionally be used as a screwdriver, but you should not abuse it for such inappropriate use.
How to replace a screwdriver with a regular drill: 3 useful tips
Ingenuity helps you get out of difficult situations associated with a lack of tools. A drill can replace a screwdriver. Knowledge and compliance with safety rules is the first condition for working with this tool. Therefore, to the question “can a drill be made into a screwdriver?” there will be a positive answer. We’ll talk about the intricacies and secrets of the process in the article.
What is better: a drill or a screwdriver?
The operating principle of a drill and a screwdriver is similar. The devices differ from each other in that the first tool is equipped with a chuck rotation limiter when the resistance reaches its highest point. If you use a drill to tighten screws, it is important not to miss this moment. then the surface will not be damaged, and the corners of the bolt will not be smoothed out (this will significantly reduce the adhesion of the surfaces).
The drill is intended for drilling holes, and the screwdriver is for screwing in self-tapping screws, but they can be replaced with one another. There are attachments for the drill that turn it into a screwdriver. There are nozzles:
- simple;
- with limiter.
How to use a drill as a screwdriver?
The limiter prevents the screw from going too deeply into the surface. This effect is ensured by the restrictive rim present on the nozzle.
It is impossible to say which is preferable - a drill or a screwdriver - since the two tools perform different functions.
Using a drill as a screwdriver
If you do not have attachments (and the opportunity to purchase them), it is recommended to use the following strategy. The drill does not have a splitting coupling, which leads to unpleasant consequences. Using this tool as a screwdriver
Without the necessary attachment, it can result in:
- broken screw head;
- broken bits;
- drill burnout.
READ How to Disassemble a Hammer Drill
Do not tighten the screws or bolts with a drill all the way, but leave at least half a centimeter outside the surface. It is optimal to manually tighten the remainder of the screw into the surface. Yes, you will waste time, but you will keep the drill safe.
The drill can also be used for its intended purpose (drilling surfaces). Drill a hole in the surface of the material used, then carefully screw in the screw. This will be much faster than screwing in a screw by hand. In addition, you will definitely not damage the surface, creating a more delicate fastening without delamination of the material. Useful if you need to drive a screw into wood.
Is it possible to tighten screws with a drill? You can, but do not lose sight of one feature of the screwdriver. This is a kind of symbiosis of a Phillips screwdriver and a drill. A tool with speed control would be especially appropriate. The slower it works, the lower the risk of an unsuccessful result. If you have skill and good reaction, furniture assembly (and other construction work) will go even faster with the help of a drill.
Based on the information above, we can conclude that there are three ways to get a quality result when using a drill instead of a screwdriver
:
Use special nozzles with a limiting rim;
Do not screw the screws into the surface completely, making the last few turns by hand;
Drill the surface in advance, and then screw the bolts into the hole made.
Just always be careful and follow safety precautions when working with tools. Watch the video: How to use a drill instead
screwdriver?
Twisting wires
A screwdriver with a specific attachment is excellent for twisting the separated ends of wires. Usually twisting is done using pliers, but those who wish can use a screwdriver and use it for this purpose. The main thing is to perform this tricky procedure correctly.
How to make a powered screwdriver
A powered screwdriver is the dream of many home craftsmen. In principle, it happens that in a home workshop there is no need for a cordless tool. You can have access to an outlet at any time. Of course, having a cordless screwdriver in your hands is convenient. But when working, you also hold in your hands, in addition to the tool itself, a battery. And it will be harder.
Also, batteries often get damaged and break. And since you are unlikely to buy a battery separately from a screwdriver on sale, you will have to puzzle over how you can provide your screwdriver with the necessary power from an outlet, bypassing battery devices.
Advantages of cordless screwdrivers
Cordless screwdrivers are very convenient at construction sites - it’s very easy to work with them on the roof, in difficult conditions, where trailing wires will only get in the way and create unnecessary danger. But this is where battery failure most often occurs - the screwdriver fell, the battery broke, and you will have to look for a new one.
Let's figure out how to make a powered screwdriver.
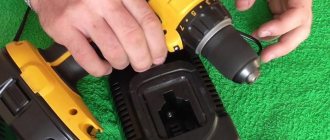
Replacing a screwdriver with a conventional drill
The easiest option is to use a regular small drill as a screwdriver. You just take the bit and clamp it into the chuck instead of the drill. Working with a drill as a screwdriver will require some skill. The fact is that the drill does not have a “ratchet” - in a screwdriver, the ratchet will work as a fuse when the fasteners are tightened. Therefore, you need to clearly feel this moment and release the button. Otherwise, broken screw heads, damaged bits and bad mood are guaranteed. Another difference between a drill and a screwdriver is the rotation speed.
If the torque in a drill is small and the rotation speed is high, then the opposite is true with a screwdriver. Some even have the ability to adjust the rotation speed. Without a high torque, it is unlikely that you will be able to tighten a large self-tapping screw - you will have to resort to using a screwdriver. Therefore, small screws are usually tightened with a drill.
It is not recommended to use a hammer drill as a screwdriver, although its operating parameters of torque and rotation are more acceptable. The hammer drill has a large radial runout, making it difficult to tighten screws with its help.
Just a corded screwdriver
The second option is to purchase a corded screwdriver at the store. They come in several types. The first, cheapest ones are the same electric drill with a ratchet installed on it. They are not positioned as a professional tool, and can only be used to tighten small fasteners. However, having a ratchet will save the screw heads, your bits and your nerves.
A more expensive screwdriver is a specialized network one. Such a tool has a built-in gearbox, most often of the planetary type.
They are positioned as a professional tool, and are much more expensive.
Often such screwdrivers have the ability to tighten large nuts, bolts, and have a magazine for small screws. This option is the best, although the most expensive.
Converting a cordless screwdriver to a corded one with your own hands
The third option is to convert the cordless screwdriver to work on mains power. You will need knowledge of electronics and circuit design, so it's not for everyone. In addition, you will need to know the operating parameters of your battery.
If the battery is broken, you can ask people on DIY forums to measure the current and voltage parameters of the battery. This will help you make a network power supply. In principle, if you have good knowledge of electronics, you can simply disassemble the battery. Its design will contain chemical batteries connected in a certain way. Knowing their type, from the name of the battery, as well as the connection diagram, you can quickly estimate the battery parameters. And then assemble a rectifier with the necessary operating parameters. Or even replace the elements in a failed battery. And then you won’t have to assemble the rectifier.
Video on battery repair and conversion
This is about repair: This is about altering the battery type:
This is about converting to a network model:
hochu-stroitsya.ru
Design and principle of operation
A screwdriver can be used in various fields of activity and for various actions, for example, in everyday life, during construction, assembling and disassembling furniture, in various workshops and where many fasteners are used. They can drill, make threads, tighten and unscrew fasteners. Let's get acquainted with the device and operating principle of such a mechanism.
All screwdrivers are divided into three types:
- operating from a regular network and called network;
- operating from a charged battery and called rechargeable;
- operating both from the mains and from the battery - a combined option.
All screwdrivers are very similar both in external and internal structure. They consist of such elements as:
- frame;
- cartridge;
- power button;
- rotation switch;
- speed controller;
- power lock button;
- tension regulator.
The body of a power tool consists of two parts and can be made of plastic or an alloy of various metals, but this is much less common.
Inside it are:
- electric motor;
- pay;
- capacitor;
- gearbox;
- coupling
The principle of operation of all screwdrivers is similar to each other - the electric motor is driven into rotation using the consumed electricity, which transmits force using a gearbox and shaft from the motor to the existing nozzle installed in the chuck, and the nozzle already carries out the process of drilling, screwing in or unscrewing fasteners. In corded screwdrivers, the motor uses an alternating mains voltage of 200 V, and in cordless screwdrivers, the motor uses a constant voltage from 3.5 V to 36 V.
Changing the attachment with a quick-release chuck:
- first you need to choose a drill for the work you plan to do, or a bit, taking into account the size of the head and the type of slot;
- the cartridge is untwisted counterclockwise;
- install the selected nozzle;
- By rotating the cartridge sleeve in a clockwise direction, the nozzle is clamped.
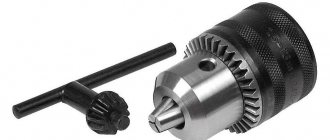
Changing the nozzle with a turnkey chuck:
- take the key and insert it into a special recess;
- unwind the cartridge;
- insert a new nozzle;
- rotate the key in the direction of movement clockwise, securing the nozzle.
How to make a screwdriver from scrap parts with your own hands
Cordless screwdrivers are used everywhere in workshops and households. Such a tool is valued for its lack of connection to a 220 V household network. It is compact, does not take up much space and can replace a drill in simple jobs that are sometimes found around the house. In construction stores and on the market, such equipment can be found in a wide range. Its cost sometimes makes you think, and sometimes even makes you want to save money. What if you make it yourself? Today we will reinforce this quite reasonable idea with a master class from one of the tinkering enthusiasts.
Required resources for DIY
Materials:
- DC motor with 12V step-up gearbox;
- Three 3.8 V batteries from an old laptop;
- Drill chuck with clamping adapter for the gearbox shaft;
- Connector socket for 5.5 connector for charger;
- Momentary start button;
- Thin galvanized metal plate, width – 20-25 mm;
- A small piece of plywood, thickness – 10 mm;
- PVA glue, sandpaper;
- Screw with two nuts 3x30-35 mm;
- Empty deodorant bottle;
- Paint, brush;
- Copper wiring, electrical tape;
- Several self-tapping screws with washers;
- Double tape;
- Plastic food container. Tools:
- Jigsaw;
- Drill, drills 3, 8-10 mm;
- Soldering iron with solder and flux;
- Scissors, painting knife;
- Pliers, metal scissors;
- Hacksaw for metal, marker for marking.
Assembling a screwdriver with your own hands
Stage one - preparing the handle for the screwdriver
The shape of the handle should be comfortable for the hand and functional for filling the screwdriver. We make it from two pieces of 10 mm plywood. Cut out the template from a sheet of cardboard. We transfer the outline of the handle onto the plywood with a marker and cut out both parts with a jigsaw.
We connect them with PVA glue. Gluing will be better if you place the workpiece under a press, clamp it in clamps or a vice. We drill a through hole in the middle of the handle with a 3 mm drill. It is necessary for the engine mounting plate.
We make the next hole for the button from the side edge. We first drill it with a 3 mm drill, and then expand it by 8-10 mm. The expansion depth is about 15 mm. We clean the edges of the plywood with sandpaper and cover the part with paint for moisture protection.Stage two - install and connect the engine
Using metal scissors, cut a strip 20-25 mm wide from a piece of galvanized steel. This will be the clamp for the engine.
We mark holes on both sides and drill with a thin drill. We bend the plate with an arc, and fasten the engine to a thin bolt with a lock nut. We fix the drill chuck through a clamping adapter and fix it with a hex bolt.
We place the power button in the hole on the handle, and place the wires on its reverse side. We solder the wires to the engine and the charging socket, insulating the connections with heat shrink.Stage three - installing batteries
In the plastic container we make four holes with a 3 mm drill, and one with a 10 mm drill for the charging socket.
We fix the connector with the outgoing wiring with a clamping nut on the container body. We secure the container to the end of the handle with several self-tapping screws. We wrap three batteries with tape or cling film. We connect their contacts sequentially. We combine the power wires from the batteries with the outputs from the connector, twist them and wrap them with electrical tape. For reliability, the connection can be soldered with a soldering iron.
We pack the resulting power supply into a container and close it with a lid.
How to prepare for work?
The first thing you will need to do in order to get started is to remove the screwdriver from the case or suitcase and check for visible damage, chips or cracks. If you notice that there is something wrong with the tool, then under no circumstances should you use it, as this may be unsafe. Be sure to make sure that the screwdriver
charged, or the screwdriver itself is connected to the network. When these conditions are met, the screwdriver is turned on at idle speed and the rotation of the nozzle and the threads on the fastener are checked for compliance. If all conditions are met, then you can safely begin work.
Be sure to select and secure the correct bit or drill depending on where and how you plan to work. We mentioned how to secure them above when we talked about changing the nozzle.
When using the device directly, you must also follow a number of simple rules and requirements.
Pay close attention to the screwdriver itself. There is a special scale on it, by rotating which you can adjust the power of the tool. When you turn the dial, set the mode you need, based on what kind of work you are currently doing.
Modes:
- twisting;
- unscrewing;
- blocking
Switching between these tool capabilities is quite easy and simple. You just need to hold the screwdriver by the handle located above the battery. Most often, the handle is covered with a material that is rubberized. That is why such a processed handle is safe to use and guarantees that the screwdriver will not fall out of your hand while working. For greater reliability, the instrument is fastened to the hand using a strap.
How to make a router from a drill with your own hands: components, manufacturing steps, video
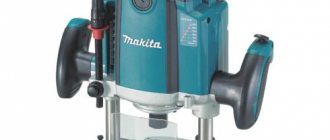
The relevance of the question of how to make a router from a drill with your own hands is explained by the fact that not all home craftsmen can afford to purchase expensive serial models. Meanwhile, the usefulness of such a device and the need for its use in many situations (construction and repair work, manufacturing of all kinds of structures from wood, decorative design of products from various materials) are undeniable.
Simple milling of wooden parts can be done on a homemade drill stand
Using a router equipped with the appropriate working tool, you can successfully mill wood products, form edges of various configurations on them, prepare seats for door locks and hinges, create grooves on wooden parts, and also solve many other technological problems.
Components and assembly algorithm
It is possible to make a milling machine from a drill, which almost every home craftsman has, but you should keep in mind that such a device cannot fully replace the serial model. This is explained by the fact that the chuck of a conventional hand drill is capable of rotating at a speed of 3000 rpm, while a serial milling cutter is able to ensure rotation of the tool used at a speed of up to 30,000 rpm. In addition, the gearbox of a household electric drill is not designed for intense loads, which will quickly cause it to fail.
Vertical router from a drill
Diagram of the simplest vertical stand for a drill
Meanwhile, the simplest milling cutter, made from scrap materials at minimal financial cost, is capable of successfully coping with many technological tasks. To make your own router from an electric drill, you should find the following materials and tools:
- several pieces of chipboard or thick plywood;
- a clamp with which the drill will be fixed to the base of the device;
- bolts, screws and other fasteners;
- feather drill or drill bit with a diameter of 40 mm;
- standard set of locksmith tools.
Scraps of slats, pieces of plywood, metal corners - all this can be used to make a simple milling stand
The process of assembling a homemade router takes place according to the following algorithm.
- The base of the future router is assembled from sheets of chipboard or plywood, which includes a horizontal base and a vertical part on which the electric drill will be fixed. The dimensions of the sheets of chipboard or plywood from which such a structure will be made are calculated depending on the dimensions of the electric drill used as the basis of the homemade machine.
- A hole with a diameter of 40 mm is drilled in the horizontal base of the device, which is necessary to provide access for the tool to the processing area.
- A clamp is attached to the vertical stand of the device using a bolt, in which the electric drill is fixed. The drill should be positioned in such a way that the lower end of its chuck is a few millimeters from the horizontal base of the router.
- To make the position of the drill on a vertical stand more stable, you can fix a small wooden block in its upper part, which will act as a stop.
Options for securing the drill (click on the photo to enlarge) Adjustment of the cutting depth when using such a router is carried out by changing the position of the electric drill in the clamp that secures it.
Stand with height adjustment via lever
How to make a milling machine of the design described above more convenient and functional? To do this, it can be equipped with a simple microlift, which will be responsible for moving the electric drill in the vertical direction. To make such an elevator you will need the following consumables and components:
- two metal rods that will act as guide elements;
- a platform (carriage) for fixing an electric drill, made of chipboard or thick plywood;
- a threaded axis and a nut, which will be responsible for moving the electric drill in the vertical direction;
- elements that ensure the fixation of the electric drill in the required position.
Stand with height adjustment via threaded rod
The principle by which such a homemade router works is quite simple and is as follows.
- When the threaded axis rotates, the carriage with the drill attached to it moves in the vertical direction.
- After the electric drill and the tool secured in its chuck are set in the required position, the carriage is fixed using fasteners.
Naturally, the entire design of such a homemade router, the operation of which is well demonstrated in the video, must be fixed on a reliable basis. The latter can be the surface of a desktop or workbench.
Machine made from an old electric motor
A homemade milling machine, with the help of which many technological operations are quite successfully performed, can be made without the use of an electric drill. In order to make such a device, you will need the following consumables and components:
- drive electric motor, which can be used as an electric motor from an old washing machine and other household appliances;
- a cartridge in which the cutting tool used will be fixed;
- an adapter with which the drive motor shaft will be connected to the cartridge;
- sheets of chipboard or thick plywood for making the base and vertical guide of a homemade router.
Homemade machine based on a Soviet three-phase motor
When choosing an electric motor for a homemade milling machine, keep in mind that the power of the latter should be in the range of 500–1100 W. The higher the power of the drive motor, the greater the depth that can be processed with a milling cutter.
A very important requirement when making a homemade milling machine is the absence of play in the contacting elements of the device. If you neglect this requirement, you may encounter the fact that the processing performed using such a milling cutter will not be of high accuracy and quality. In addition, the quality and accuracy of processing performed even on a homemade milling machine is seriously influenced by the characteristics of the cutting tool used.
met-all.org
Can it be used as a drill?
As mentioned above, a screwdriver is mainly used for such things, to unscrew or tighten something. When using a screwdriver as a drill, carefully read the instructions to see if this option is provided in the manufacturer’s instructions.
If it is still possible to use a screwdriver as a drill in order to drill and make a hole, for example, in a wooden or plastic product, then it is recommended to place a small and even piece of wood under this or that object. This way your hole will be made better and will prevent cracks and chips from appearing.
If your work uses metal, then you need to follow some simple rules. Before you start drilling, the hole location must be tilted to prevent the drill from sliding on the metal. Select drilling mode and get to work. But here we must not forget that when drilling through metal, the drill may break. To prevent this, it is not recommended to press the tool too hard. If it happens that the drill gets stuck, then switch the screwdriver to the unscrewing mode and calmly unscrew the drill.
How to make a drill from a screwdriver yourself
- Comparison of the characteristics of a drill and a screwdriver
- Using a household screwdriver as a drill
- Using a specialized tool
- Connecting a screwdriver to the network: recommendations
In order to understand how to make a drill out of a screwdriver, you first need to understand at least in general terms what both tools are and how they differ from each other.
Cordless screwdriver diagram.
Comparison of the characteristics of a drill and a screwdriver
The main functional purpose of a screwdriver is the installation and dismantling of threaded fasteners. If necessary, some models allow you to drill holes in various materials.
Diagram of the internal structure of a screwdriver.
The design of the tool includes a clutch that regulates the amount of torque, or as it is also called #8211 ratchet. This unit ensures that work can be done without breaking the splines on the heads of the fasteners. Having set the regulator to a certain position, it is physically impossible to apply more force #8211 the cartridge in which the bit is clamped will simply scroll.
Another characteristic difference of #8211 is the presence of a forced spindle braking system. The operation of this system is manifested in the almost immediate cessation of rotation of the tool when the power supply is interrupted.
Characteristics that affect the tool’s ability to tighten self-tapping screws or screws of a certain length and diameter, as well as the ability to drill holes of the required diameter and depth:
- torque
- number of revolutions per minute.
Mini drill assembly diagram.
To work with fasteners, a torque of 10 Nm and a speed of 500 rpm are sufficient. To make holes, these parameters must already have larger values: 30-60 Nm and 1200-1300 rpm.
An electric drill is a fairly powerful tool, the main function of which is to make holes in materials of varying hardness. In this case, the torque from the motor shaft is directly transmitted to the working element #8211 drill.
A drill, unlike a screwdriver, has higher revolutions per minute and less torque. Some models provide smooth control of the engine speed via a rheostat, which allows, if necessary, installation or dismantling of threaded fasteners.
Thus, the applications of the two tools overlap in some areas. A logical assumption would be to use a screwdriver in some cases to perform operations related to drilling holes. Additional prerequisites for such use are the low weight of the tool and, accordingly, the ease and convenience of working with it.
Return to contents
Using a household screwdriver as a drill
Diagram of the assembled mini-drill.
It is very easy to turn the most ordinary screwdriver into a drill. The design of the chuck makes it possible to quite reliably fix drills with a cylindrical shank. It is enough to insert a drill into the clamping chuck of the tool and you can start working.
However, it must be understood that the structural strength is not designed to accommodate holes, especially in hard wood, metal or concrete. When significant axial loads are applied, there will be a high probability of failure of the planetary gearbox that transmits torque from the engine to the working element or the torque control clutch.
Return to contents
Using a specialized tool
In order to be able to combine the functions of screwing screws and drilling holes in the body of one tool, the following conditions must be met:
- the minimum required values of torque and number of revolutions per minute must be ensured
- The battery must have the necessary power to make a reasonable number of holes of the required diameter and depth without overcharging.
Read also: How to choose a top-loading washing machine
Drill device diagram.
Tools with similar parameters are already specialized and are called drill-drivers.
The required number of holes can be made in several ways:
- using two batteries with alternating mode of operation (one is working, the other is charging)
- the use of batteries with a larger capacity and, accordingly, a longer service life
- use of an electrical network as a power source.
The functional range of operations that can be performed with such a power tool expands to drilling holes not only in wood and materials like plaster, but also in brick and concrete. This already affects the area characteristic of the hammer drill.
It is safe to say that a drill-driver is a universal tool for performing repair and finishing work at home.
Return to contents
Connecting a screwdriver to the network: recommendations
Scheme of a household electric drill.
In cases where purchasing an expensive, powerful professional tool is unaffordable or not rational from a financial point of view, you can try converting a household screwdriver into a drill.
Use Cases
The correct use of a screwdriver is its use in accordance with the instructions or established documentation. According to these documents, the main area of use is the ability to directly screw in and unscrew various fasteners, as well as for drilling various holes.
READ Converting the DeWALT dc727 screwdriver to lithium batteries
Depending on the capabilities, one or another model can be used both in everyday life and in the professional sphere. Household screwdrivers are cheaper and have little power, while professional models have increased power, high performance and wider functionality for use.
Knitting reinforcement
A screwdriver can be used to knit reinforcement using steel wire. This is widespread in construction, when various reinforced concrete structures of houses and foundations are being erected. In order to knit, take a battery-powered or mains-powered tool that has a hook attachment.
There are still disadvantages
Self-discharge and “memory effect” are absent in such high-quality devices. The inability to operate the battery in low temperature conditions, as well as the high cost, are two significant disadvantages of this type of product. Repairing screwdriver with your own hands can be done according to the scheme indicated at the beginning of the article. It will be necessary to completely replace the entire battery contents if it was damaged as a result of exposure to low temperatures.
In many cases, the battery assembly feature prevents its repair. Some models are quite easy to understand. Removing the battery components will be much more convenient thanks to the design of the case, the elements of which are fastened with screws.
READ How to Change the Oil in a Viking 545 Lawn Mower
Such models are easy to assemble, so they are easy to repair. Glued cases are much more difficult to disassemble. Preheating the battery parts may make the procedure easier.
How to use a screwdriver correctly?
- Design and principle of operation
- How to prepare for work?
- Use Cases
- Twisting wires
- Knitting reinforcement
- Features of drilling concrete
- Can it be used as a drill
? - Helpful operating tips
Many craftsmen prefer to use a screwdriver instead
screwdrivers. It allows you to save time and get the job done quickly and efficiently. Let's get acquainted with the operating principles and design of this tool, find out the scope of its application and operating rules, and also give some useful tips.
Features of drilling concrete
As noted above, a screwdriver can be used in different areas and in different ways. Electric screwdrivers can be used to drill wood, concrete and many other materials. Carefully read the instructions for use of a particular model, as it is written there what materials it can be used for drilling.
Very powerful drills and screwdrivers are used for drilling concrete. Most often, such tools work in impact mode, but even with such a device, drilling a concrete wall is quite problematic. Therefore, for such cases it is better to use a special diamond-coated drill.
Hammer function
Drills and screwdrivers often have the function of a hammer drill. This means that the electrical device, in addition to rotational movement, is capable of creating impact force. A hammer drill is used to punch holes in hard materials (brick and concrete). But it should be taken into account that the impact function of the device is used only on brick or lightweight concrete. To drill a reinforced concrete wall, of course, it is better to use a hammer drill as a separate type of electrical appliance.
The picture below shows a cordless impact drill and screwdriver.
Drill-screwdriver device
The symbiosis of screwdrivers and drills is most often executed in the form of a pistol (see figure below).
The design of the unit is characterized by the following elements (the numbering corresponds to the figure).
, the second (high speed) switches the device to drilling mode.
We continue to disassemble the Interskol screwdriver battery
This can be done in several ways - you can unsolder the wires that go to the board.
You can also simply remove the contacts from the top battery cover. The photo shows what shape the curved contacts have, so you can easily remove them yourself.
Under the plastic cover we see how the batteries are connected to each other. They were spot welded. This solution is used in almost any battery of another tool. This is a reliable and gentle battery connection. At the same time, the destructive heating of the lithium batteries themselves is minimal.
Carefully tear off or bite off the metal tape with pliers to disconnect the cans from each other. On the board side, they were also connected to each other with tape and placed on a cardboard spacer with glue. This is done so as not to short anything on the board. You must remember to return it to its place when reassembling the battery.
Due to the lack of a spot welding machine, we will solder new lithium-ion batteries with a well-heated, powerful soldering iron very quickly. We remember that heating lithium-ion batteries reduces their service life and is generally explosive.
Pay special attention to the condition of the wires inside the battery. They may be broken or frayed. They need to be properly insulated or replaced with fresh ones. Since I was repairing a screwdriver battery on the go in the field, I had to use a brilliant invention of an engineering mind. I took out blue electrical tape.
READ Stihl 250 Doesn't Start Reasons
When disassembling the battery of screwdriver , I was pleasantly surprised - a thermal sensor was installed in the budget screwdriver to monitor the temperature of the batteries. It turns out that if the lithium cans overheat, the protection circuit turns off the power until the temperature is restored to normal. True, the owner has never been able to drive him into this mode. We carefully tear off this thermal sensor so as not to break it - then we will place it in the same place on the new cans.
Types of bits for a screwdriver: how to choose
To choose the right nozzles, you need to study their varieties. First determine the shank shape type and diameter. It ranges from 1/4 to 1 inch.
- basic;
- special;
- combined.
Types of main bits:
- splined. They differ in the width and thickness of the slot;
Spline bits of different widths and thicknesses
Types of special bits:
- tri wing or triangular;
Double pin have a notch
The drywall bit has a stop stop
Spring Lock Bit
Combination bits have two types of shank shapes or one, but of different sizes. For example, a splined shank and sprocket.
Example of a combination nozzle
Splined shank and sprocket
Determine the length of bit you need for the job. It ranges from 10 to 200 mm.
Depending on the shape of the shank, the nozzles have a certain marking:
- Sl (Slot) – splined;
- Ph (Philips) – cross-shaped universal;
- Pz (Poz An important characteristic is the grade of steel from which the bat is made. The nozzle may have a protective coating. The strength of the equipment depends on this. The main types of steel and coatings that should be given preference:
- Cr-v - chrome vanadium steel. The most common, with increased hardness;
- Cr-Mb - chromium-molybdenum steel. Less common. Very durable material;
- Ni - nickel coating. Increases resistance to corrosion;
- WC - tungsten carbide coating. Increases strength;
- Tin - titanium nitrite yellow coating. Increases strength.
Tin - coating for increased strength
Nozzles vary depending on the purpose:
- twisting and unscrewing;
- drilling;
- riveting;
- polishing;
- milling.
Considering all the parameters considered, you can easily select the necessary bits.
Method 1
You will need to purchase a special device for magnetizing and demagnetizing screwdrivers. Insert the bat there. A square window magnetizes, while a stepped window does the opposite.
Device for magnetization and demagnetization
Device for magnetization and demagnetization
Magnetization and hardening of attachments
A large number of nozzles are made in China from soft material. Therefore, they quickly lose their shape. A new bit doesn't last long. To extend its service life, the nozzle must be hardened. You will need: machine oil, a gas burner or gas stove, a small container for oil from any tin can, a piece of steel wire.
- Wrap the wire around the bat so that it does not fall out.
Bat wrapped in wire
The bat must be red hot
Black bat - hardened
A hardened bat will last longer than a regular one.
Nickel-cadmium (Ni-Cd)
This type of battery has a relatively low price, but is quite common in middle-class devices. Despite the entry of new types of batteries onto the market, this battery has been and continues to be popular.
The advantages of this type of battery:
- low price;
- tolerates low temperatures well during operation or storage;
- completely discharging the battery does not harm it, so the tool can be stored in a discharged state for a long period, after which (if properly charged) it restores its properties.
READ How to Drill a Bolt Through the Center with a Drill
The disadvantages of Ni-Cd batteries are quite noticeable.
- A battery capacity of 2 Ah is considered the maximum.
- Short service life. The highest quality batteries do not withstand 1000 cycles (charge-discharge).
- High degree of self-discharge. If the battery is fully charged, then after a while you will find that it is completely or partially discharged.
- “Memory effect” is the biggest disadvantage of these batteries. You cannot recharge the battery if it has not completely exhausted its resources. This is explained by the fact that when you try to charge the battery from a value other than zero, the value that remains in the battery will be perceived as “0”. Therefore, the battery capacity is reduced artificially. To prevent this from happening, before connecting the battery to the charger, it should be completely discharged. This fact causes inconvenience, since you have to waste time on the discharge procedure.
- Ni-Cd elements must be properly disposed of, otherwise they are harmful to the environment.
Comparison of batteries used for screwdrivers
Having briefly looked at the types of batteries, let's compare them with each other according to ten parameters, which will help you figure out which batteries are better for screwdrivers. Let us immediately warn you that there is no absolute leader in all categories, and you need to pay attention to those advantages that are useful for a specific activity and area of use.
Lithium-ion batteries
Li-Ion batteries significantly outperform other types of batteries. The advantages of lithium-ion batteries include the following:
- almost complete absence of “memory effect”;
- You can recharge a lithium-ion battery at any stage of discharge, without fear of loss of capacity;
- no loss of power when the battery charge is low;
- effective service life is 5-8 years;
- low self-discharge;
- requires little charging time;
- no toxic elements;
- high power in small dimensions.
- shock sensitivity (may explode upon strong impacts);
- the battery does not tolerate complete discharge and recharging - this causes the battery to fail;
- Discharges quickly at low temperatures;
- high price;
- service life is lower than that of nickel-cadmium batteries.
READ How to Recondition a Lithium Ion Screwdriver Battery
It is difficult to say unequivocally which battery is better. Mainly, you must decide for what purpose you are going to purchase a screwdriver. If for home use, which involves infrequent use with long breaks in work, then you need to choose a tool with a nickel-cadmium battery.
This can be explained by the fact that during long-term storage without recharging, the NiCd battery does not lose its properties, provided that it has been completely discharged.
Lithium-ion batteries are the choice of professionals. They are designed for constant, long-term and continuous operation. Also, for a professional tool, the battery recharge time is important. But it is worth remembering one rule: a lithium battery cannot be allowed to fully discharge.
Nickel metal hydride batteries
NiMH batteries were developed to overcome the disadvantages of nickel-cadmium batteries. The positive characteristics of nickel-melal hydride batteries are as follows:
- have smaller dimensions and weight;
- have low toxicity;
- “memory effect” is weakly expressed;
- have high capacitive characteristics;
- resistant to mechanical damage;
- the number of charge-discharge cycles has increased (up to 1500).
However, NiMH batteries also have their disadvantages:
- they are prohibited from being used at sub-zero ambient temperatures;
- The battery tends to discharge quickly;
- shorter battery life when compared with nickel-cadmium batteries;
- high price;
- takes a long time to charge;
- The battery does not “tolerate” deep discharge.
Thus, although NiMH batteries were created to compete with nickel-cadmium batteries, they are significantly inferior in performance to the latter.
Which is better to choose? drill or screwdriver for home: 3 selection criteria
Minor home renovations, nailing shelves and installing pictures require drilling, screwing or unscrewing. To do this job yourself and quickly, you need the right tool. For everyday needs, it is impractical to have many different tools, but there certainly should be one. All that remains is to make a purchasing decision: drill or screwdriver?
So what to choose: drill or screwdriver?
How often do you plan to work with the tool? Lightweight electric screwdrivers have much less powerful, lower voltage motors than most cordless drills. Therefore, they may not cope with the task if they screw long screws with a gap into hard wood. 18- and 20-volt cordless drills can handle almost any screwdriving task. Even a cheap drill is more powerful and durable than a corded screwdriver. Therefore, this toolkit is suitable for working with the hardest building materials. Drilling in walls, installing complex structures in places with electricity - all this can be done with a drill.
220 volt drill instead of a screwdriver. How to screw in a self-tapping screw with a drill.
Tip: A screwdriver with lower RPM has much better control. Therefore, if we are talking about irregular small jobs, then it is better to choose a screwdriver. It is also more suitable if the work consists solely of screwing in self-tapping screws, screws and screws.
Work in places without electricity. To make a hole or two, it is better to use a cordless screwdriver than a drill with a similar power supply. For example, the Bort BAB-10 screwdriver, which is powered by a battery, is more convenient and cheaper. drill for household use.
.
Comfort level when working. Cordless drills increase their power at the cost of added weight. Some professional cordless drills weigh up to 3 kg, which makes long-term use tiring. Less powerful household drills are lighter, but even they cannot compete in lightness with electric screwdrivers, which weigh less than half a kilo. If the heavy weight and presence of a wire interfere with the work of the drill, then it is better to purchase a cordless screwdriver. It works productively with wood, plastic, metal, and accurately screws fasteners.
The difference between a drill and a screwdriver
The tools drill, screw in screws, and punch holes in concrete, stone, and brick planes with equal success. But the existing differences in their mechanisms do not allow us to turn a blind eye to the features of the first and second home assistant. Take, for example, the ratchet of a screwdriver, which a drill lacks. The addition allows you to adjust the force with which screws, screws and self-tapping screws are screwed in. Comfortable? And how!
It is not easy to understand which is better, a drill or a screwdriver. It’s worth starting from what a particular tool is needed for. Corded drills and screwdrivers are faster, have greater power, weight and drilling diameter in different materials. Yes, they are more efficient in their work, but they are definitely not more convenient than a lightweight tool weighing 1.2 kg.
For greater practicality when working without a mains connection, use cordless tools. If you take cordless screwdrivers and compare them with drills, they will turn out to be more popular, cheaper and more widespread. Their "weak point". power. Networked drill
, judging by the impressive indicator of this parameter, works much more efficiently.
Universal drills and screwdrivers
In order not to think about your choice for a long time, make a “knight’s move”. The universal tool combines the functionality of both assistants, expanding the range and increasing the efficiency of work. In appearance, it looks more like a screwdriver, but when you turn on the ratchet, you turn on the jamming mode for the drill connection. and a drill appears in front of you. If you purchase an impact attachment, it will perform even more tasks.
Drills and screwdrivers are divided into mains-powered and battery-powered based on their power source.
Price difference
Cost also plays a big role when choosing the perfect tool for your home. Drills are not only practical and powerful, but also quite affordable. You can choose a particularly optimal option from the household assortment. Their initial cost is within the capabilities of every owner.
Tip: Tools powered by the mains are not as convenient to use (more weight, presence of wires), but they quickly cope with work on wood, metal and concrete.
Features of screwdrivers. working with self-tapping screws, screws and screws. They are not very suitable for drilling. Cordless models are convenient to use, but their power is enough for short and simple work. The price of such a tool is three times cheaper than its network counterpart of decent quality.
For small amounts of work, it is better to purchase a screwdriver. If you are renovating your home and often need to make holes in different materials and work with fasteners at the same time, then a drill is better. This tool is supported by its low cost with normal characteristics - everything you need for household purposes.
Tip: Any tool can be made better with special drills.
To decide what to buy – a drill or a screwdriver – answer the questions:
What kind of work are you going to do (do you need an impact drill or can you get by with something simpler). The more complex the task, the more powerful the tool is needed: a screwdriver is suitable for screwing, and for drilling in concrete. drill
.
How often do you plan to use the tool (often or occasionally). For minor, occasional work with screws and holes, you can use a screwdriver, but for regular work you need a more powerful tool. Long-term work with hard materials is possible with an impact drill and a universal drill-driver.
What will the working conditions be like (will there be access to power supplies). Drills and screwdrivers come in corded and corded versions. If you work on a site without electricity, then you need a cordless tool. It is important to remember that corded drills and screwdrivers are much more powerful.
As you can see, making a choice was not so difficult. The main thing is to ask the right questions and give clear answers to them! This video review will further help you assess the situation.
Sources:
https://www.moyo.ua/news/kak_zamenit_shurupovert_obychnoyi_drelyu_3_poleznyh_soveta.htmlhttps://stroy-podskazka.ru/shurupovert/kak-polzovatsya/https://schemy.ru/info/mozhno-li-ispolzovat-drel-v- kachestve-shurupoverta/https://www.moyo.ua/news/chto_luchshe_vybrat_-_drel_ili_shurupovert_dlya_doma_3_kriteriya_vybora.html
Which is better: a drill, a screwdriver or a drill-driver?
What is another name for a drill? Are a drill and a screwdriver the same thing?
In our catalog of power tools, all electric drills and screwdrivers are located in one section.
The fact is that they have a similar operating principle, which is why they are often confused with each other. Drills, screwdrivers, impact wrenches, electric screwdrivers and hammer drills are designed (at first glance) almost identically. Each of them has:
- motor - an electric motor that is powered by a network or batteries;
- gearbox - a “gearbox” with gears that reduces speed and increases torque;
- chuck - a clamping mechanism in which drills, drills or bits are secured.
But, despite the similar design, all of the listed devices are “tailored” for different types of work and are designed to solve a certain range of problems. Therefore, drills, screwdrivers and hammer drills, in addition to their similarities, also have many differences. The difference between them lies in size and weight, power and torque, rotation speed of the cartridge and its design, the presence or absence of a shock mode, as well as other little things and nuances, which will be discussed below.
The most appropriate analogy would be with cars: cars, trucks, buses, SUVs and racing cars. All of them are four-wheeled vehicles, but there are many differences between them. Of course, you can transport potatoes with a Ferrari, and have a blast on the track with a multi-axle dump truck. But should they be used this way? Exactly the same can be said about drills with screwdrivers and hammer drills.
Popular drills Interskol DU-13/780ER 421.1.0.00 from 2,493 rub. Interskol DU-22/1200ERP2 330.1.0.00 from 5,932 rub. Makita HP1640 from RUR 3,799 Bosch GSB 16 RE Professional 060114E500 from RUR 7,826 Metabo SBE 650 600671510 from RUR 5,809 Bosch GSB 13 RE Professional 0601217100 from RUR 3,699 DEKO DKID650W 063-4085 from RUR 1,199 Makita 6413 from RUR 3,165 Interskol DU-16/1000ER 57.1.3.00 from 4,290 rub. Bosch GSB 1600 RE Professional 0601218121 from RUR 5,213 Interskol DU-16/1050ER 149.1.3.00 from 4,289 rub. PIT PSB 13-C2 from RUR 1,579 Makita HP1640K from 4,400 rub. Bosch GSB 13 RE Professional 0601217102 from RUR 3,468 Makita HP2050 from RUR 7,530 Interskol D-10/420E 672.1.0.00 from 1,568 rub. Makita HP1630K from RUR 5,050 Bort BSM-1100 from RUR 3,730 DeWALT DCD740N from RUR 10,601 AEG BE 750R from RUR 5,509
What to choose: drill or screwdriver?
The similar “pistol” shape should not mislead you. Drills and screwdrivers are different types of tools, “sharpened” for different tasks.
You need to buy a drill if you plan to drill holes (in wood, metal, plastic, brick or other materials). Drills are equipped with jaw chucks (key or quick-release chucks) that allow drills with cylindrical shanks to be tightened tightly. Because you need to press hard on the tool while drilling, many drills are sold with additional side handles for two-handed operation. They often have stops that allow holes to be made to the desired depth.
But if you don’t need to drill, but tighten and unscrew fasteners, then you should buy a screwdriver. Screwdrivers are generally not as powerful as drills. But they have more torque necessary for tightening hardware. The screwdriver chuck is usually made to fit a bit. You can insert all types of bits into it that are necessary for working with self-tapping screws, screws and screws. And if you buy socket heads with an adapter, then using a screwdriver you can also twist small bolts and nuts. The main difference between a drill and a screwdriver is that the latter has a torque adjustment clutch. It allows you to limit the torque so as not to drive the screw too deep.
Popular screwdrivers
DeWALT DCF887N from RUR 8,327 Makita DTD171Z from RUR 11,460 Makita TD110DZ from 3,800 rub. Bosch GDR 120-LI Professional 06019F0000 from RUR 3,853 DeWALT DCF801D2 from RUR 16,390 Makita DTD152Z from RUR 4,929 Makita TD110DWAE from RUR 9,920 Worx WX291 from RUR 5,590 Makita TD0101F from RUR 5,550 DeWALT DCF887P2 from RUR 31,864. Bort BSM-300I from RUR 2,740 Makita DF033DZ from 3,170 rub. Bosch GSR 12V-35 HX Professional 06019J9101 from RUR 11,908 Ryobi RID1801M from RUR 4,804 Makita DTD155Z from RUR 7,530 Makita TD001GZ from RUR 14,590 DeWALT DCF620D2K from RUR 21,280 Bort BAB-12x2LI-FDK from RUR 3,180 Makita DTD153Z from RUR 7,190 DeWALT DCF809D2T from RUR 20,535
What is a drill/driver? How is it different from a drill?
Drills and screwdrivers are a kind of “mixture”, an attempt to combine two types of tools in one. And quite successful, I must say. This tool is in great demand, and the vast majority of manufacturers have similar models.
Drill drivers have jaw chucks (like regular drills) that can hold both drill bits and bits. But at the same time they have torque adjustment clutches (like simple screwdrivers). And the most noticeable feature is the presence of a speed switch. The first speed (slow) is used for tightening and unscrewing fasteners, and the second (fast) is used for drilling.
Popular drills and screwdrivers
Interskol DAU-13/18V 574.2.2.70 from 5,290 rub. Metabo PowerMaxx BS Basic 600080500 from RUR 5,547 Metabo PowerMaxx BS 600079550 from RUR 5,399 DeWALT DCD701D2 from RUR 10,882 Metabo PowerMaxx BS 600079500 from RUR 5,490 Makita DF333DWYE from 6,025 rub. DeWALT DCD791D2 from RUR 17,621 DEKO DKCD20FU-Li 063-4103 from RUR 3,090 Bosch GSR 12V-30 Professional 06019G9020 from 7,180 rub. Metabo BS 18 L 602321500 from 9,280 rub. Metabo PowerMaxx BS Quick Basic 600156950 from RUR 7,860 Metabo PowerMaxx BS Basic 600984000 from RUR 5,295 Metabo PowerMaxx BS Basic Set 600080880 from RUR 7,799 Makita DF0300 from RUR 3,815 Bosch GSR 18V-50 Professional 06019H5020 from RUR 11,935 Interskol DA-13/18VK 575.2.2.70 from 3,750 rub. Metabo PowerMaxx BS 12 601036500 from RUR 7,134 Makita DDF485RF from RUR 11,105 Metabo BS 18 L BL 602326500 from RUR 11,690 DEKO GCD12DU3 063-4096 from RUR 1,572
So what should you buy: a drill, a screwdriver or a drill-driver? Which tool is better?
If you ask these questions to professionals, most of them will answer that it is better to buy a drill and screwdriver separately. When using a tool professionally (with intensive use and heavy loads), narrow specialization is often a more profitable solution than versatility. Therefore, any good craftsman always has at hand a variety of narrow-profile tools that are selected for a specific job. Some people even buy several different screwdrivers at once: a small one for working in confined spaces, a large one for serious tasks, and a wrench specifically for working with bolts and nuts.
But for household use it can be more profitable to buy a universal tool - a drill-driver. It will cost less than a drill and screwdriver separately, and will take up less space on the shelf. Therefore, if you work in a home workshop or are engaged in construction a little, and not on an ongoing basis, then a drill-driver may well turn out to be the most suitable and profitable device among all the types of tools under consideration.
| There are several types of screwdrivers in the model line of each manufacturer. |
Do you even need a screwdriver if you have a drill?
The question of whether it is possible to tighten a self-tapping screw or screw using a drill cannot be answered without a slight digression. It concerns differences in the design of different types of power tools. The fact is that drills and screwdrivers behave differently after the start button is released. The drill is inertial, its chuck rotates for a few seconds after the tool is turned off. But the screwdriver doesn’t, it stops instantly. In addition, the drill operates at significantly higher speeds. And it doesn’t have a torque-limiting clutch.
Therefore, when tightening fasteners using a drill, there is a high probability of tearing off the slots in the head, damaging the bit, or driving the screw too deep. Theoretically, with proper skill, by limiting the speed of rotation of the cartridge through very short and light pulls on the trigger, you can ensure that the fastener goes in smoothly and to the required depth. But it's inconvenient and, frankly, simply unsafe. We strongly do not recommend using a drill to tighten screws and self-tapping screws.
Can a hammer drill or hammer drill be used as a screwdriver?
Impact drivers can drive large diameter fasteners into dense woods. Therefore, some craftsmen are tempted to use an impact drill or hammer drill to drive large “crackers” into wooden boards and beams when building a house or repairing a roof. We will try to dissuade you from such experiments. The fact is that the inertia of the cartridge (see the answer to the previous question) plus the impact energy is a sure way to “miss”. At best, you will simply ruin the fasteners and the material into which you try to screw them with an impact drill. At worst, you will get injured due to improper use of a tool that is prohibited in the operating instructions.
And with a hammer drill it’s even worse. Firstly, it has a completely different cartridge (for drills and augers of the SDS+ or SDS Max standard), and the bit will not hold in it. Secondly, the impact power of the hammer drill is such that the self-tapping screw is more likely to break than to tighten. Therefore, this option should not even be considered seriously.
Popular impact screwdrivers
DeWALT DCF887N from RUR 8,327 Makita DTD171Z from RUR 11,460 Makita TD110DZ from 3,800 rub. Bosch GDR 120-LI Professional 06019F0000 from RUR 3,853 DeWALT DCF801D2 from RUR 16,390 Makita DTD152Z from RUR 4,929 Makita TD110DWAE from RUR 9,920 Worx WX291 from RUR 5,590 Makita TD0101F from RUR 5,550 DeWALT DCF887P2 from RUR 31,864. Bort BSM-300I from RUR 2,740 Ryobi RID1801M from RUR 4,804 Makita DTD155Z from RUR 7,530 Makita TD001GZ from RUR 14,590 Makita DTD153Z from RUR 7,190 DeWALT DCF809D2T from RUR 20,535 Metabo SSD 18 LTX 200 BL 602396890 from 16,110 rub. DeWALT DCF815D2 from RUR 10,824. Metabo PowerMaxx SSD 12 BL 601115500 from RUR 13,820 Makita DTD154Z from RUR 9,680
What is the difference between an impact drill and a hammer drill? What power should it be?
For a drill, hammer drilling is an auxiliary function that is turned on in the most difficult areas, and for a hammer drill it is the main operating mode. Therefore, they differ in size and power, and the mechanisms of rotary hammers and impact drills are implemented differently. In a drill, the impact effect is created using two wavy washers. When the impact mode is turned on, one puck “jumps” over the other, and its “jumps” are transmitted to the cartridge. Due to this, the tip of the drill constantly moves back and forth (literally by fractions of a millimeter) and chisels the material, speeding up the drilling process. If you abuse the impact mode of the drill, then over time the “waves” on the washers wear out, and the effect of the impact almost completely disappears.
But hammer drills are designed differently. Instead of primitive wavy washers, there may be a swinging bearing or even a full-fledged crank mechanism inside the hammer drill. This design provides significantly greater impact energy. Therefore, it is almost impossible for impact drills to compete with rotary hammers in terms of performance when drilling durable structural materials such as brick, concrete and stone.
| Drill impact mechanism design. |
There can be no definite answer about power; building materials are too different. Most manufacturers (including well-known ones like Bosch and Makita) have impact drills with power ranging from 500 to 750 W (models with motors up to 1000 W are less common). And if this is not enough for you, then it is better to buy an inexpensive three-mode hammer drill that can both chisel and drill (with or without impact), like a regular drill.
How is an electric screwdriver different from a screwdriver?
Roughly speaking, cordless screwdrivers can be called miniature versions of screwdrivers. Due to their small size, they are very convenient to use for assembling cabinet furniture and electrical switchboard equipment, repairing household appliances or installing sockets and lamps. But you should take into account the difference in torque. For screwdrivers it is rarely less than 15 - 20 Nm, and for screwdrivers it is rarely more than 4 - 5 Nm. Therefore, even good electric screwdrivers simply do not have enough strength to drive a self-tapping screw into a board as deftly and quickly as the cheapest screwdriver.
Cordless screwdrivers
Bosch GO Professional 06019H2100 from RUR 3,017 Xiaomi Mijia Electric Screwdriver from RUR 2,243 Interskol OA-3.6F DM 433.0.2.00 from 1,190 rub. Xiaomi Mijia Electric Screwdriver 24 in 1 from RUR 2,690 Xiaomi HOTO Electric Screwdriver from RUR 2,477 Xiaomi WowStick 1F Plus 69 in 1 from RUR 2,064 Hitachi DB3DL2 from RUR 6,474 Bosch IXO 06039A8020 from RUR 1,999 Interskol OA-3.6F DM 433.0.1.00 from 1,581 rub. Xiaomi WowStick SD from RUR 1,796 Makita DF012DSE from RUR 9,680 Bosch GO Professional 06019H2020 from RUR 36,500 Makita DF001DW from RUR 3,640 AEG SE 3.6 LI-152C from RUR 6,232 Xiaomi WowStick 1P Plus 20 in 1 from RUR 1,209 Bosch IXO 06039A8022 from 4,400 rub. Zubr ZO-4 from RUR 2,179 Kraton CSL-3K-H from RUR 2,057 Bosch IXO 06039C7122 from RUR 5,108 Ryobi ERGO from RUR 1,140
Is it possible to polish a car with a drill?
The drill is designed for drilling, not polishing. Therefore, it has a fairly high rotation speed of the cartridge (around 2 - 3 thousand revolutions per minute for most models). And to polish a car’s paintwork, the speed is two to three times lower (when using liquid polishes, it is generally very low, around 400 – 800 rpm).
Most likely, an attempt to polish the body with a drill will burn out the varnish, which will cause marks in the form of characteristic “burn marks” to appear on the car. It's better to buy a polishing machine. Even in the sub-$100 range there are good car polishing machines. With their help, it is much more convenient to restore paintwork, remove dull spots on paint and sandblast on windows and headlights than with a drill.
We hope this article helped you understand the differences between drills, screwdrivers and electric screwdrivers, what they are needed for and how they should be used. Additional information can be found in the articles “How to choose a screwdriver” and “Which screwdriver is better.”