Installing a plastic window sill plug
- Types of end caps
- Characteristics of plastic plugs
- Tools and materials for installing the plug
- End cap installation technology
A window sill plug is a plastic accessory for a PVC window, which is used to hide cavities, stiffeners and defects that appear during installation work that are visible on the cut of the window sill board. It protects the product from moisture and dirt, ensuring its tightness, and also gives the window structure a finished look. How to choose and install this part correctly?
How to cut a plastic window sill without dismantling it
If you have a wide window sill in the kitchen that constantly prevents the freezer from opening, you can try sawing it off lengthwise. This is difficult to do, since you will need to cut off the part that goes under the window. To saw off the inside, the product is pulled out. After trimming, they are mounted back. You can cut a curve on one side of the product or saw off the spout.
- Open the refrigerator door and make a mark. At this place we draw a rounding. Use a large bowl or cup as a template.
- We cut off the excess plastic with a jigsaw.
- Then we make the end trim. To bend it and form a non-standard shape, the product is heated in boiling water for no more than 2 minutes. The result should be an angle of 90°.
- The hot pad is installed on the end of the window sill panel.
Round window sill boards are finished in the same way.
How to cut a plastic window sill?
The most important thing is to correctly adjust the dimensions of the window sill, since it is sold as a single plate. The first step is to take measurements of the width and length of the concrete base, which should have a slight overlap.
The width of the PVC product should protrude slightly beyond the seat. This size is usually chosen taking into account the practical considerations of the owner and is 80-100 mm. Otherwise, the overhang of the window sill will prevent the circulation of warm air that comes from the heating radiator.
Fit to size
When all the tools and materials have been prepared, you can proceed to the next stage of work. It consists of taking measurements and transferring the markings onto a PVC board. To do this, you need to add 10 cm to the length of the opening. This measure is needed to create an attractive appearance for the entire window opening.
At the first stage, measurements of the window sill are taken
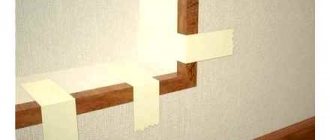
Once the markings are completed, you need to cut out the PVC window sill. This process is easily performed with a jigsaw, but if you don’t have one, you can use a regular hacksaw. But slopes require a lot of effort. Where the plastic window sill will be installed, it is necessary to make grooves. Their depth should be 5 mm greater than the length of the part being installed .
To insert window sill boards, grooves are made in the slopes
It is best to make grooves in the slopes with a chisel, which we install in a hammer drill. They should have an even shape that will not interfere with the entry of the window sills. After chiselling, the opening must be cleared of debris. And after that, proceed to the next stage.
HOW TO INSTALL A WINDOW SILL
Some people believe that it is necessary to install not only plastic, but also window sills made of other materials, not strictly at a horizontal level, but with a slight slope from the window. What goals are pursued by this deviation from the accepted norms of horizontality, I have no idea.
You will like it better, this way it creates difficulties for wounded insects trying to escape from you to the window, to the light. The wounded insect, unable to withstand the torment of persecution, having exhausted its last strength while climbing up the mountain on foot, falls onto the surface of the window sill and, in full accordance with the laws of physics, slides down behind the radiator grille, where it is stored in a dried form with similar ones for many and many years. I can’t find any other explanation for this bias.
READ Li Ion Screwdriver Battery Not Charging
The introduction of a gun and a cylinder with professional foam significantly simplifies foaming during all operations, even if this is the installation of plastic window sills, as it is also called the installation of interior doors. If you don’t have a gun, then you shouldn’t just spend money on a gun. Use a foam bottle with a special tube included.
Installation process - step-by-step guide ↑
The correct sequence of work and compliance with technical nuances are a guarantee of the quality of the window sill. The process of attaching to a plastic window is not complicated and does not take much time.
Sequence of work - how to avoid mistakes ↑
At what stage of the renovation is it most appropriate to install a plastic window sill? The correct answer is immediately after installing the windows, before finishing the internal slopes.
If you install it later, the slopes will have to be partially or completely redone. After all, for installation you will need to select grooves in the slopes. It is not recommended to remove the protective film from the plastic board until all repair work is completed.
Advice! When installing a window sill, the protective coating must not be completely removed. But only in those places where the panel fits into the grooves (near the frame and on the sides). If this is not done immediately, the film will be difficult to remove completely.
Preparatory stage - creating a strong support ↑
How to properly install a window sill on plastic windows:
- If you are installing the window yourself, form a foam mounting seam under the frame. A seam larger than 8 cm should be foamed in several passes with an interval of 7 minutes. And after hardening (after 20 minutes), install a vapor barrier tape on top. If the window installation is carried out by craftsmen, this stage must be completed by them.
- How to install a window sill if the window is already standing? Select grooves on the sides of the window opening (from 10 to 60 mm depending on the size of the “ears”). If you need a grinder for this, it is better to cover the double-glazed windows with cardboard sheets during the work. Since flying sparks can damage windows (melt plastic).
- Screw 51 mm support screws into the support profile under the frame. They should be located at a distance of 17-19 mm from its lower edge. This technique will increase the maximum pressure that the structure can withstand.
- If the window sill distance exceeds 40 mm, it should be increased with plaster. After all, at this size the foam will not completely polymerize. Which will lead to a decrease in its supporting and thermal insulation characteristics.
- Next, you need to thoroughly clean the window sill using a construction vacuum cleaner or brush. And also - prime the rough surface. The point here is in the features of the polyurethane foam. For adhesion to the surface, the latter must be wet. The primer also further increases adhesion.
- Measure the surface and, if necessary, adjust the plastic board to size. The end should not be placed close to the wall. You need to leave 1 cm for thermal expansion.
- Lay out support points in increments of 50–60 cm. To do this, fold the plastic wedges into a “jack” and rewind with electrical tape or masking tape. For reliability, you can grab the support points with self-tapping screws, since during installation you need to be careful not to move them out of place.
Advice! If some of the liquid gets on the glass during priming, you need to wipe it off immediately. Since when it hardens, the composition forms a film that is difficult to remove.
We fix the window sill - the secrets of proper installation ↑
How to install a window sill to a plastic window:
- Check the window sill for voids in the foam. If gaps are found in the wall, foam them to prevent the windows from freezing.
- Install the window sill into the profile with force. Align it centrally so that it has a 2-3 mm slope from the level into the room for every 20 cm of depth. This is necessary for moisture to drain out.
- Foam the space under the window. Place a load on top (for example, 5-liter bottles) around the entire perimeter. The foam tends to expand, squeezing out the board. To prevent this from happening, a load is needed.
- Install end caps.
- Apply a layer of sealant to all cracks.
- After the foam has completely hardened (about 12 hours), remove the load.
Installation Features
A plastic window sill is inserted under the window frame. But before this, you need to prepare wooden blocks of the required thickness in order to wedge the product between the window frame and the concrete base of the opening, and there should be no gap between them. Wedges are placed in the middle and along the edges.
When installing, it is necessary to control the position of the window sill using a building level - it should be located with a slight slope into the room, 2-4 mm will be enough. To maintain the slope, you can also install bars of appropriate thickness on the near side of the base.
After this, the product should be fixed using:
- polyurethane foam - blown into the gaps between the base and the window sill;
- brackets (L-shaped plates) - they are fixed to the wall, and a PVC product is screwed from below with self-tapping screws.
As you can see, there is nothing complicated in installing a window sill, so you can install it yourself without resorting to outside help.
How to install a plastic window sill. Installation of different types of window sills on plastic windows
You should understand in more detail how to install window sills on plastic windows, and a step-by-step description of the work will help with this:
- The first and mandatory step is to thoroughly clean the working surface on which the workpiece will be mounted from construction debris and dust.
The surface on which the window sill will be installed must be clear of debris
Where to start installing a window sill
I will describe the process of installing a plastic window sill using the example of a window with a balcony door. It is necessary to install two window sills at once . One under the window, the other under the balcony door.
The old PVC window sill was dismantled. But first, we had to dismantle the left window slope, since it was attached to the surface of the window sill. I will write about how to make slopes on windows later.
The surface for installation must be thoroughly cleaned of old foam, construction debris and dust, and then primed. Next we proceed to marking. We need to cut both PVC window sills to the size we need. Everyone is free to decide how many centimeters the window sill will protrude relative to the wall; I think this is not important. The main thing is that it does not block the heating radiator. In normal cases, I leave about five centimeters.
Since, in the example I am describing, the right side of the window sill does not go under the slope of the window, but remains open, it would be completely useful to check that it has a right angle. This can be done simply using a square. If there is no right angle, then you need to create one. Draw a line with a pencil and cut it off.
How to cut a plastic window sill
So a man calls the phone and asks: “ How to install a plastic window sill ?” If you have had similar cases, then you can probably imagine how difficult it is to explain to a person about installing a plastic window sill over a plastic phone.
The secret of installing window sills has been strictly kept for centuries and passed on only from teacher to student. However, I did not take an oath not to disclose the method of installing the window sill correctly and simply, because I will tell you a lot that I learned from my experience about installing this structural element of the window, giving it a finished look, right now and here.
The reality around us is so replete with plastic that one could set out to write a tutorial about installing a plastic window sill using only plastic tools. However, why make life difficult for yourself? Let's use the tools that are available, regardless of the material from which they are made. What do we need from this earlier?
I will outline the process of installing a plastic window sill using the example of a window with a balcony door. You need to install two window sills . One under the window, the other under the balcony door.
The old PVC window sill was dismantled. But somehow, we had to dismantle the left window slope, since it was attached to the surface of the window sill. I’ll write about how to actually make slopes on the windows later.
The surface for installation must be carefully cleaned of old foam, construction debris and dust, and then primed. Next we proceed to marking. It is necessary to cut both PVC window sills to the size that suits us. Whoever is free to decide to what extent the window sill will protrude relative to the wall, I think that this is not important. The main thing is that it does not block the heating radiator. In ordinary cases, I leave approximately 5 cm.
How to cut a plastic window sill
Because, in the example I am describing, the right side of the window sill does not go under the slope of the window, but remains open, then it would be completely useful to check that it has a right angle. This can be done simply using a square. If there is no right angle, then you need to make one. Draw a line with a pencil and cut it off.
Listed above are the tools with which you can cut off the plastic of the window sill. There is no need to worry if the cut is not entirely accurate. After all, usually the edges are hidden behind the slopes; if not, then they are locked with plugs, which I did not photograph (not criminal forgetfulness). I prefer to cut with a grinder, but I lower the blade speed to medium. I cut with an ordinary metal disc.
There is one dharma to be learned in the process of installing a window sill. Its essence is in the fact that the window sill should be 5-7 mm. fit under the bottom frame of the window. This is necessary to maintain cosmic order. We take it into account when marking and cut it with extra.
You've probably heard or read that the window sill is installed on foam and pressed down from above, preventing it from being squeezed out by the expanding foam. This is right. The load prevents the plane of the window sill from tilting upward. However, how to keep the window sill from sagging down? Which beacons should I focus on for installation?
To install the stops, we will need dowels and nails 8x40 and 8x60, the availability of which I have already mentioned. As you might have guessed, it is on the heads of these nails that the window sill will rest on its own one of the planes.
Using a hammer drill, we drill holes with a diameter of 8 mm. and 40 mm deep. We insert dowels 40 mm long into the holes. But we take nails 60 mm long. This protruding length will allow us to adjust the heads to the appropriate height and prevent the nails from falling through.
HOW TO INSTALL A WINDOW SILL
Some people believe that it is necessary to install not only plastic , but also window sills made of other materials, not strictly at a horizontal level, but with a slight slope from the window. What goals are pursued by this deviation from the accepted norms of horizontality, I have no idea.
You will like it better, this way it creates difficulties for wounded insects trying to escape from you to the window, to the light. The wounded insect, unable to withstand the torment of persecution, having exhausted its last strength while climbing up the mountain on foot, falls onto the surface of the window sill and, in full accordance with the laws of physics, slides down behind the radiator grille, where it is stored in a dried form with similar ones for many and many years. I can’t find any other explanation for this bias.
The introduction of a gun and a cylinder with professional foam significantly simplifies foaming during all operations, even if this is the installation of plastic window sills, as it is also called the installation of interior doors. If you don’t have a gun, then you shouldn’t just spend money on a gun. Use a foam bottle with a special tube included.
How to cut a plastic window sill. How to cut a plastic window sill?
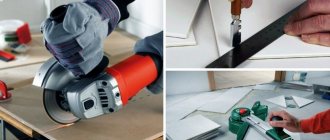
Plastic is cut quite easily with standard saw tools and equipment:
- angle grinder;
- circular;
- electric jigsaw;
- hacksaw for wood or metal.
It is most advisable to use a jigsaw for cutting PVC window sills. The grinder also copes well with this task. A circular saw is less preferable - due to the high speeds and large teeth of the saw blade, there is a high probability of destruction of the plastic product.
If an electric tool is not available, you can use a hand tool. A blade for metal is best suited, since a hacksaw for wood has large teeth, so the ends will have to be additionally processed with a file. After which you can attach a decorative overlay to them.
Installation Features
A plastic window sill is inserted under the window frame. But before this, you need to prepare wooden blocks of the required thickness in order to wedge the product between the window frame and the concrete base of the opening, and there should be no gap between them. Wedges are placed in the middle and along the edges.
When installing, it is necessary to control the position of the window sill using a building level - it should be located with a slight slope into the room, 2-4 mm will be enough. To maintain the slope, you can also install bars of appropriate thickness on the near side of the base.
After this, the product should be fixed using:
- polyurethane foam - blown into the gaps between the base and the window sill;
- brackets (L-shaped plates) - they are fixed to the wall, and a PVC product is screwed from below with self-tapping screws.
As you can see, there is nothing complicated in installing a window sill, so you can install it yourself without resorting to outside help.
Properties of a plastic window sill
Plastic window sills are produced by extrusion followed by lamination with white PVC film, which, in turn, is covered with a protective film.
The protective film is removed after installing the window sill in place and cleaning the room.
PVC window sills are durable, moisture resistant, and do not fade in the sun.
Cutting the window sill is done quickly and easily using a grinder or jigsaw.
You can even store the window sill in the open air or in any other room with violations of temperature and humidity standards.
Dear Clients!
To place an order or consult, call us at:
Plastic windows
In recent years, plastic windows have become an integral element of any interior. Regardless of the style of the room, it is equipped with energy-efficient plastic windows and window sills made of the same material. This is durable, and thanks to the large assortment of decorative films, very beautiful material has firmly entered our lives. This article will discuss how to properly attach a plastic window sill.
Content:
Advantages of a plastic window sill
The most popular materials for window sills are wood, plastic and stone.
- Wooden window sills are too finicky and require constant maintenance. In addition, over time they dry out or become damaged from frequent staining.
- Stone window sills are certainly durable and beautiful, but they are very expensive and you cannot install them yourself.
- Plastic window sills are not just durable, light and beautiful; their technical characteristics best match those of PVC profile windows, which will make their maintenance easier.
- In addition, the service life will be the same, so after installing the window, slopes and window sills, you will not have to replace or restore any one element.
- If the window frame is laminated, then the same film is selected for the window sill.
- Due to its properties, plastic is resistant to moisture, so even with possible condensation on the windows it will not begin to rot. With regular care, mold does not form on it, since the surface does not have microcracks.
- Lower price than a wooden or stone window sill of the same size.
- Resistant to aggressive chemical environments.
- Due to the light weight and plasticity of the material, it is easy to cut and install independently without special tools.
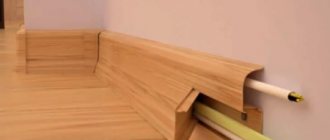
- A plastic window sill is not a cast slab. It consists of transverse chambers. This not only reduces weight, but also serves as additional thermal insulation.
- More expensive models of PVC window sill have a special coating that makes it resistant to high temperatures and mechanical damage.
They have only one drawback - low strength.
How are plastic window sills made?
There is no official classification of plastic window sills, but they are conventionally divided into several types.
- Standard plastic window sills. They are the most popular. They are made in white, width from 20 to 100 cm in increments of 5 cm. They have the lowest resistance to mechanical damage.
- Thermo- and impact-resistant plastic window sills. It is rational to mount them in wide openings that serve as a working surface. For example, when a kitchen window sill is used as a table. Lamination with a special film gives the product particular strength.
- Laminated window sills. They are more beautiful, but their characteristics remain the same. Films not only add color to the window sill, but can also imitate natural materials (stone, wood). Despite the fact that the lamination method is reliable, a number of manufacturers offer window sills that have an acrylic layer on top of the lamination. In this case, the surface strength increases several times (however, so does the cost and weight, which negates its advantages).
- The panels are made by extruding PVC blanks with an extruder. The surface is laminated with a film, which makes the window sill smooth and further protects its surface from damage. The thickness of the window sill varies from 1.8 to 2.2 cm.
How to choose a plastic window sill
At first glance, all the window sills are the same and there is a desire to buy the cheapest one. But professionals know several nuances that will help you choose the best quality product.
- A plastic window sill must be made from high-quality raw materials that have passed a quality test for safety for humans. This can only be tracked by the product certificate.
- The store should also provide detailed characteristics of the material. These include resistance to UV rays (especially important for colored products), mechanical strength and resistance to condensation.
Having received all the necessary information, choose a model that is suitable in design and size.
- It is best to choose a white window sill. This is due to the fact that it is guaranteed not to fade when exposed to direct sunlight. And small scratches on it will be almost invisible, unlike colored models.
Advice: cheap plastic may turn yellow after a few years, so it is recommended to choose white window sills from the middle price segment.
- A plastic window sill, regardless of price and manufacturer, is a panel containing stiffening ribs 1.5 - 3 mm thick and air chambers between them. It is the number of stiffeners that is responsible for the strength of the window sill. The higher their number, the more load it can withstand.
- The panels have a standard length of 600 cm. You can buy and cut them yourself, or order ready-made ones according to individual sizes.
Advice: in order not to make mistakes in preliminary calculations, it is recommended to call a surveyor.
- The width of the panels ranges from 20 to 100 cm. At first, the increment is 5 cm, after 60 cm - 10 cm. Based on this, the internal size of the window opening (depth) is measured. Since the window sill should protrude forward (but not completely cover the radiator), add another 10 cm.
- For example, the depth of the window sill in a panel house is 15 cm, add another 10, and you get 25 cm - the required panel width.
Finishing slopes of plastic windows
Slopes are made of three types: plaster, plasterboard and plastic.
Plastering
Plaster slopes are the most economical, but at the same time the dirtiest option. They need constant painting, at least once a year, and may turn yellow (depending on the paintwork) in the sun. The main thing when doing independent work on finishing slopes on plastic windows is not to cut off the mounting foam. It has a structure of cells that are not closed inside, which, when cut, will absorb moisture from the air and get wet. This will lead to the formation of cold bridges and blowing through the assembly seam.
The surface of the wall can be reinforced with plaster mesh; work is easier to do with ready-made plaster mixtures.
The main task is to level the surface and form a smooth, even surface. The top of the slope can be painted with any paint in accordance with the color scheme of the interior.
Plasterboard
Plasterboard options, like plastering, can be considered dirty work that requires careful covering of the furniture in the room. To finish plastic windows with plasterboard slopes, you must carefully measure the dimensions. For ease of installation, guides are used, to which the drywall sheets are attached with self-tapping screws. Insulation (for example, basalt) is inserted into the space between the sheets and the window opening. The glue is applied to the front edge of the window opening - the slope should be coated to a depth of 10 cm. This must be done without voids so that the glue lies in a continuous strip. Next, you need to wait until the glue sets and begin finishing.
Plastic
Plastic slopes are the most durable, easy to maintain and use option. They are sold directly as systems, which include a panel, guides, and decorative overlays.
Before installing the panel, the window opening is leveled and a wooden batten is attached to the wall. As a result, the slopes are smooth. The joints between the panels and the window opening are treated with sealant. Thermal insulation is provided by insulation or foam, which makes slopes much warmer than plaster slopes.
Thus, the work of installing window sills and slopes must be treated with the utmost care and seriousness.
Incorrect installation of slopes can damage the mounting seam, which in the future may lead to the need to replace it, and errors in installing the window sill can disrupt convection in the room and a stream of cold air from the window will constantly blow into the room, and the glass will fog up.