Skirting boards have long been an integral part of the interior and are actively used in room decoration. Manufacturers make this piece of furniture from different materials, which ultimately can affect the choice of tool and cutting method when it is necessary to obtain perfectly accurate corner joints. The article will touch upon the question of how to cut the plinth correctly and with what, in order to be able to join two parts as accurately as possible without the use of decorative overlays.
Plastic skirting board
Main types of floor skirting boards
Until recently, it was impossible to find other types of skirting boards on the market other than wooden ones. These products are still popular, although they are gradually losing ground to more practical and durable products.
Varieties by type of material:
- Wooden. This is a classic option. The reason why such skirting boards are still in demand is the raw material used in manufacturing. After all, when building eco-housing, people choose products made from natural materials. Wood products are made from various types of wood, and therefore differ in decorative qualities and durability.
Wooden skirting boards
- Veneered. Various materials can be used to make the main part, but only veneer made from high-quality wood species is used as the top covering. Upon external inspection, without knowing the distinctive features, a veneered plinth is practically no different from a wooden one.
Veneered plinth
- PVC plinth. This type of product becomes more popular every year due to its practicality and low price. Plastic skirting boards are made with various characteristics, which helps to select products exclusively for the needs of the homeowner. For example, for semicircular walls, manufacturers offer flexible options, moreover, they are practically not inferior in decorative properties to wooden baseboards.
PVC skirting board
Cutting the corner of a plastic skirting board
Only from the outside, it may seem that cutting corners is a simple matter and does not require much knowledge and experience. However, this is just an outside view. When you take it on yourself, especially if it’s the first time, your hands begin to shake and the slightest incorrect action will lead to rejection of the part.
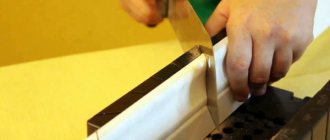
Skirting cutting process
An incorrectly executed cut will lead to the appearance of gaps, which means that such a connection is not suitable for joining in the corners: the decorative component is disrupted, and the practical component suffers no less.
Tools for work
To make the cut as efficiently as possible, workers use a hacksaw. However, this tool is not suitable in all cases. For example, to cut thin skirting boards, it is better to use a grinder or metal scissors. Although these tools also require the experience of a specialist.
Cutting skirting boards to finish a corner
Using a stencil
This method is suitable if the room where you plan to install skirting boards has non-standard dimensions.
How to cut a plastic skirting board:
- We cut a strip from any flexible material that matches the width of the baseboard.
- By attaching the prepared material to the corner, we form its shape.
- The resulting stencil is applied to the plinth and a corner is cut out from the resulting blank.
Using a stencil
Miter box - an auxiliary tool for cutting corners
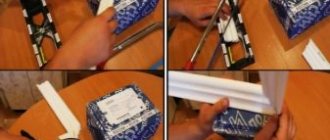
To make the work of cutting corners not so difficult, a miter box was invented, which is a small block with a recess for the plinth. The device has special gaps for cutting at different angles.
The process of working with a miter box
The plinth is laid inside, and having chosen the desired angle, the cut is made using a hacksaw for metal or a fine-toothed tenon.
Important! It should be understood that to form the connections, blanks from two plinths are used, the shapes of the corners of which are mirror opposite to each other.
After placing the plinth in the miter box and choosing an angle, make sure that the workpiece moves a little further from the cut point. If the plinth is smaller in size relative to the device itself, it is recommended to fix the first one. Otherwise, the plinth will move, and it will no longer be possible to obtain a high-quality cut.
Using a miter box
If you don’t have a miter box, a ruler and pencil will do.
The lack of a miter box, and the reluctance to make a stencil, leads to the next method, the main tools of which are a ruler and a pencil.
How to properly cut a plinth for an internal corner:
- Take measurements of the width of the product.
- Transfer the resulting value to the end part of the plinth.
- Draw a line with a pencil from the corner to the marked point.
- Cut according to the mark.
- The second plinth is applied to the first (formed) and is also cut. It is important that the cut is mirror-like.
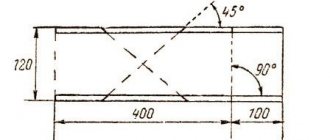
Drawing for stencil
Useful tips
- According to some craftsmen, installation of skirting boards begins from the inner corner.
- A room with precise geometric shapes will result in angles that are exactly 90 degrees.
Forming corners
- If possible, all cuts are recommended to be made only using a miter box. It is this device that will help achieve the most accurate result.
- After trimming, it is necessary to carry out mandatory grinding of the end parts of the plinth. This approach will help to obtain a tighter connection.
Using a miter box
- If the baseboards have a cable channel, it is initially recommended to remove the top cover to mask the wires and attachment points.
- Cutting corner parts is done at the very beginning, so as not to be distracted by this procedure during the work process.
Protractor and miter box for non-standard angles
- To decorate corners, use special corner joints. Also, do not forget about the end parts of the plinth - cover them with decorative caps.
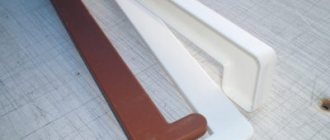
Elements for connecting skirting boards
Joining cut corners
However, cutting the corner correctly is only half the battle. It is very important that even after installation the structure looks as neat as possible.
So craftsmen, especially beginners, should scrupulously follow the installation algorithm:
Adhesive compositions
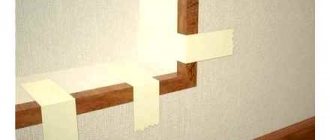
- First, prepare the base on which the plinth will be glued. To do this, remove the old finish, degrease and prime the surfaces.
- After the primer has polymerized, we begin gluing. Apply glue to the piece adjusted to size (the type of composition must correspond to the material), and then press the plinth to the base.
- When one part of the corner is installed, apply glue to the second fragment. Be sure to treat the end being joined with adhesive.
- Glue the second part of the corner, aligning the planes.
- The gap between the parts, if any, is filled with either acrylic sealant (for polymer products) or wood putty (for baseboards made of wood, cork and MDF).
Photo in the process of gluing the outer corner
Skirting for the floor: cutting it correctly
If the room has been renovated according to Euro standards, then the corners must certainly correspond to 90°. Then there is nothing easier than using a miter box. Having laid the plinth inside the device, select a cut angle of 45° and prepare the corners on two plinths.
Angle for corner joining
However, perfectly straight angles are not so common, and there are usually some deviations in one direction or another. In this case, it is necessary to mark the floor with a pencil.
How to cut a plinth according to the markings:
- Two parallel horizontal lines are drawn.
- Approximately in the middle, a dividing line is drawn, which is placed across the marking.
- At the top, by attaching the protractor to the transverse line, we determine the angle of 45 degrees and put a mark on both sides.
- We do the same at the bottom.
- Applying a ruler to the marks, we apply a cross-shaped marking.
The result should be the letter “F”. If you want to get cut angles of 45, 90 or 135o, you can always use this little trick by placing the plinth on the corresponding line.
The finished result
Internal joint
The workpiece is placed in a special device - a miter box. This simple tool is cheap and a must buy. Consider the maximum width of the cut strip that can fit in the miter box - it should be no less than the width of your parts. Pressing the bar tightly against the wall of the miter box, you saw off the plinth through the slot under which there is a “45 degrees” designation. One blank comes out. The second one is heated in exactly the same way, but the cut is made in the other direction and the bar must be applied to the opposite side of the miter box.
READ How to Properly Mow with an Electric Trimmer With Line
After these operations, two elements emerge, completely adjacent to each other. As a result of the connection, an internal joint of ninety degrees emerges. Before installation, it is recommended to carefully clean the cut with sandpaper. If wood blanks were sawn, then to obtain perfect joints you need wood putty - small chips often occur when sawing.
detailed instructions
Here is an example of instructions on how to cut a plinth at an angle using a miter box and a tenon:
- Having taken the dimensions and made sure they are correct, we lay the plinth inside the device and press it against one of the walls.
- Taking into account the shape of the corner, we select the correct groove for cutting the baseboard with a tenon.
- You need to saw without jerking, with careful and smooth movements.
Nowadays, hardware stores offer various options for masking corner joints, and therefore, in some cases, you can make straight cuts without worrying about the decorative component of the joint.
Instructions for forming an outer corner:
Outside corner
Forming an internal corner:
Internal corner
Formation of the final plinth:
The final part of the plinth
other methods
If you have a good eye and precision in your hand movements, you can use a homemade template that resembles an imitation of a miter box. To do this, take a narrow board or thick plywood and draw a layout in the form of a horizontal rectangle. Using a protractor, mark 45° on the right and left sides of the rectangle. Draw a mowing line connecting the reverse edges.
Now you can cut the ceiling plinth using this layout. The actions are ordinary and similar to the description above in the first version. Only the ceiling parts do not need to be inserted, but placed on the sketch and the hacksaw combined with the layout markings.
Description of methods for gluing ceiling skirting boards (cornices) to the ceiling. Method of gluing using glue, putty and sealant. How to make even corners on the ceiling.
READ How to Cut Corners of Ceiling Plinths at Home
