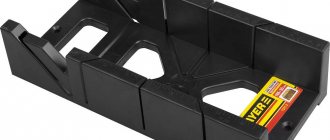
We make a miter box with our own hands
Ceiling plinth how to make a corner
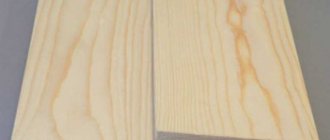
Use a 20cm board to make the tool
Making a tool for forming an angle with your own hands is quite simple.
When manufacturing technology is carried out, the miter box will not be inferior in quality to store-bought models.
To carry out manufacturing work, you need to prepare materials and tools:
- board, when using pine wood its thickness should be 20 mm, if we use oak or ash material, a thickness of 10-15 mm is sufficient;
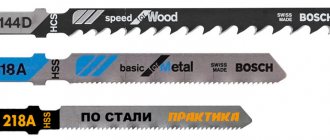
- hacksaw for wood and metal;
- vice or clamps;
- sanding paper or narrow needle file;
- confirmants and hexagon;
- drill and drill bits for confirmations and wood;
- Using a protractor, ruler and pencil, we will make markings before sawing. To learn how to make a miter box with your own hands, watch this video:
After preparing everything necessary, we begin manufacturing the product.
Box manufacturing process
The height of the side should be from 30 to 50 mm
First you need to make the side walls and bottom of the miter box box. To do this, we first prepare boards of certain sizes:
- the height of the sides will depend on the width of the product being cut, varies from 30 to 50 mm;
- the optimal length of the side walls is 15-30 cm.
- We cut out two parts of the same size, they will serve as sides, and the bottom is 150 mm wide.
- We sand the workpieces and align the corners at 90 degrees.
- Place the pieces next to each other and check that they are the same size.
Let's start marking the cuts on the side parts. For more detailed instructions on how to make a miter box with your own hands, watch this video:
Marking the cutting locations
To avoid errors when working with a miter box, you need to correctly mark the location of the slots:
- At the end of the sides we draw two lines, perpendicular to each other.
- We measure the width and thickness of the box, step back from the drawn lines by the size of the width of the box and make two marks to make a square.
- On two opposite sides we measure an angle of 45 and 90 degrees.
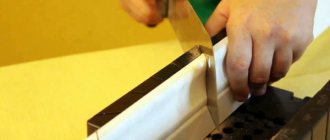
- Once again we check the correctness of the markings, only after that we cut the diagonal cuts. To make the cut perfectly even, we start sawing with a hacksaw for metal with fine teeth, then connect a hand saw for wood. The depth of the cut should be up to the top level of the bottom of the tool.
- Then we make a second cut perpendicular to the first cut, which is needed for even cutting of the baseboards.
- We clean the sawing areas with sandpaper.
- We connect the blanks together with glue and fix them with confirmants. We clamp the box with a vice, remove excess glue and leave for 24 hours until completely dry.
If you want the tool to be dismountable, then we fix it with screws without using glue.
We looked at what a miter box is and how to use it. This tool is an indispensable assistant in carrying out repair work; it does not take up much space, but you cannot do without it if you need to cut a product at an angle.
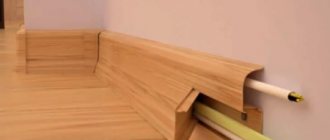
How to run a wire under the baseboard
How to seal gaps between the floor and wall
Installation of skirting boards with cable duct
Joining corners using a miter box
- A miter box is a carpentry tool that allows you to cut various materials, which are subsequently planned to be mounted together at right angles.
There are two main designs of miter boxes:
A simple miter box is a wooden (plastic) tray with vertical slits in the walls into which a hacksaw will be inserted. This design allows you to accurately trim the baseboard vertically at an angle of 90 or 45 degrees. In addition, it is convenient to work with such a miter box, because it is possible to use a hacksaw not only to cut vertically, but also to tilt the blade at 45 degrees.
Simple miter box
A miter box with a rotating mechanism is a professional tool; it allows you to fix the hacksaw blade at any desired angle. If a regular miter box is only suitable for cutting skirting boards for joining at right angles, then with a rotating mechanism it is suitable for installation at any angle.
Miter box with rotating mechanism
The procedure for cutting fillets:
- attach the fillet to the place of planned installation and take measurements
- Place the upper part of the plinth (the one that will be attached to the ceiling) on the bottom, the lower part of the plinth will be pressed against the wall of the miter box
- cut the baseboard, smoothly and without sharp pressure, at an angle of 45 degrees. The cut must be carried out with a hacksaw with a fine tooth (optimally a hacksaw for metal) or a knife. A large tooth will bite the material, especially polystyrene with its porous structure - the end will turn out uneven, with chips
- The operation is carried out similarly with the adjacent plinth - only the cut is made in another slot at 45 degrees
- attach the resulting skirting boards to the place of planned gluing and select the optimal joining angle. If necessary, the cutting planes can be adjusted with a sharp knife to achieve the most accurate fit.
Advice! If there is a need to simultaneously cut the outer corner on one side and the inner corner on the other, cut out a more complex element first - the inner corner.
The procedure for trimming adjacent fillets for internal and external corners:
Trimming adjacent fillets
Advice! The most accurate cut can be obtained by making a simultaneous cut of two joined skirting boards. Since the plinths are sawn in a mirror image in relation to each other, you can fold both plinths with their inner sides facing each other and secure them tightly in the miter box, after which you simply make one cut at an angle of 45 degrees.
Smooth and neat corner of baseboards in the kitchen
The corners of the plinths are decorated using a miter box
You can trim a baguette using a miter box
If you don’t have a miter box, then this is not a reason to give up; there is a method that allows you to get a good result, you just need to be careful and careful. First of all, you need to cut off those sides where the baseboards will join, strictly at 90 degrees.
After this, we take the plinth and apply it to the wall in the same way as it is planned to mount it. Please note that the precisely cut end is pressed tightly against the wall. Now draw a line with a pencil:
Draw a line along which the plinth will be glued
We take the second plinth and repeat all the operations exactly, but on the other side:
Marking the baseboard on the other side
We get on the ceiling the point of intersection of two lines - this will be the place where the skirting boards join. Now let's designate this point on each of the fillets:
Transferring the point of intersection of lines to the plinth
The line that will run from the transferred intersection point to the opposite edge of the plinth is the desired cut line. Using a sharp knife (a metal file), we make the cut clearly, but without strong pressure. We join the plinths in the corner, selecting the optimal position, if necessary, we cut the corners with a knife:
Angle obtained by marking method
If the angle is not straight, the work becomes more difficult, but not much. We simply measure its value exactly, divide it in half and get the value required to mark the cut of the plinth. For example, the angle is 76 degrees, we need to cut at an angle of 38 degrees. In this case, it is better to make the initial cut at an angle of 40 degrees, and then at the joining site, adjust the angle with a knife.
Unfortunately, even with the most accurate and scrupulous work, it may turn out that the angle is not quite even and precise - maybe the wall is not quite straight, the angle is not quite straight, perhaps when cutting the material could be slightly deformed under pressure. Therefore, the corner may have gaps along the joining line, or dents may appear on the edges - this looks sloppy and unaesthetic.
Advice! This can be corrected by using a sealant - just fill the dents and cracks, let the sealant dry well and trim off the excess sagging with a knife - and the appearance will again be pleasing to the eye.
Even skirting board corners can be trimmed without using a miter box
A neat corner in the room, formed using markings
The markings will help you cut the baseboard neatly and evenly.
A neat and beautiful edging on the ceiling sets interior accents and masks the gaps between finishing materials. There are several techniques for how to correctly cut a corner on a ceiling plinth. Builders use several special devices or work without them.
Assembly instructions
How to cut a plastic skirting board
The time has come for assembly.
To make a miter box, we will need the following materials and tools:
- edged board made of hard wood: 20 mm thick, length – arbitrary, 2 pieces;
- board for the sides and base - 1 piece;
- wood hacksaw with fine teeth;
- hacksaw for metal;
- 4 pieces of confirmations;
- confirmation key;
- drill;
- wood drills;
- vice/clamps;
- the thinnest file.
Choosing a hacksaw
We only need the tool for manufacturing. The miter box itself is made for a specific hacksaw, but not vice versa.
A good hacksaw for making should have a thin, stiff blade with small teeth
Such teeth cut wood evenly, thinly, without distortions, which is important for precise cutting of skirting boards, for example.
Any thin fabric will definitely be flexible, which is a big disadvantage for a miter box. If so, then the hacksaw must have a butt - a special stiffening rib.
Video:
https://youtube.com/watch?v=8eWPPv1bkgQ
You can go simpler - using a circular saw you can quickly make very even cuts, the main thing is to mark them correctly.
Assembling the side walls
We use a thick board for the side walls:
- Board thickness – 20 mm;
- The height of the side is chosen at will, but 5 cm is more than enough;
- The length of the side wall of the tool is from 25 cm, if the workpieces are wider, then the length of the miter box should be longer - from 35 cm;
- Using a circular saw/hacksaw, we cut out two identical sidewalls. Dimensions of two sidewalls – from 6 cm in height (+1 cm to the height for fastening), from 25 cm in length – 2 pieces;
- Base size - from 8 cm wide and more, similar length - from 25 cm, 1 piece. The thickness of all blanks is from 2 cm.
Marking for cuts
Before we attach the sidewalls with confirmations to the base, we need to make cuts:
apply the sides to each other; we check the edges for evenness - both workpieces must match in all sizes; We clamp the sidewalls with a vice or clamps; we measure exactly the middle - from it we will measure all angles; measure angles of 45 and 90 degrees on both sides of the middle; We make diagonal cuts: we use a hacksaw for metal and when the cut is made to the desired depth, we take the usual hacksaw for wood and widen the cuts. It’s faster to do it right away using a circular saw
Pay attention to the photo: the image shows the marking principle; cuts are made to the very base of the miter box - it is impossible to go deeper; we cut a perpendicular slot, which is needed for sawing workpieces at right angles; Using a very thin file, we clean all the cuts from the inside.
Assembling the miter box
The cuts are completed - we assemble the miter box:
- Attach the side parts to the base to secure the ends of the base with the guide sides;
- We drill holes according to the marks made; if there is no special drill for confirmations, then we drill to a shallow depth, first with a wide drill, then with a thin drill, which in diameter corresponds to the thread of the connection. Use a thin drill to drill holes of the required depth in the base. If you look at the photo, the confirmations do not protrude from the wood in any way;
- We fasten the side walls to the base with confirmations. The miter box can also be attached to a table for permanent cutting on a solid base. The miter box is ready.
The video below shows the entire assembly step step by step.
Video:
The good thing about a finished miter box is that it is collapsible - if the slots become too wide and you can’t cut smoothly, then the sides can be removed and new ones can be made in just one hour using a circular saw, a pencil and a ruler.
Aluminum is suitable only as a base, but for the sides it is better to use steel. If so, then you can cut it either with a circular saw with a thin disk, or in a metalwork shop on a machine.
But such a miter box will last for years.
We cut the corner of the ceiling plinth using a miter box
Joining ceiling plinths in the corners
As written above, trimming a corner can be done either with the help of a special tool - a miter box, or without it. The set of other items that you will need is the same in both cases: a hacksaw, a cardboard cutter, a protractor and a pencil, a stepladder.
Which miter box is better to buy for pruning?
This article will describe how to work with the simplest miter box, such as the one on the left side of the photo. It is possible to cut the plinth at an angle of 45 and 90 degrees - this is the required minimum. And on the right side of the photo is a rotating miter box. Its device is more complex, includes a built-in hacksaw and allows you to cut material at different angles. Of course, this option is easier to use and provides more cutting options.
However, if you are not the owner of a private house where you periodically have to do carpentry, then it would be better to get by with the simplest option. For comparison, a regular miter box for a ceiling plinth costs 100-350 rubles, and after the renovation is complete, you can throw it on the balcony or throw it out completely. A rotary one can cost from one and a half thousand, plus it then needs to be stored somewhere in proper conditions.
How and with what to cut a plastic plinth: an ordinary and rotary miter box
There is another way to cut down a ceiling plinth. Video on how to cut a baguette with a miter saw. In addition, you will find some useful tips for cutting with an ordinary miter box.
Please note: before making the first cuts, you need to carefully measure the baseboards. This way you will avoid unnecessary expenses.
Starting trimming: inner corner
We take the ceiling molding, which will be located on the left, and place it in the corner so that its end is pressed tightly against the opposite wall and, if necessary, adjust the length of the segment. We mark in any way the side that looks down.
Now let's go to the miter box: the ceiling molding is placed in the device on the right, with the bottom side closer to you. We place the hacksaw from right to left. Now you can cut the corner. In the diagram this is the left side of the figure. We also trim the right molding.
How to cut a corner of a ceiling plinth: positioning the baguette in a miter box
Trimming the outer corner of the ceiling molding
Here we proceed according to the same plan as when trimming the internal corner: apply it to the wall - check the length matches - mark the apex point of the wall corner on the lower edge of the baguette - go to the miter box.
To trim the outer corner, the ceiling moldings are placed in the device in the same way as for the inner corner. We only make corrections to the point of the apex of the corner, which we set on the baguette. It should coincide: with the leftmost slot for the left ceiling plinth, and for the right, respectively, with the rightmost one.
How to cut the corner of a ceiling plinth: the correct position of the baguette
Please note: in the article we describe each stage starting from the left side of the wall. However, it doesn't really matter that much.
You can start work from any side.
Trimming the corner of a ceiling molding that has a large pattern
Sometimes the pattern on the surface of the border is very large, and it falls right on the joints in the corners. In this case, we have to puzzle over how to cut out the corner of the ceiling plinth and combine the sides without disturbing its overall composition. In fact, there is nothing complicated here:
- We cut out an area with a pattern + 5 cm on each side from the ceiling molding.
- Divide the resulting segment in half.
- Now we do the marking and trimming as described above.
If there are minor flaws in the connection, we mask them by sealing them with putty, after installing the baguette on the wall and the glue has dried.
How to join the corners of a ceiling plinth if it is wide and has a large pattern
Methods for cutting corners on ceiling plinths
There are three main methods for cutting corners on baseboards:
- using a carpenter's miter box;
- using a drawing on the table and
- using markings on the ceiling.
We do not consider the “by eye” method, although it is used quite often, but, nevertheless, such actions almost never give accurate results even with experienced craftsmen (see How to attach a ceiling plinth - step-by-step instructions).
Using a miter box
Carpenter's miter box
- A carpenter's miter box is a device in the form of a tray with grooves for a hacksaw and is designed for precise cutting of corners on slats and beams. A standard miter box has a stencil of angles of 45⁰, 60⁰, 67.5⁰ and 90⁰.
Sawing the outer corner of the left plinth
- In order to make a cut for the outer corner of the ceiling plinth, you need to insert the profile into the miter box on the side on which the plinth will be fixed to the ceiling. We apply the cornice to the wall of the miter box closest to us, because we are doing this not for the floor, but for the ceiling . Find an angle of 45⁰ in the gutter and cut off the extra piece.
- The ceiling plinth is applied with the bottom up, and when we look at it from top to bottom, we will see the profile in exactly the angle in which it will be on the ceiling (see The junction of the wall and the ceiling: how to choose the right ceiling plinth). Take into account that the lower point of the cut (in the miter box it is the upper one) will border on the corner of the wall, therefore, it will be the closest extreme point from the beginning of the profile . To saw off the left plinth at the outer corner, we position the hacksaw from left to right, and for the right plinth, vice versa.
Sawing the inner corner of the left plinth
- Now let's figure out how to saw off the plinth for the inner corner. The lower extreme point of the profile (the upper one in the miter box) will protrude, therefore, the left plinth needs to be sawed off from right to left, and the right one - from left to right. This way we get an internal angle.
Using a drawing on the table
Imitating a miter box using a drawing on the table
- How to cut down a ceiling plinth if you don’t have a miter box? You can get by with a drawing on the table that will imitate this carpentry device (see How to properly cut a ceiling plinth: step-by-step instructions from real masters of their craft). We make two parallel lines on the table at a distance the same as the inside of the groove in a standard miter box - 85mm .
- Now among these lines we find a square and draw two diagonals in it, as shown in the figure. Thus, we get an imitation of a miter box, with angles of 45⁰.
Sawing the inner corner of the left plinth on the table
- All further operations are carried out in exactly the same way as in a miter box, only instead of pressing the plinth against the side, we align it along the line. Please note that the plinth cannot lie directly on the line, so you need to navigate visually or place some square object (box) against the line to form a side .
- Do not forget that when cutting to the ceiling, the bottom of the plinth will be at the top and vice versa. For an internal corner, the lower corner of the profile will protrude, and for an external corner, the upper part of the plinth will protrude.
Using markings on the ceiling
Marking the ceiling for installing skirting boards
- But how to cut a baseboard if the corners in the room are not 90⁰? This happens quite often, especially in the private sector. For this you will also need to make a small drawing.
- The plinth is placed at the desired angle between the ceiling and the wall, and a line is drawn along the ceiling. We perform the same operation on the other side of the corner. Now, when we apply the baseboard, one of the lines crosses it (see photo) .
- The intersection point and the bottom corner of the baseboard will serve as the cutting line. The cutting angle from the outer to the inner should be approximately 45⁰.
- In order to cut off the outer corner, you need to make the same drawing . Only this time the upper part of the plinth will be protruding.
Recommendations. Use a hacksaw to cut solid ceiling moldings made of plaster, wood or polyurethane. The fine teeth of its blade make the cut smooth, while a hacksaw for wood (even with fine teeth) will leave a ragged mark.
To cut foam ceiling plinths, use a utility knife with a replaceable blade. To ensure an even cut, replace the blade with a new one. It is not recommended to cut polystyrene foam with a hacksaw!
Skirting on the floor
Everything that we discussed regarding the ceiling plinth can be used to install the plinth on the floor. You only have to change the side where the profile is pressed against the side of the miter box. That is, if to cut the corners for the ceiling we press against the near edge, then for the floor we need to focus on the far side or line - everything else remains unchanged .
If we draw the corners directly on the floor, then everything remains the same, only we will no longer look at our work from bottom to top, but from top to bottom. Wooden plinths for floors, of course, are not used very often now, but a profile made of good wood will never lose its relevance . Therefore, the ability to make a clear cut for joining will always be necessary.
Important points
Let's look at how to correctly cut the corners of ceiling plinths and get an excellent result the first time. Follow some useful tips:
- Before fastening, both parts must be adjusted to each other. Attach both halves to each other. The wall surface must be dry. If you find any defects, you can easily smooth them out with a knife.
- Several trims may be required. Don't be discouraged if it takes a long time and you have to make several trims, especially if this is your first time doing the job.
- Correctly determine the length of the planks in the corners. For an internal corner, the length of the strip should be adjusted exactly from corner to corner; for an external corner, the measurement is taken from the internal point in the direction of the room.
- If the corners generally match perfectly, but there are small gaps in the middle, they can be sealed with putty.
How to cut ceiling plinth correctly. Important little things
The measurements required to cut the plinth for the ceiling should be done in a special way . To determine and mark an internal corner, the length must be measured from the corner itself. To mark the outer corner, it is necessary to take into account that the plinth will protrude into the interior of the room at a distance equal to its width.
It is not advisable to fasten the skirting boards until their exact location has been measured and the counter plinth has been cut. Only after the perfect convergence of both strikers in the corner can you begin their installation and fastening. If you work with polyurethane or wooden skirting boards, defects and flaws can be corrected with a nail file or file. To fit a foam product, you should arm yourself with a sharp knife.
If even after finishing the baseboards there remains even a small gap, do not rush to get upset - it is easy to repair it with ordinary putty. Cutting ceiling plinth accurately and accurately is not that difficult. But in order to acquire at least a small skill, first try to practice on small workpieces.
Installation material
Of course, correctly cutting and filing the plinths at the joints is the most important stage in the work, but it is also important to glue them correctly, otherwise, even with even corners, the ceiling plinth will look sloppy and ruin the entire repair. They always start gluing from the corners - it’s easier to track how smoothly the material lies, plus it’s just more convenient, because
It will be easier to cut the size of a straight piece of plinth than to adjust the fittings not only to the size of the corner, but also to the already glued ceiling plinth
They always start gluing from the corners - it’s easier to track how smoothly the material lies, plus it’s just more convenient, because It will be easier to cut the size of a straight piece of plinth than to adjust the fittings not only to the size of the corner, but also to the already glued ceiling plinth.
If you glue the material into the joints correctly, then there will be no problems with the rest of the baseboard either.
Video:
Before gluing ceiling plinths, you need to prepare the surface. This is done using a primer; for a simpler repair option, you can simply moisten the surface with a sponge and water.
The treatment provides better adhesion of the material, which greatly facilitates the work, because The fittings will immediately adhere tightly to the surface and will not move or fall off.
The first step is to apply glue or putty to the baseboard, depending on what material you have chosen for the work.
If this is putty, then not only the back, but also the front part of the fittings is treated with it, but the strip should be narrow enough so that there is not too much glue.
Before applying the glue, perform another preliminary joint and make sure that the material is joined smoothly, without cracks or gaps.
After this, treat the first part of the part with glue and press it to the ceiling. Then you need to join the second part of the corner.
If you need to trim rounded corners with plinth, the material is first cut into several parts and then glued to the desired surface one by one.
The situation is a little different with wooden skirting boards - they are usually screwed on with screws rather than glued on.
This means that you need to be even more careful about the correctness of their joining, because it will no longer be possible to redo the work after installing them and connecting the baseboards differently.
If, despite all your measurements and connections, you notice that after gluing the ceiling plinth, cracks or irregularities still appear in the corners, use sealant to eliminate them.
The white sealant will be almost invisible on the baseboard, especially if the work is done carefully.
After you have glued the fittings, wipe the area with a sponge or just your hand to smooth the seams and remove any remaining product.
Video:
Once the corners are ready, you can begin finishing the rest of the surface. This is the instruction on how to properly install ceiling skirting boards in the corners.
This work will require some care on your part, but overall it is not difficult.
Use the video with instructions - they will help you not only cut the skirting boards correctly, but also install them so that there are no unevenness or gaps and you don’t have to redo the work in the future.
Post navigation
No comments yet!
How to properly brew anti-parasitic monastery tea
How to properly brew anti-parasitic monastery tea High quality How to properly brew anti-parasitic monastery tea At a good price Eco-friendly how to properly brew anti-parasitic monastery tea
How to brew white tea correctly
How to brew white tea correctly Let's assume you managed to buy high-quality white tea. Let's assume - because buy it in ours,
How to properly brew ground coffee in a cup
How to brew coffee in a cup correctly A cup of well-brewed coffee for breakfast increases energy throughout the day. Of course, everyone knows that coffee
Features and methods of forming the corners of ceiling plinths
You need to understand that corners in rooms are not only internal, but also external, which, in fact, is the main difficulty of our task.
However, the problem is completely solvable and can be solved in several ways:
Firstly, it is possible to avoid cutting the material altogether by purchasing special fittings. Corner elements for ceiling plinths are both internal and external corners attached to the corners of the room. The ends of the outermost plinth strips are inserted into this corner for the plinth. This option is the simplest and does not require any special skills.
A special element for arranging corner joints of ceiling plinths
Well, the second option is to trim the edges of the baseboards at a certain angle, which will ensure a tight and even fit of the baseboard strips to each other. Cutting, in turn, can be carried out in two ways:
- using a special template tool called a miter box;
- manually according to markings made using a certain method.
Types of ceiling plinths
Classification of baguettes is carried out according to the material of manufacture:
- Plaster
. The most ancient representatives of ceiling plinths. Special dies were used for their casting. Various solutions were used as adhesive installation composition. The name “fillets” is also applied to gypsum moldings. In modern construction they are used very rarely due to the high cost and inconvenience of installation. In addition, more reliable and inexpensive imitations of gypsum fillets have appeared. - Polystyrene (polyurethane)
. The most common type of ceiling plinth. Products of this type are characterized by low cost, excellent aesthetic characteristics, ease of installation and a rich assortment in terms of external design. The width of polystyrene baguettes varies between 5-250 mm. They can be used in any type of room, complementing various interior styles.
- Wooden
. Expensive and rather bulky baguettes, which are mainly used to decorate wooden houses with the corresponding interior. To install wooden planks, in addition to glue, screws and nails are often used. - Plastic
. An excellent option for bathrooms and other rooms with high humidity. Installation is carried out using special moisture-resistant glue or hidden screws.
When installing the above products, you need to know how to cut the ceiling plinth. This does not apply to plastic products, which are equipped with special corner adapters.
Choosing a cutting tool
Before making corners on the ceiling plinths, you need to find out what building material the fillets are made of:
- Expanded polystyrene. This material is extremely fragile and crumbles easily. Its advantage lies in its affordable price for many consumers. When working with polystyrene foam, due to its fragility, you should use a knife or hacksaw. In this case, you cannot apply strong pressure; you need to do the work as carefully and leisurely as possible, otherwise the plinth will break.
- Polyvinyl chloride. Products made from it are inexpensive, but they also need to be handled with care. PVC skirting boards are highly electrostatic and therefore strongly attract dust. To cut such products, use a hacksaw or knife.
- Extruded polystyrene foam. Fillets made of this material are durable and reliable, but their cost is higher than previous samples. They are not easy to break, and when cutting they do not crumble. When choosing which tool and how to cut corners from this material on ceiling plinths, it is best to use a construction knife or hacksaw, which are designed for working with metal products.
- Tree. The most durable type of these products is made from wood. These reliable products are the most difficult to work with due to the high resistance of the material to physical impact. Wooden plinths are cut with a hacksaw, and with small teeth.
- Polyurethane. It is used to produce durable skirting boards for ceiling surfaces. They have a big drawback - polyurethane products react poorly to temperature changes and are sensitive to heat or cold. These nuances must be taken into account before cutting the ceiling plinth in the corners.
How to Cut an Internal Corner Using a Miter Box
Content
How to cut ceiling plinth
in corners with and without a miter box
When someone first takes on the task of preparing the corners of a ceiling plinth for installation, in most cases he has to ruin not a meter of material. As annoying as it may sound, even the newly acquired miter box
It rarely helps in this matter when the walls in the room are connected at an arbitrary, and not at a right angle.
Then you have to rely on your eye weight or make a special template. Now you can learn how to make the corners of a ceiling molding with or without a tool.
to cut correctly
corners on ceiling plinths of various shapes
Advice: instead of the saw that comes with the miter box, it is better to use an ordinary hacksaw for metal. Its cut is more precise and smooth, which is important in this process.
Before work
Choosing the correct width of the baguette is the key to a beautiful interior. The way you do it also plays an important role in the process of sawing. We would like to give you a couple of tips to help you achieve your goal.
What you need, how to choose the width of the material and how to cut the ceiling plinth in the corners:
- the prepared surface of the walls is not a model of evenness; use strips of the smallest width, because they are more flexible and will be able to cover the largest number of flaws. Accordingly, on the contrary, the more ideal the surface, the width of the molding, and perhaps more simply, but keep in mind - in rooms with low ceilings, install a narrow molding so as not to further reduce them visually;
- Always apply the left side of the corner to the miter box when sawing from the left, and the right side to the right. Already today, this is suitable for the side of the instrument closest to your hands, the far side for floor moldings. Please don't be confused.
How to cut corners on a skirting board ceiling at 45 degrees
Below you will find a more detailed understanding of the task at hand, where you can find out how to cut the corners of the ceiling plinth correctly and with great quality.
Outer
There is one aspect of this process that you should never forget. We always look at the ceiling fillet from below, so when the plank is placed in the miter box (to the wall closest to your apartment), it must be turned over.
READ Set Ax Knife Knife Saw Case
The highest part of the molding will then be at the bottom, and the bottom, accordingly, at the top. However, there will be no gaps between the planes of the corner parts when they are connected.
In the photo - a miter box, a carpenter's tool used to cut the corners of the ceiling plinth
The process summary will be as follows:
- Take measuring tools, such as a tape measure, and a pencil. Start marking from the inner corner , so you won’t miss the outer one. What happens is that the length of the baguette is not enough and you will have to make a lot of connections;
- Place the molding on the ceiling surface and mark the dimensions;
- Prepare a miter box and a hacksaw. Press the baguette to the side of the tool closest to you;
- Hold the fillet with your hand and adjust the position of the hacksaw when the appropriate angle
. These will be standard characteristics - 45, 90, as it is also called 135˚, or arbitrary, for which purpose you need to move the miter box to a selected degree; - Cut the workpiece with a hacksaw;
- Place the back bar against the near wall of the instrument and secure it with your hand;
- Set the selected degree on the miter box and cut the workpiece with a hacksaw;
- Join the purchased baseboard strips.
How to join skirting boards
. a blog about products that bring benefits. In this question, the video carefully explains what and how to connect.
Correctly joining the corners of the ceiling plinth
In this video I tried to convey in an accessible and clear way what, how to join floor or ceiling plinths in exterior or interior.
Advice: if the walls are connected to each other at right angles, only in this case a miter box will help you when working; otherwise, you will have to create the fit yourself.
Interior
There is a professional miter box, which has a rotating platform and can be moved apart to obtain random angles, also for use at home, where special abilities are limited. Usually in repairs it is enough to use the 2nd option.
How to cut ceiling plinths in corners without gaps
READ Saw Calm Not Gaining Speed
What is needed, the basic principle is that the ceiling strips are cut off from the wall of the instrument closest to your hands, we have our hopes up, you remember.
The process in this case looks like this:
- Measure the desired length of the baguette by placing it on the ceiling surface;
- Place the molding strip in the miter box, and its position must completely correspond to the location of the baguette on the ceiling;
- Press the bar against the near wall of the instrument;
- Choose the appropriate cutting degree, in most cases it is 45. Make sure that the handle of the hacksaw is closest to the hand holding the bar in order to make a very accurate cut;
- Cut the workpiece, but do not put unnecessary force on the hacksaw;
- Prepare and cut the back baguette strip, remembering that it must be pressed against the nearest wall of the miter box;
- Select the appropriate cutting angle for it as well, leaving a small distance between the handle of the hacksaw and the hand holding the molding;
- Cut off the edge of the plank.
Proper cutting of ceiling plinths
in the corners improves the appearance of the room
All that remains is to check the correctness of the joining of the segments, provided that our client meets the expectations, install them in place.
Advice: start cutting from the front part of the molding, then you can very accurately orient it in your apartment. After cutting, process the corners of the wooden baguette and adjust them with ratfil.
How to cut the corners of ceiling plinths using a hacksaw and miter box
How to make the corners of a ceiling molding without a miter box
For the first time, having decided to make a frame on the ceiling, a beginner does not see any difficulty in solving this issue, but in vain. We recommend that you immediately take into account the costs of a certain amount of material that will simply have to be thrown away.
As annoying as it may sound, unfortunately, at what angle to cut the ceiling plinth depends only on the connection of the walls to each other. Not everyone fits the straight line, which is quite easy to cut the planks at 45˚. Often there are characteristics corresponding to 85 or, in other words, 95 degrees, but this is already a problem for beginning finishers.
How to cut a plinth in the corners of a ceiling plinth without using a miter box
If you are the owner of an apartment built in the last century, this was generally considered the norm. There is a fact that when you simply cut the planks at 45˚ and install them on the ceiling, they will have gaps that will later have to be sealed with sealant or putty. We will try to help you solve this problem at the lowest possible cost, because not every molding costs a penny.
READ How to cut porcelain tiles with a grinder without chipping
What you need, how to correctly cut the corners of the ceiling plinth for the internal corner:
If the plinth is made of:
- foam or polyurethane, then it is enough to have a sharp knife or a hacksaw;
- wood - just a hacksaw.
- Take the molding and place it at your chosen corner. Orient it the same way it will eventually be installed. Using a pencil, draw a line along the bar and remove it;
- Do the same function with the 2nd fillet as with the previous one. With all this, it must be adjacent to the junction;
- Ultimately, you will have a marked area;
- Take a baguette and lean it against the markings. Transfer to him the point of intersection of the two straight lines you drew earlier;
- Draw a line from it to the back edge of the fillet, which will be the cut line. Do the same with the second baguette.
Final trimming of the corners of the ceiling plinth without using a special tool
Remember for:
- internal corner
- the lower part protrudes above the upper; - external - the top one above one of them.
Conclusion
If it seemed to you that the work of creating a beautiful interior with the help of a ceiling molding is quite complicated, it’s only right away. Do what remains for our client to do, according to our instructions, and you will quickly understand the essence of the process. The main thing is to be careful and correctly calculate the amount of material needed to complete the work.
The video further allows you to expand your knowledge on this topic. If you have any questions while reading the publication and after finishing it, please ask them in the comments, our task will be to answer them.
Source
How to use a miter box correctly
Thanks to the miter box, everyone will be able to saw various materials. But before starting work, be sure to read the rules for its use. In addition, prepare additional materials:
- hacksaw (the pitch of the teeth must correspond to one or another type of material that is being processed);
- assembly knife - needed for cutting foam baseboards;
- ruler and pencil - for markings on materials;
- sandpaper - for cleaning irregularities and burrs.
The operating rules are as follows:
- It is better to secure the plinth in a miter box on the right side, and cut the corner on the left side of the product;
- the left product is attached to the left, and the corner is cut off to the right.
How to cut material
When cutting, it is extremely important not to mix up the sides. In order to correctly cut the material using a miter box at an angle of 90 or 45 degrees, it is secured in the body and then rested against the end wall
And only then the material is sawed. If the tool is professional, then you can adjust the size down to the millimeter.
A template should be made for each section, taking into account a margin of 50 mm. Since the walls in rooms are not always smooth, before cutting the material you should check how they fit together.
The cut should be carried out as follows:
- mark the cut line with a pencil;
- place your product in the miter box body with the front side so that the cutting line mark looks like a continuation of the slot in the tool;
- Press the workpiece from the end of the body wall, insert a hacksaw into the slot, then cut the material according to the mark;
- insert the second blank with the other side into the slot;
- We clean out any unevenness using fine sandpaper.
How to cut an arbitrary angle
Sometimes the walls are not connected to each other at right angles, then the sawing will need to be adjusted. This is done in two ways:
- Using thick paper or a homemade cardboard template. If the plinth is hollow from the inside, it is unlikely to stay vertical. In this case, you will need a homemade corner in which the product is placed, just like in a miter box. The corner is placed on a pre-prepared stencil so that it matches the template, then the product is cut according to the marks.
- Make marks on the material using a pencil. Cut two products at an angle of 90 degrees, then attach them to the wall and mark the junction line. Find the point of contact between the skirting boards, then transfer the markings to the material and make a cut.
Sawing off corners of floor plinths (internal and external)
The rules for sawing off the inner corner of a floor plinth are as follows:
- the miter box must be placed on the table parallel to itself;
- press the product to the side opposite to you;
- place the right plinth on the right, and the left one on the left, respectively, cut from the opposite side;
- align both parts of the plinth, you will end up with an internal corner, the top of which is located away from you.
As for sawing off the outer corner, you must adhere to the following rules:
- We place the miter box on the table parallel to ourselves, as in the previous case;
- press the baseboard on your side;
- we install the right product on the right, the left one - on the contrary, we bring it to a diagonally located line, sawing is carried out from the bottom up;
- Connect the parts, we get an outer corner with the vertex towards you.
How to correctly cut a corner on a ceiling plinth
Most often in homes we have to deal with cutting at 45 degrees. You can cut corners on ceiling plinths using several different methods.
How to make corners on a ceiling plinth using a miter box
This method is the simplest and most reliable. The miter box allows you to cut as accurately as possible.
Before performing work, you should correctly mark the element. They do this in two ways.
- On the plinth, mark an angle of 90 or 45 degrees with a pencil. Then the product is placed in a miter box and cut along the marked line.
- Place the element in place and mark the outer edge. A fillet is also installed on the opposite side and the edge is also marked. The place where the marks intersect is the outer edge, and the end of the wall is the inner edge. The outer and inner edges of the product are marked, and then the baguette is cut.
Important! The harder the material, the sharper and more reliable the cutting tool you should use. An ordinary knife is also suitable for foam products. To cut ceiling plinths in wooden corners, you need a power saw or jigsaw.
How to make an internal corner of a ceiling plinth
Most often in a home they deal with internal corners. The cutting is quite easy.
- To begin with, the material is placed at the junction of the wall and ceiling in the position in which they are going to attach it later. Mark the desired length on the product.
- The ceiling plinth is placed in the miter box in the same position, that is, the part of the fillet that is mounted on the ceiling should face up, and the part facing the wall should be adjacent to the wall of the device. The edges of the products are aligned with the extreme angle mark of 45 degrees.
- The blade is turned at an angle of 45 degrees and the excess fragment is removed. The knife should be sharp, and ideally it should cut in one motion. The second part is prepared in the same way, but on the other side.
Important! The plastic should be cut from the front side to get an even, beautiful cut.
How to make an outer corner on a ceiling plinth
You have to deal with external corners if the room has niches, bay windows, protruding boxes or columns. Here you also need to cut the ceiling plinth at 45 degrees.
- In fact, the difference between these two cases is only in the correct measurement. The plank is placed along the joint and a mark is made on the inside.
- The product is placed in the miter box in the same way as it was tried on, that is, with the ceiling part up. The edge of the fillet is placed so that the mark on the inside coincides with the slot, but at the same time the outer part of the plinth protrudes somewhat beyond the edge.
- A hacksaw is inserted into the slot and cut off. The second fragment is prepared in the same way, but in a mirror image.
For cutting hard baguettes, such as wooden ones, it is better to use a jigsaw.
How to make a corner of a ceiling plinth without a miter box
When pruning, sometimes you can do without a miter box. In some cases, this method is even more effective, since the miter box is designed for high evenness of the walls and ceiling. In reality, this is not always true.
- The element is placed so that its edge rests against the junction of two walls. Mark the position with a pencil. The same is done with the baseboard on the opposite side.
- At the junction of the wall and ceiling, the intersection points are connected and a diagonal is laid. It is then marked on the product itself. This is the mark for the cut.
- Use a blade to cut along the marked line. When docked, they line up perfectly. Using the same technology, you can cut the material for external corners.
Decorative corners for ceiling plinths
Trimming wide options is much more inconvenient. It is difficult to fit the product into such a compact tool as a miter box, and complex terrain can be ruined.
For such models, special corners are produced. This option can only be found for products made of PVC, polystyrene foam or polyurethane. The elements have the same design, their sizes are easily adjusted, since such a lightweight material as foam is easy to cut.
The technology is very simple: the corner is fixed into the joint, and fragments of the ceiling plinth are attached to it.
Gluing process
Gluing the cornice There are two methods of gluing the baseboard to the ceiling.
- A faster option: the cornice is glued after finishing the walls and ceiling with glue.
- Before finishing the walls: the stucco molding is attached to putty or acrylic sealant after leveling and priming the walls. This option is better because the cornice will fit most tightly to the wall, and during the next repair there will be no need to tear it off.
Glue mounting
- We begin the installation with measurements. Usually, gluing fillets (as professional builders call plinths) starts from the corner of the room.
- The first part needs to be cut from the corner of the room using a miter box and a hacksaw.
The angle of the cut should be exactly 45° and have a slight slope towards the front or back side (read more about how to cut an even angle). To create an outer corner, the top edge should protrude above the bottom, and vice versa for the inside. The joining of two cornices along the length occurs at right angles without additional trimming. For more information on joining the corners of the plinth using a miter box, watch the video. - Apply glue evenly to all adjacent surfaces of the baseboard, except the joints. Press the baseboard into the corner and hold it for a minute, but do not press too hard.
- Glue the next corner piece and move further in a straight line. Remove any glue stains with a soft cloth.
- Seal the cracks with sealant.
Pasting on putty or sealant
The process is almost the same, but you additionally need to prime and level the surface.
- Treat the gluing area with a primer.
- Dilute the putty and use a small spatula to apply a thin layer of it to the back side of the cornice.
- Remove excess putty and seal the cracks. Also caulk all joints.
- After the putty has dried, seal the cracks again.
After gluing is completed, the stucco molding can be painted with water-based paint with the addition of a color to match the color of your interior. Take the time to protect adjacent surfaces with masking tape when painting. To highlight the relief, paint the protruding parts in a contrasting color.
Docking on straight sections
The most difficult areas when decorating the ceiling perimeter with a frieze are the corner areas. Having passed the first corner, they usually begin to move in both directions at once, gluing plank after plank one by one. If the entire frieze fits when joined directly, no problems arise: using a miter box, cutting both edges at an angle of 90 degrees, they are connected with assembly glue. The main thing is to achieve maximum invisibility of the joint.
A slight difficulty arises when the installation work approaches the next corner and the frieze needs to be cut to length. This must be done with a certain margin for cutting the corner. Experienced craftsmen recommend leaving a margin of at least 10-15 cm, taking into account possible errors during design (sometimes it doesn’t work out the first time). After the corner of the frieze is trimmed and checked, the plank is applied dry to the area remaining from the corner with a straight cut towards the nearest baguette. Having marked the required length with a simple pencil, cut off the excess at an angle of 90 degrees, and glue the manufactured and adjusted section.
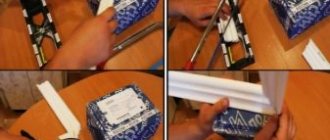
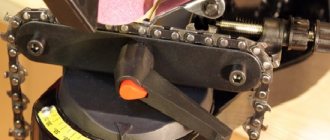
Making a miter box with your own hands
The plastic miter box has a number of disadvantages. One of them is that over time, the guide slots become wider, the gap between their walls and the hacksaw blade changes, and it is very difficult to achieve the same quality of cut. As the guides wear, the accuracy of the 45 degree angle becomes increasingly questionable. Making a more reliable, accurate and durable miter box with your own hands is much easier than it seems at first glance
You yourself can choose the optimal length and width of the miter box bed, which is especially important for working with long parts such as baseboards
To make a miter box with your own hands, you need a well-processed board, preferably made of hard wood. However, coniferous is also suitable, only its thickness should be close to 20 mm. Boards made of oak or ash can be thinner, 10-15 mm is quite enough. The ends of the workpieces must be perfectly smooth, and the corners must be exactly 90º. The width of the miter box bed is selected taking into account the dimensions of the parts that will have to be processed. Actually, it is not advisable to make a base wider than 150 mm. The sides of a homemade miter box are made about 150 mm high. The parts of the miter box are connected with self-tapping screws, and for greater reliability, dowels are additionally installed with glue. After tightening the screws, the glued parts must be clamped with a clamp to secure them more securely and remove excess glue. The glued box must be kept until the glue has completely dried, and then markings must be made.
A perpendicular line is drawn at the end of the side and exactly opposite the first line, the same mark is applied to the opposite side. Then you need to measure the width of the miter box taking into account the thickness of the sides and apply the next two marks, retreating from the drawn lines by the width of the box. When projecting the marks onto a plane, the result should be a square.
When making a miter box with your own hands, the instruction of the ancestors is very useful: “Measure seven times...” After the initial marking, double-check the parallelism of the marks and the distances between them. Then it’s a small matter: using a sharp hacksaw, carefully make diagonal slits, checking the marks. The finished cuts should be slightly widened. To do this, the slots should be sanded with coarse sandpaper folded in half. You can make another perpendicular cut on the sides and process it in the same way. Agree, trimming a part is a more common operation than burring, and its accuracy is no less important.
| Design solutions for the bedroom From classic to modern, from pompous style and high-tech to minimalism. Today, giving the bedroom interior an original look is not particularly difficult: the choice of materials is limitless, the technologies are simple and can easily be mastered independently. We invite you to get fresh design ideas from our short review. |
| Choosing the optimal foundation for a bathhouse Any construction begins with a foundation, and a bathhouse is no exception to the rule. Tape, slab, columnar – there are many types of bases. But how to choose the option that is optimal? The very solution that allows you to save on foundation construction without compromising its quality? Find answers to these questions in our review. |
| Technology of building a house from timber Where to start building a house from timber? What needs to be taken into account so as not to later regret the choice of building material? In one article, we sequentially examined the stages of erecting a cobblestone structure, taking into account the requirements of technology. Having such a short guide before your eyes, you will be confident in the correctness of your actions. |
Making a wooden miter box
There are two ways to make a wooden instrument:
- First option. Prepare three wooden boards. If you don’t have them at hand, you can use planks made of wood or plywood. Using a hammer and nails, a figure shaped like the letter P is knocked out of the boards. The angles necessary to complete the work are marked on the sides of the resulting product and cuts are made along them. The result is something like a miter box, in which holes are made with a hacksaw. Skirting boards are inserted into them and trimming is performed.
- Second option. It is a combination of a miter box made from a paper template and wood. You will need 2 boards or planks. They are used to assemble a figure in the shape of a corner. Lines are drawn on whatman paper equal to the cutting angle of 45 or 90 degrees. Before making a corner from the ceiling plinth, you can draw any corner - this feature is the advantage of a homemade tool over a purchased ready-made device. The fillet is applied to the miter box and pressed with the left hand. The template is placed in the place where the cut will be, and the plinth is cut off in accordance with the line drawn on the paper.
There is another way to replace a miter box from the store. It does not involve making an instrument out of either wood or paper. To do this, you only need to take any objects that form an angle. For example, it could be a wooden tabletop. Before cutting the baseboard, you should take careful measurements. To mark the angle of the fillet located inside, the length should be measured from it.
There are nuances in how to make an outer corner of a ceiling plinth - in this case, to mark it, you should be guided by the fact that the fillet will protrude into the room at a distance equal to the width of the product. In accordance with all the described calculations, the lines of the plinths are marked.
If you fail, you should not despair, since you can always redo the work with errors by filling the empty space with putty. When the ceiling plinths with corners are installed in place, the ceiling will take on a neat and finished look.