Description of the tool
Knowledge of the structure and operating principle of an electric planer is necessary for everyone who wants to use this tool. It will help not only to use the device correctly, but also to repair it yourself if necessary.
Device
The design of the tool has remained virtually unchanged since the release of the first model.
Only some additional functions and electrical control have appeared.
The engines also became more advanced: they reduced weight and gained more power.
The design of an electric planer includes the following parts:
- Frame;
- Electric motor block;
- Handle for support;
- Chip collection bag;
- Rubber pad;
- The sole, which acts as a support, consists of an adjustable and fixed part;
- A pipe for removing generated debris;
- Button to turn on;
- Lock button;
- Regulator for setting planing depth;
- Drum with cutting knives (from 1 to 3 pieces);
- Side limiter;
- Transmission mechanism.
For home use, it is enough to buy a model that will contain only one knife. On more expensive planes, an electronic unit is also installed to control the number of working revolutions. With its help, the speed of shaft torsion is controlled, depending on the volume of the load. But the size of the sole is very important. It controls the stability of the plane while performing work. The length can vary from 30 to 40 cm.
Principle of operation
Various models of electric planes operate according to the same principle:
- When power is supplied to the starter windings, the electric motor rotor begins to rotate.
- Then, using a transmission mechanism, the torque is transmitted into the drum to the blades.
- They, in turn, rotate in a circle. When the blades come into contact with wood, part of the surface of the material is removed. The amount of wood cut is adjusted manually. Using the pipe, excess chips are ejected.
- When the power is turned on or off, the electric motor starts and stops not instantly, but gradually. This helps to avoid overload during work.
How to plan a board with an electric planer
An electric planer is a tool that greatly simplifies the sharpening process.
Let's move on to how to plan a wide board with an electric planer. This task is not an easy one, although of course it is easier than working with an ordinary hand plane. The fact is that the uniformity of the edge depends on you, which is regulated by the force of pressure on the device. In this case, the force must be exerted with a constant, identical force. Otherwise, the surface you are planing will turn out to be non-uniform. This is especially true for wide boards, where you need to go through several lines with a plane. The first run is an adjustment run; it will set the surface removal depth for all other runs. Now let’s talk about how to plan boards correctly with an electric planer. As we have already said, uniform pressure on the surface and consistency of the applied effort are very important. In addition, it is important to guide the plane along a straight path, without moving to the side. Preliminary markings or a laser level can help with this. Well, it is also very important to position the board correctly. It should lie on a perfectly flat surface, then the result will be maximum. By the way, there is a more advanced version of the electric planer - a surface planer, with its help the process of controlling the evenness of the edge becomes simpler.
Read also: Weight of tubular inventory scaffolding
An electric plane is an essential tool for anyone who deals with wood processing, and during construction or renovation it can become an indispensable assistant. In everyday life, a traditional hand plane is usually enough for a home craftsman, but in a private farmstead or summer cottage there is plenty of woodworking. Baths, outbuildings, fences, benches and other furniture - the list goes on and on.
An electric planer will save the craftsman a lot of time and effort and allow him to achieve good results. Using an electric planer, workpieces are brought to the required dimensions, surfaces are leveled, nicks, burrs and knots are removed, edges are cut, and grooves are selected. A plane, of course, is not capable of “fine” processing of surfaces to perfect smoothness; this will require additional tools. But with its main task - rough processing of wood in large volumes - the electric planer, if the operating rules are followed, copes “excellently”.
As when choosing any power tool, when choosing an electric planer, a master should start from the main tasks in which the tool will be most often involved. An important role is played by the power of the tool, which is directly related to its performance. A plane of greater power plans “deeper”, that is, it can remove a thicker layer of wood in one pass. Manual electric planers are produced with a power ranging from 0.5 to 2.2 kW. Above one and a half kilowatts is, in fact, a professional tool for large-scale work. If you plan to use the plane frequently and in large volumes, it makes sense to take a closer look at more powerful models. But, as always, the rule applies: the more powerful the tool, the more it weighs and the higher its price. It will be convenient to work with a low-power plane while suspended. Medium power models weigh between 2.5-4 kg.
Another indicator is the rotation frequency of the drum, that is, the number of revolutions it makes per unit of time. This value is very important to consider when choosing a plane, says user wind1wind
: the higher the speed, the better the quality of the cut. The optimal option that you should focus on when choosing is 15000-16000 rpm.
– The plane does not create a completely flat surface, but a “wave” with very fine steps. To make this waviness invisible, the number of shaft revolutions and the number of knives on the shaft are increased. These two parameters are very important when choosing.
Width
planing depends on the width of the cutting edge of the knives. The most popular knife sizes for household electric planers are 82, 102 and 110 mm. The higher the planing width, the fewer passes will need to be made to completely process the surface.
To simply process a board to a smooth surface, all you need is a plane with knives narrower than the board. But if the width of the knife does not cover the width of the material being processed, you will not get a perfectly flat surface - even a minimal “step” will remain.
Depth
cut is essentially the thickness of the layer of wood removed by a plane in one pass. In household planes it usually does not exceed 2 mm, in more powerful ones - 4 mm. Most models have depth adjustment.
Electric planers use removable blades made of carbide and hardened steel. Most of them, even carbide ones, can be sharpened and sharpened, but narrow knives cannot be sharpened: their design does not imply sharpening. Some models of planes are supplied with a sharpening device. You can make it yourself.
– To straighten knives you need thicker glass and a couple of sheets of good sandpaper. We soak the paper in water, place it on the glass - and off we go! But this is exclusively for straightening, knives “stuck” on nails and bricks - only for use on the machine.
Sole
The plane in contact with the surface being treated must be level and smooth. In modern models of planes, barely noticeable grooves are made on its surface - grooves that prevent the formation of an “air cushion” between the sole and the material during operation and thus ensure uniformity of the cut. The grooves on the front of the sole are designed for chamfering the corners of parts. When choosing a plane, you should pay close attention to the quality of the surface of the sole, especially if we are talking about inexpensive models.
– A defect found in non-brand planes is the so-called “drunk sole”. We check this way: set the removal adjustment to zero, move the knife to the upper position. We apply a ruler along the length of the plane, alternately on both sides, so that it lies on both platforms at once. There should be no gaps between the ruler and the sole.
When choosing an electric planer, it is important to hold the tool in your hands, to understand whether the tool’s handles, start and adjustment buttons are conveniently located for you, and whether its weight suits you. Modern electric planers have many additional options and parameters that facilitate and improve the work process. But all of them, of course, increase the cost of the instrument. Among the most popular options are directional ejection of chips with the ability to connect a bag for collecting them or a vacuum cleaner, a “soft start” system and speed control. Here everything depends on the requests of the master and his financial capabilities.
A useful accessory is a universal ruler that allows you to evenly process a surface wider than the planing width of the plane in one pass, as well as planing at an angle of 90 degrees to the supporting surface. Often such rulers are included with the plane, but if not, it makes sense to purchase it separately.
The basic work performed by an electric planer is easy for a beginner to master, and if you follow simple rules, the tool will serve for a long time and effectively. Planing should begin only after the drum of the switched-on plane has reached full speed. And you shouldn’t immediately set the maximum planing depth: it’s better to remove a millimeter twice than to try to remove two millimeters at a time. There is no need to put any force on the tool: it should only be guided, and the plane should plan itself, “like clockwork.” And for this, the knives must be sharp.
It is not so easy for craftsmen starting to work with an electric planer to determine when sharpening or replacing the knife is necessary. Forum member Nomad
advises using visual methods. If the knives are sharp, the surface will be smooth. If they are dull, rags of wood form on it, since the knives no longer cut, but tear it. Another sign of dull knives is wood that turns brown from high temperatures, especially in the area of knots.
– Even with dull knives, the plane begins to vibrate on the knots, as if bouncing up and down: the knife does not cut and is pushed away from the dense material. The best thing is to install new knives and see how they work. And then the feeling of sharp knives will be familiar. And with the same sharp knives, try to walk along a knot to see the difference.
A common problem that novice craftsmen face is the displacement of the material being processed under the plane. Although a plane is one of the safest tools, there is still a risk of injury when holding wood with your hand. The problem can be solved by making a simple board clamp and limiting the lateral displacement of the plane - as forum user wind1wind advises:
– Along the width of the sole of the plane on the workbench, attach two blocks no less long than the boards being processed. The sole of the plane should pass between them with a minimum gap, but without difficulty. A piece of slats is attached to one end, against which the board will rest. Additionally, the board between the blocks can be fixed with a wooden wedge.
Read also: How to connect four light bulbs from one switch
For this design to work as it should, the end stop made of slats and wedges should be slightly thinner than the board being planed, a forum member advises. The blocks should, on the contrary, be thicker than the board being processed by about 1/2-2/3 of the thickness of the plane sole. Then they will prevent the lateral movement of the plane during operation. On the other hand, the plane will not touch the blocks with protruding parts of its structure (belt casing, engine).
Members of the forum discuss the features of choosing electric planers, the advantages and disadvantages of specific models in. You can read the recommendations and get advice on how to properly operate an electric planer. Members of the forum exchange experience in replacing, sharpening and straightening knives for planes. Look for information on the repair of planes, routers and circular saws. This video explains the basics of working with an electric planer.
Many beginners are interested in the question of how to work with an electric planer. At first glance, there is nothing complicated: plug it into a power outlet, press a button, move it back and forth across the surface, removing chips. However, during the first attempts, the result is not always impressive.
When purchasing a tool, you need to check its functionality, completeness and appearance. It is worth paying attention to the sharpening quality of the installed knives. If the kit contains spare knives, you need to check them too. The cutting edge should be smooth, sharp, without gouges or bends. All other settings should be checked at home in accordance with the manufacturer's instructions.
What are there
On sale you can find household and professional (semi-professional) electric planers. They differ from each other in color and markings. The first ones are cheap and light. The second ones are more expensive, more powerful and heavier. Their motor life is many times greater; they can do work every day for many hours.
As a rule, in everyday life there is no such need; an electric planer is used from time to time, so purchasing a household model for your home, but from a well-known manufacturer, is a common solution.
The processing width in one pass for household models is usually 82 mm; less common are models with knife lengths (knives are positioned horizontally) of 100 mm and 110 mm. Professional models may have more.
The tool bed is divided into two parts - the front, adjustable, which rests on the workpiece in front of the knives, and the back, which rests on the already processed wood. On the front part of the bed there is a longitudinal recess (several recesses of various sizes), into which you can hang the edge of the workpiece when chamfering, which will allow you to chamfer most accurately.
On the front handle there is usually a regulator for the thickness of the removed chips (depth of cut).
Another important component is the chip removal system. Planing produces a significant amount of chips. The planer has a pipe into which dust and chips are thrown out during operation.
An industrial vacuum cleaner can be connected to the pipe. But you can also connect a bag to collect shavings so as not to litter the room with them.
Some models of electric planers are equipped with such a bag. But you can do it for any model yourself.
How to make a chip bag? You will need a spare tube from the vacuum cleaner, which connects to the nozzle of the plane. And also a piece of fabric, a zipper sewn into the fabric to remove shavings, and a crimp clamp to secure the neck of the bag to the tube.
Some models are equipped with side and top stops, which allow you to guide the plane along the edge of the workpiece at a certain distance from it and to a certain planing depth. This allows you to select folds.
Some expensive, powerful models are equipped with a planer-thicknesser device or a simpler frame, with which the plane can be secured with the knives up, thus obtaining a small planer (thicknesser).
How to replace knives
The electric planer is equipped with knives made of high-strength, abrasion-resistant alloys.
If the knives begin to leave a mark on the wood, this indicates they are damaged and need to be replaced. A knife, as a rule, has two sharp edges, and if one is dull, then you just need to turn the knife over.
To replace knives, you must first disconnect the electric planer from the power supply. Then you need to unscrew the screws securing the knife holders and remove the holders from the groove, and then remove the knives from them.
By inserting new knives into the holders (turning the existing ones over), you can reassemble in the reverse order. It is important to set the knives in height, which is not easy and requires effort.
How to choose and use an electric planer correctly
An electric plane is an essential tool for anyone who deals with wood processing, and during construction or renovation it can become an indispensable assistant. In everyday life, a traditional hand plane is usually enough for a home craftsman, but in a private farmstead or summer cottage there is plenty of woodworking. Baths, outbuildings, fences, benches and other furniture - the list goes on and on.
An electric planer will save the craftsman a lot of time and effort and allow him to achieve good results. Using an electric planer, workpieces are brought to the required dimensions, surfaces are leveled, nicks, burrs and knots are removed, edges are cut, and grooves are selected. A plane, of course, is not capable of “fine” processing of surfaces to perfect smoothness; this will require additional tools. But with its main task - rough processing of wood in large volumes - the electric planer, if the operating rules are followed, copes “excellently”.
As when choosing any power tool, when choosing an electric planer, a master should start from the main tasks in which the tool will be most often involved. An important role is played by the power of the tool, which is directly related to its performance. A plane of greater power plans “deeper”, that is, it can remove a thicker layer of wood in one pass. Manual electric planers are produced with a power ranging from 0.5 to 2.2 kW. Above one and a half kilowatts is, in fact, a professional tool for large-scale work. If you plan to use the plane frequently and in large volumes, it makes sense to take a closer look at more powerful models. But, as always, the rule applies: the more powerful the tool, the more it weighs and the higher its price. It will be convenient to work with a low-power plane while suspended. Medium power models weigh between 2.5-4 kg.
Another indicator is the rotation frequency of the drum, that is, the number of revolutions it makes per unit of time. This value is very important to consider when choosing a plane, says FORUMHOUSE wind1wind: the higher the number of revolutions, the better the quality of the cut. The optimal option that you should focus on when choosing is 15000-16000 rpm.
wind1wind:
– The plane does not create a completely flat surface, but a “wave” with very fine steps. To make this waviness invisible, the number of shaft revolutions and the number of knives on the shaft are increased. These two parameters are very important when choosing.
width depends on the width of the cutting edge of the knives. The most popular knife sizes for household electric planers are 82, 102 and 110 mm. The higher the planing width, the fewer passes will need to be made to completely process the surface.
To simply process a board to a smooth surface, all you need is a plane with knives narrower than the board. But if the width of the knife does not cover the width of the material being processed, you will not get a perfectly flat surface - even a minimal “step” will remain.
The depth of cut is essentially the thickness of the layer of wood removed by the plane in one pass. In household planes it usually does not exceed 2 mm, in more powerful ones - 4 mm. Most models have depth adjustment.
Electric planers use removable blades made of carbide and hardened steel. Most of them, even carbide ones, can be sharpened and sharpened, but narrow knives cannot be sharpened: their design does not imply sharpening. Some models of planes are supplied with a sharpening device. You can make it yourself.
Olegych:
– To straighten knives you need thicker glass and a couple of sheets of good sandpaper. We soak the paper in water, place it on the glass - and off we go! But this is exclusively for straightening, knives “stuck” on nails and bricks - only for use on the machine.
The sole of the plane in contact with the surface being processed must be flat and smooth. In modern models of planes, barely noticeable grooves are made on its surface - grooves that prevent the formation of an “air cushion” between the sole and the material during operation and thus ensure uniformity of the cut. The grooves on the front of the sole are designed for chamfering the corners of parts. When choosing a plane, you should pay close attention to the quality of the surface of the sole, especially if we are talking about inexpensive models.
Blackk:
– A defect found in non-brand planes is the so-called “drunk sole”. We check this way: set the removal adjustment to zero, move the knife to the upper position. We apply a ruler along the length of the plane, alternately on both sides, so that it lies on both platforms at once. There should be no gaps between the ruler and the sole.
When choosing an electric planer, it is important to hold the tool in your hands, to understand whether the tool’s handles, start and adjustment buttons are conveniently located for you, and whether its weight suits you. Modern electric planers have many additional options and parameters that facilitate and improve the work process. But all of them, of course, increase the cost of the instrument. Among the most popular options are directional ejection of chips with the ability to connect a bag for collecting them or a vacuum cleaner, a “soft start” system and speed control. Here everything depends on the requests of the master and his financial capabilities.
A useful accessory is a universal ruler that allows you to evenly process a surface wider than the planing width of the plane in one pass, as well as planing at an angle of 90 degrees to the supporting surface. Often such rulers are included with the plane, but if not, it makes sense to purchase it separately.
The basic work performed by an electric planer is easy for a beginner to master, and if you follow simple rules, the tool will serve for a long time and effectively. Planing should begin only after the drum of the switched-on plane has reached full speed. And you shouldn’t immediately set the maximum planing depth: it’s better to remove a millimeter twice than to try to remove two millimeters at a time. There is no need to put any force on the tool: it should only be guided, and the plane should plan itself, “like clockwork.” And for this, the knives must be sharp.
It is not so easy for craftsmen starting to work with an electric planer to determine when sharpening or replacing the knife is necessary. Forum member Nomad advises using visual methods. If the knives are sharp, the surface will be smooth. If they are dull, rags of wood form on it, since the knives no longer cut, but tear it. Another sign of dull knives is wood that turns brown from high temperatures, especially in the area of knots.
Aleksej2000:
– Even with dull knives, the plane begins to vibrate on the knots, as if bouncing up and down: the knife does not cut and is pushed away from the dense material. The best thing is to install new knives and see how they work. And then the feeling of sharp knives will be familiar. And with the same sharp knives, try to walk along a knot to see the difference.
A common problem that novice craftsmen face is the displacement of the material being processed under the plane. Although a plane is one of the safest tools, there is still a risk of injury when holding wood with your hand. The problem can be solved by making a simple board clamp and limiting the lateral displacement of the plane - as forum user wind1wind advises:
– Along the width of the sole of the plane on the workbench, attach two blocks no less long than the boards being processed. The sole of the plane should pass between them with a minimum gap, but without difficulty. A piece of slats is attached to one end, against which the board will rest. Additionally, the board between the blocks can be fixed with a wooden wedge.
For this design to work as it should, the end stop made of slats and wedges should be slightly thinner than the board being planed, a forum member advises. The blocks should, on the contrary, be thicker than the board being processed by about 1/2-2/3 of the thickness of the plane sole. Then they will prevent the lateral movement of the plane during operation. On the other hand, the plane will not touch the blocks with protruding parts of its structure (belt casing, engine).
Read also: Metal profile rectangular pipe
Forum users discuss the features of choosing electric planers, the advantages and disadvantages of specific models in this thread. Here you can read recommendations and get advice on how to properly operate an electric planer. Members of the forum exchange their experience in replacing, sharpening and straightening planer knives in this thread. Find information about the repair of planes, routers and circular saws here. This video explains the basics of working with an electric planer.
There are many planes and planing machines available for planing boards. However, if the board is quite wide, more than 200mm, then planing it evenly, on a plane, is quite problematic, since one side of the board is convex and the other has curved edges.
In this case, it is better to use different planing techniques. The first way is to walk, not with a wide electric planer, over protruding places. This is done in order to plan evenly and prevent the plane of the board from skewing towards one of its edges.
In this case, when planing protruding edges, it is necessary to remove the thickness of the planing with a small amount of removal, and go through the same number of times on one and the other side. Finally, we plan the board on a wide planer. If there is no planer, then special knives with rounded ends are installed on the electric planer so that there is a protrusion between narrow passages, since the width of the plane when planing is less than the board.
If you have a large machine, then in order to avoid distortions when planing an uneven board that is convex on one side, shavings are poured onto the bed, after which the board is ground in and lies flat when planing. This simplest technique allows you to avoid distortion when planing.
You should not neglect the clamping device that many planing machines are equipped with, since they not only press the board, but also press it evenly. When achieving a smooth surface of the board, the main thing is well-sharpened and adjusted knives, plus a thin layer of planing.
If your planer is narrower than the board being processed, then you should plan the board in one pass, first on one side, then on the other. Thus. You will achieve a flat surface on a wide board.
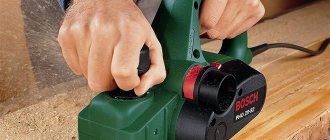
Hello, readers of the blog “build a house”. Almost all mechanical and electrical tools require proper handling and timely adjustment. We have already discussed how to properly set up a mechanical plane in our previous article on. Today I propose to consider the issue of planing with an electric planer
. At the end you will learn how to work with this tool.
Attention: To prevent sawdust and shavings from clogging the plane blade, use special bags to collect the shavings.
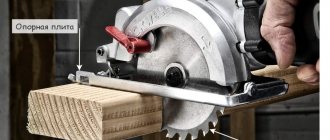
An electric planer can be used to chamfer a part.
. Based on the width of the required chamfer, run the plane along the edge of the workpiece the required number of times.
Preparing for work
- Before you start working with an electric planer, it is necessary to carry out a preliminary inspection. It is worth checking the case and cable for damage. Make sure that the knives are free from defects, are not loose or clogged with foreign objects. According to safety regulations, inspection is carried out only with the device turned off.
- You should only work with an electric planer while wearing safety glasses, which will prevent chips from getting into your eyes. Try to wear clothes whose ends will not dangle. The part to be planed must be securely fastened.
- If you are processing a long surface, then provide yourself with the opportunity to move freely and comfortably. Check the length of the power cable; it should not be stretched.
- When the engine of the electric planer is started, it is worth starting processing after a few seconds.
Rules
- The beginning of surface treatment with an electric planer consists of a smooth first pass. At the beginning of the movement, you should press with slight force on the front part of the device, and when the blade completely enters the part, you can release the pressure. For normal planing, the weight of the electric planer itself is enough. You must continue moving while holding the device with both hands.
- Approaching the end of the surface to be planed, press the back of the plane, this will prevent “collapsing”.
- After passing one strip, check the surface for defects. Recesses and bevels will indicate incorrect adjustment of the knives. To understand how to adjust them, I advise you to read the instructions for the device. Each model has its own specific differences.
- If the surface of the product turns out to be wavy, then you moved the electric planer too quickly.
- It is necessary to plan as smoothly as possible, without unnecessary jerks and stops.
Surface treatment
An electric planer can perform three operations:
Scheme of options for sharpening a plane knife.
- chamfer at different angles;
- select quarters on blanks;
- plan surfaces.
The main purpose of the tool is to plan surfaces of various lengths and widths.
When working, the plane must be placed on the surface of the workpiece with the front plate so that the knives do not touch the surface. Press the start button, after picking up speed (the sound stops changing pitch) begin moving the plane along the surface. The tool must be held strictly parallel to the surface being processed, the movement must be uniform, without jerking or stopping. When starting to move, you need to increase the pressure on the front part, and when exiting the surface to the rear part. The plane should work smoothly, without vibration. If strong vibration occurs or the sound changes during operation, you need to turn off the tool, determine and eliminate the cause of the abnormal operation.
The depth of the passage must be set depending on the processing purposes. If you need to change the size of the workpiece, you can use the maximum size. When leveling the surface, it is advisable to work with a shallow processing depth, achieving the required quality in several passes.
Also, the depth of processing depends on the material. Hard rocks should be passed several times at shallow depths to avoid overloading the tool.
Operating principle of an electric planer
The main part of the electric planer is a rotating drum on which the cutting elements are attached. It is driven by an electric motor, rotation is transmitted by a toothed belt. The tool operates via an electrical cord from a 220 volt household power supply.
Planers are usually equipped with motors with a shaft rotation speed of over 1000 rpm and a power of 550 to 950 watts. The motor elements that require special attention are the carbon brushes. For convenient monitoring of their condition, cleaning or replacement, a special removable casing is installed above the motor.
Planing should begin only when the drum reaches its maximum rotation speed. You need to carefully move the plane from the end of the workpiece and begin to slowly move it forward. The sole of the tool should be directed parallel to the wood being processed. In this case, at the beginning of the workpiece, the force is slightly transferred to the front handle, and at the end - to the rear. Planing should be smooth, with an average processing speed of 150–200 centimeters per minute.
This is important: you should regularly check whether the cutting knives of the tool are dull. If the blades lose their sharpness, the plane may bounce violently off the wood, creating a risk of serious injury.
How to use an electric planer correctly
First of all, you need to understand that planing with an electric planer is only applicable to wood. Before starting work, it is necessary to securely secure the processed lumber - the quality of the resulting wood and the safety of the work process will depend on this. The presence of play can cause the workpiece to be thrown to the side upon contact with the rotating drum, possibly resulting in injury to a person.
The lumber must be secured in such a way that the worker carrying out the planing has the opportunity to move freely with a plane from one edge to the other of the workpiece.
The difference between planing on a wide board
The difference between planing a wide board and working on a narrow board is that the process is carried out in several passes along the blade. This is due to the fact that the width of the cutting knives is not enough to process the surface of the workpiece in one pass. The main difficulty in this case is the exact parallel alignment of two adjacent processed lines.
This is important : in order to obtain higher quality material, professionals take a longer workpiece and cut the ends after planing.
Preparing to work with an electric planer
Before you start working with an electric planer for the first time, you need to study the operating instructions for the device and take into account the features of a particular model. Each time before using the tool, you must check:
- is there any damage to the case, cable, knives;
- Are the cutting elements securely fastened?
- whether the mechanisms are clogged.
You should also not neglect safety rules. To work with a power tool, you must choose suitable clothing - sleeves and other parts should not interfere or hang down. It is necessary to prevent tension on the power cable: if its length is limited, you will need an extension cord. It is also important to securely secure the board or other lumber to the work surface.
Note: measure 7 times and read the instructions: why is it important to study the instruction manuals
Checking and adjusting the position of the front plate
To learn how to properly use an electric planer, for example, the Makita N1923B model, you should first carefully study the preparatory stages of the work. The process of setting and monitoring the front plates is an important point in the work. It is with these actions that preparation for using the device begins. To do this, you need to turn off the power and prepare an overlay - a ruler or glass of appropriate sizes.
Next, we fix the front plate by turning the device over, and by rotating the drum we secure the knife in the upper position. Use a ruler to check the parallelism of the front plate and the sole. Unevenness in position may be caused by clogging with wood waste or prolonged use without maintenance.
To adjust, you must perform the following steps:
- detach the handle with the front sole from the body;
- remove blockages inside the vacated compartment of the device;
- lubricate the mechanisms;
- assemble an electric planer;
- re-check parallelism.
Adjusting the position of the cutting edge
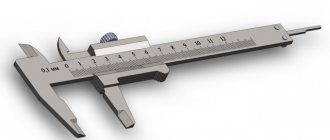
Before working with an electric planer on wood, you need to adjust the position of the cutting edge in relation to the sole of the tool. The level of the outer part of the knives depends on the type of cutting element and the depth of the required planing, which is changed using a switch handle with a minimum step of about 0.1 mm. The protruding fragment of the blade (usually 0.5-1 mm) should be in a position parallel to the power tool plate, at the same distance. The setup takes place in several stages.
For this procedure, slightly unscrew the fastening bolts, use eccentrics to achieve the desired height of the knives, fix them and check them. If there are several cutting components in the model, they should be installed in the same way, using a caliper or ruler. When everything is done correctly, the drum rotates easily.
Adjusting electric planer knives
An electric planer can be used to perform both rough processing of wooden planes and finishing, after which sanding may not even be necessary. Therefore, it is important to be able to adjust the knives correctly so that the planing depth provides the surface cleanliness you need. On electric planers, the planing depth is set by switching the handle. The adjustment step can be up to tenths of a millimeter. Therefore, when buying a plane, pay attention to this parameter as one of the most important. Depending on what work you plan to perform, you should select a power tool with a sufficient adjustment step for this purpose. Before you start processing the surfaces of boards or bars that you will use in the future, make several test passes on a workpiece that you won’t mind throwing away later. It is during these test runs that attention should be paid to possible processing defects.
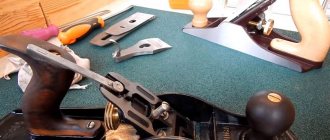
Hand electric plane
Electric planer knives
The first electric plane was released by Makita. Today it is difficult for a master to imagine life without this incredibly useful tool.
How to adjust an electric planer
Adjustment of electric plane knives should be carried out according to the situation using a special adjustment mechanism, which is located on the front handle of the electric plane. By rotating this handle, we achieve the required amount of release of the knives (0-2 mm); they should be positioned evenly, parallel to the bed. Excessive release makes work difficult and puts additional stress on the plane motor.
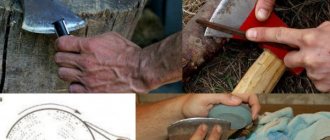
Sharpening electric planer knives
Sharpening the knives of an electric planer is carried out similarly to a mechanical one. The main sharpening difference between an electric planer and a mechanical planer is the number of knives. There are two of them here.
Knife sharpening
Planing with an electric planer
A separate condition for correct and safe planing of any structures with electric planers is the rigid fixation of the workpiece being processed.
Attention: an electric planer is a rather dangerous tool (risk of injury to fingers), so always remember safety precautions.
Only after the workpiece being processed is clearly fixed, you can start planing it. First you should start with rough processing. For this, sherhebel is often used. When using scherhebel, movements should be directed not along, but across the fibers. Otherwise, you may cut off too much wood.
Attention: if, during planing with Sherhebel, there are curls on a wooden workpiece that aggravate the planing, then you should not put too much pressure on them. Otherwise, the wood may break off in these places and this workpiece will not be suitable for further use.
Subtleties of working with an electric planer
After finishing processing the surface of small workpieces with Sherhebel, it should be cleaned first with a single, then with a double plane. If you are dealing with long workpieces, such as bars, then it is better to use a jointer or semi-jointer. Movement on the surface must be directed not against the grain, but along it. This is the only way you can get the most even and smooth surface of the wood.
Planing
Caution: When using a long plane, both hands must be used. Place your palms on the handle of the tool and press both edges firmly against the surface of the workpiece.
Performing various types of work with an electric planer
Electric planers can be used to perform various operations:
- plan wide or narrow boards, as well as other wooden blanks;
- choose quarters;
- remove the chamfer.
Before carrying out work, you should select lumber of appropriate quality:
- without knots;
- well dried;
- without cavities filled with resin, chips and cracks (longitudinal or transverse);
- with a flat surface that does not contain depressions or protrusions;
- There should be no metal inclusions in the board or timber: nails, screws, bolts, brackets, screws, staples and others.
When using a portable method of using an electric planer, the workpiece is securely fixed on a hard surface. To do this, install at least 2 stops, but it is better to place them on all sides of the part. They also ensure free movement of the power cord so that it does not get caught. The safety of the operator partly depends on this.
Cutting a quarter using an electric planer
Selecting a quarter (removing a fold) is one of the operations performed using an electric planer. To do this, you need to install two stops:
- the first (top), which controls the movement of the tool along the workpiece in the desired direction;
- the second (lateral), which determines the depth of the quarter sampling.
The stops are adjusted to the required dimensions, following the instructions in the operating instructions for the product used. In this case, the distances are measured by focusing on the cutting edge of the blade, which occupies the upper position.
There are two ways to select a quarter:
- moving an electric plane along the workpiece;
- moving the processed wooden part along a homemade machine.
In any case, the movement of the power tool or workpiece must be at the same speed (smooth).
Removing the fold in the first case is carried out in several passes, proceeding as follows.
- On the surface of a well-fixed workpiece, using a marker or pencil, marking lines are applied that determine the depths with the width of the quarter.
- Turn on the electric plane.
- After the drum has reached full speed, the tool is brought to the workpiece. The movement begins with light pressure on the front part of the working unit, leveling the force after the sole is completely on the surface of the part and increasing it at the end.
- Perform passes until the desired sample size is achieved.
Preparation for working with an electric plane and rules for its installation
An electric planer purchased recently or used for the first time in practice needs to be checked.
It is not recommended to start operating the mechanism without preparation, because this can lead to its breakage or damage to wooden blanks.
First, you should read the operating instructions. Next, preliminary preparation is carried out, checking:
- position of the front part of the sole;
- degree of freedom of rotation of the working drum with cutting elements fixed on it;
- presence of various damages to the plug, power cord, housing;
- freedom of movement of the power button;
- correct placement of knives.
The functionality and configuration of the electric planer must be checked at the time of purchase. The rotation of the drum is checked by moving it with your hand. The button operates by pressing it. The integrity of the unit is determined visually. When no defects are found, a test run of the equipment can be performed.
Before planing with an electric planer or performing other operations with it, it is recommended to first practice processing on unnecessary boards or bars. This will allow you to “get your teeth into” and adapt to the technique in order to get an acceptable result in the absence of the necessary practical experience.
If the switched-on tool begins to vibrate or the quality of processing of the boards is poor (waves and burrs appear on the surface of the wood), then the knives on the drum should be sharpened or replaced.
Setting the correct position of the front of the plate
It is recommended to start setting up the electric planer by adjusting the position of the front part of the stove with the plug unplugged. To do this, you will need to use a ruler or a suitable size piece of ordinary glass. All actions are performed in this sequence.
- The front (movable) part of the sole, using a special adjusting handle, is set to a position that provides the minimum depth when planing.
- Place the power tool on a level workbench or work table in an inverted position.
- The drum is rotated so that one of the knives is located above its axis.
- A ruler or glass is placed on the sole: they must lie in the same plane.
When the overlay on the slab is tilted, this defect is eliminated as follows:
- remove the adjustment handle and the front part of the sole;
- clean the opened cavity from chips and dust;
- lubricate the mechanism;
- put the stove in its original place;
- install the handle;
- Check the position of the sole using a ruler.
The adjustment is considered complete when the glass or ruler is located in the same plane with the sole.
Checking the installation of knives
The installation of the blades is checked using a metal ruler. To do this, it is applied to the edge of the slab. Then they look to see if the blades located on the drum touch the ruler. When the knives do not come into contact with the ends of the lining, begin to regulate them. Using the hex wrench supplied with the power tool, loosen the blades on the drum. Then the cutting edge of the knife is set parallel to the sole so that it protrudes about 0.5 mm for straight models and 1 mm (or more) for rounded ones.
Using the described method, the position of the blades is adjusted for models with both one knife and two or three. After completing the regulatory adjustments, they will be installed in the desired position.
It must be taken into account that the depth of planing and the ease of movement of the tool depend on the protrusion of the knife above the sole.
When setting the correct position of the blades, they should not touch the sole when the drum rotates.
Possible working positions of the electric planer
Some models of electric planes include a support stand. This makes it possible to perform work using this device in two ways:
- placing it in a stationary position, when the power tool is fixed motionless (rigidly) to the workbench or table;
- using an electric planer as portable equipment.
In the latter case, the tool moves along the machined surface. This makes it convenient to process long pieces of wood.
Electric planer with stand included
A rigidly fixed tool is, in fact, a planer. The wooden blank is moved along it, pressing it with sufficient force. At the same time, it is convenient to perform work operations with the help of a partner. You can work with short-length lumber alone.
The easiest option for preparing an electric planer for work is to contact specialists for help at a service center. Self-tuning of the tool should be carried out according to the recommendations set out in the manufacturer's instructions.
Safety when working with an electric planer
When used correctly, an electric planer will help you quickly complete large amounts of work, but if handled carelessly, it can also cause serious injuries. As mentioned above, the workpiece must be securely secured before starting work. Otherwise, there is a risk of it being pulled out and injuring the worker or other people nearby. During any inspections of cutting edges or adjustments of knives, be sure to completely turn off the power to the electric planer by disconnecting the electrical cord from the network. Any accidental start can leave you without fingers. Start processing the surface by first turning on the plane and allowing the knives to reach maximum speed until they touch the board. If you put the electric planer aside to check the surface you are working on, place it only on its side. The electrical cord should not have significant kinks or tangles during operation. The electrical insulation must not be damaged, all current-carrying structural elements must be reliably insulated.
In the video below you can watch tips on working with an electric planer (click on the triangle to view):
Sources
- https://2lzz.ru/elektroinstrument/elektrorubanok/kak-pravilno-rabotat-elektrorubankom
- https://stroy-block.com.ua/byttehnika/535-elektrorubanok-opisanie-i-priemy-raboty.html
- https://allremont59.ru/instrumentyi-materialyi/technika-instrumenti/kak-pravilno-ispolzovat-elektrorubanok.html
- https://pro-instrument.com/ruchnoj/kak-rabotat-elektrorubankom.html
- https://russkaya-banja.ru/instrumenty/126-rabota-elektrorubankom.html
- https://odnastroyka.ru/kak-strogat-elektrorubankom/
- https://tehnika.expert/dlya-remonta/elektrorubanok/kak-rabotat-instrumentom.html