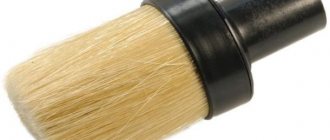
New tools have appeared with the help of which the process of finishing work can be done much faster and with better quality than before. Such tools include a plaster trowel.
With its help, you can efficiently smooth the plastered surface and erase all the flaws and bulges.
How to choose?
To ensure that the choice of product allows you to carry out high-quality repairs, you should familiarize yourself with some recommendations from specialists before purchasing.
- Take the instrument in your hand - it should be comfortable for you. The ideal handle is one that has indentations for your fingers.
- Look at the work canvas. There should be no defects in the form of nicks, scratches, or unevenness.
- Based on the amount of work. If you need to prepare a large area base, choose a larger product.
- Small varieties cope well with their main task in limited areas.
- If you have to work with a wall that has previously artificially created openings, it is preferable to use a short model.
- It is better to buy a long trowel if you have to work on finishing open areas.
- Avoid purchasing foam plastic products: they will break within the first hour of use. Do not confuse them with their polyurethane counterparts. These are two completely different materials.
- If you need to prepare a surface for painting, buy a metal trowel.
- If you are planning a purchase that will last for many years and will not interfere with preparatory work, buy a polyurethane trowel. This trowel significantly saves working time, and mixtures do not stick to it. At the same time, you will be satisfied with the result of your work.
In addition to the basic rules, keep in mind the main thing: the dimensions of the instrument are selected taking into account the size of your own palm.
A trowel is often used as a tool to add texture to the finishing layer. In skillful hands, such tools can replace textured rollers. At the same time, the result of the work will not be inferior to a professional one. And due to the possibility of trimming, you can correct imperfections that arise during the work process.
If you are planning to give the walls or ceiling the effect of Venetian plaster, such a tool will be the best assistant in implementing an unusual idea. By the way, an old wooden version with a dilapidated work surface can be used to create a “bark beetle” texture. And if you need a “fur coat” texture, you should use a product with a sponge plane.
Wall sanding grater: basics of operation
You need to be able to use absolutely any hand tool correctly; the sanding float also has some features of use, which we want to tell you about. We will start with the choice of sandpaper, on which the quality of the work done to clean the walls directly depends, and we will step by step understand the basic rules of work.
Types of tools
The main difference between all graters is the material from which they are made. Outwardly, they are all similar to each other, and the principle of operation of the instruments is the same. The most popular are graters made of polyurethane, wood, foam, metal, plastic and sponge.
Polyurethane
Construction devices made of polyurethane are now considered very popular. They are suitable for applying and grinding gypsum, lime and decorative plaster. The thickness of polyurethane floats reaches 3–25 mm, the “size range” is as follows:
- 120 x 240 mm;
- 110 x 600 mm;
- 140 x 280 mm;
- 180 x 320 mm.
Polyurethane grater 140x280mm
The thinnest soles (3–5 mm) of oblong shape are suitable for working with decorative plaster, thicker ones are suitable for rubbing and leveling ordinary mortar. The products last a long time, are comfortable, lightweight, and have an ergonomic design.
Polyurethane, as a heterochain polymer, is very strong and elastic, and the most wear-resistant modifications of the material are used for the manufacture of construction floats.
Features of using the tools:
- when working with decorative compositions, either the surface or the instrument itself must be wetted with water;
- During operation, the grater must be cleaned regularly, otherwise the quality of the finish may decrease;
- Grinding of ordinary plasters is carried out only on a fresh layer that has not yet dried;
- for lime mortars, you should choose only rectangular tools 20–25 cm thick.
Grouting plaster in a circular motion
Wooden
Wood products are considered the simplest, even quite primitive, and therefore are rarely used due to the availability of other options. They strongly absorb moisture during operation, because any plaster solution contains water, and the wall becomes wet during rubbing. The service life of wooden floats is short, they gradually become deformed and increase their weight, as a result, the labor intensity of troweling the plaster for the master increases greatly.
Wooden grater Mastertool
Foam
They are the most inexpensive option for construction floats, but are not suitable for all types of work. For their production, fairly hard types of foam are selected, which perfectly level and smooth the plaster. Such a tool is not suitable for creating relief, but gypsum and polymer plasters will have a perfectly smooth surface after processing.
You must handle foam tools with care, because they are quite fragile and can break.
Foam plastic grater 130x270 mm KLASSE
Metal
Most often, metal construction floats are used for ironing walls. During ironing, a thin water-repellent film is formed on the coating, which will protect the plaster from the negative effects of moisture. Smooth metal tools make the surface smooth, almost glossy. With the help of such floats you can compact even porous mortar that other tools cannot handle.
To rub rough plaster, you can use metal floats with a rough grinding surface. They are especially suitable if special ladles were used to spread the plaster. Next, the finishing layer is processed with a trowel with a smooth sole, using circular grouting or up and down movements. Metal tools with a serrated base are also available for sale. They are used for leveling adhesives under ceramic tiles.
Grinding grater with metal working part
Plastic
Such graters are used for high-quality application of building mixtures: putty, plaster, decorative materials, adhesives. They distribute the mass well over the surface, smooth out seams and irregularities, and are suitable for forming bark beetle-type coatings. However, the service life of plastic graters is short, so they are often chosen for one-time jobs. They are also not suitable for applying thick layers of plaster.
Plastic grater STAYER
Sponge graters and graters
Sponge instruments are made from foam, latex or rubber. They are used for processing structural plaster and grouting other decorative materials. Typically, the float body is made of lightweight aluminum or polyurethane, and the sponge itself is located only on the grinding pad. Such tools allow you to create designs on plaster and cannot be used to compact the mortar, give it perfect smoothness or gloss.
Product with sponge coating
Advantages of a modern instrument
The metal tool is lightweight and resistant to water.
A modern trowel for grouting and grinding has a number of advantages over previously used homemade wooden tools.
These include:
- lightness of the tool and its convenient use;
- for manufacturing, a material is used that absolutely does not absorb moisture and does not react to temperature changes (the plane does not bend);
- affordable price for everyone who wants to use the tool for its intended purpose;
- long service life;
- a large selection of products of this type, having all kinds of sizes.
Today, new types of products used for grouting plaster include tools based on foam plastic, plastic, rubber, metal and polyurethane, which are used in certain conditions.
Types of graters by material of manufacture
The graters do not differ in appearance; there may be only slight differences in size. There is a large selection of these devices on the market, which differ in the material of manufacture. Moreover, each type has advantages and disadvantages, and is suitable for different stages of grinding the coating being processed.
Descriptions, pros and cons
To choose the best option for the task at hand, it is worth studying the pros and cons of each. Some types are not convenient for certain stages of work. All available types will be described in detail below.
Wooden grater. This type of instrument is the first ever invented. Of course, the fact that they later decided to develop new types of this tool indicates the presence of tangible disadvantages. The most significant of them is high moisture absorption when carrying out work with its help. This leads to rapid wear of the tool, and also makes the work itself harder, because its weight becomes greater.
This type of instrument is the first ever invented.
Plastic plaster grater. It is more suitable for small amounts of work. It is chosen by specialists when it is necessary to apply plaster once and then level it with a thin coating. It can easily be improved to extend its useful life. It will not be convenient for beginners.
Foam. It is often chosen because of its low price. But the price here is justified by the quality, it breaks too easily
If you work with it, you should act carefully so as not to break it before the work is completed. Most often the handle breaks
It will be difficult for a beginner to maintain it until the end of the work; more masters can do this.
If you work with it, you should act carefully so as not to break it before the work is completed.
Polyurethane. Probably one of the best options. It weighs little, which makes plastering comfortable. Its grinding side is quite strong and it can last for a long time. The price is quite affordable.
A sponge trowel for plaster is not suitable for all stages of plastering work; it is used for the surface decoration stage. The sanding side is made of hard or soft sponge. The body is aluminum, the same as that of latex and rubber graters.
Metal. The function of this device is narrowly focused; it is used to “iron” the wall surface, creating a film that has the function of not allowing water to pass through. This is done to protect the plaster from moisture. This metal device also levels the wall well
Note! It is also suitable for leveling work on porous mortar. After treating the wall, you can immediately paint it
Construction float – one term, different tasks
One of the tasks of repair work is leveling the surface of walls, floors, and ceilings. The list of such works usually consists of plastering the surface, as well as further finishing with putty. These works are usually carried out under the label of “preparatory work”, using rough tools that cannot perfectly bring the surface to condition. That is why a construction float has come into use, which allows you to give the surface the proper appearance with greater precision and achieve maximum leveling quality.
It is possible that the grater was initially used to grind the finished plaster layer to zero, and accordingly, it coped with this task. Of course, it was impossible not to notice all the conveniences that this tool, the design of which was painfully simple, gave the craftsmen. But, as they say, everything ingenious is simple, and it’s impossible to argue. The device of the grater is, first of all, a small plane and a handle attached to this plane for ease of operation.
Based on this design, the grater began to be used everywhere, helping to level the surface after putty. Screeds with defects are rubbed with a grater. Even an ordinary sheet of metal covered with rust can be very quickly cleaned with a float by placing emery cloth on it. The list of tasks is so diverse that one can endlessly list all the positive aspects of this tool. But let's stop and talk about the main function of the grater: its use in plastering work and its use in painting.
Application of the grater
To carry out manipulations to level the walls, you will need a solution and a trowel. After this, plastering work can begin. The grouting stage will be the final one. In this case, you need to throw the mortar onto the wall with a trowel or trowel. To do this, you can use another plaster spatula.
It is necessary to determine the area of the working surface that you will process at one time. You should not apply the solution in a large volume, because you will not be able to process it in one step. The wet mixture must be rubbed with a grater in a circular motion directed counterclockwise. The plaster trowel, the purpose of which was mentioned above, should be pressed against the surface, and the master needs to apply a little pressure on it, distributing the solution over the base.
It is important to regulate the pressure. At the beginning of work, you need to decide with what intensity it is more convenient to press on the wall
This hand position must be remembered and then adhered to until the work is completed. The grater will flatten the mixture, making it much denser. This will allow you to cover the base with an even layer of mortar.
After plastering is completed, you can begin sanding the surface. You can start this work in 5 hours. To do this, you should use combined graters that have a working surface lined with felt or felt. The fibers will disperse small particles, and the walls will visually look smooth.
General principles of technology
The final stage of cladding is covering and grouting the plaster with floats. In some cases, smoothing is done instead of grouting, but the tool used is almost the same. The quality of the cladding depends not only on the tool; the composition used for finishing is of great importance. If you use a solution prepared by yourself, then the finishing layer is mixed with fine sand with normal fat content. Coarse sand will give a rough surface, suitable only for laying tiles.
We recommend: How to choose a hammer drill for the home - which hammer drill is best for home work and apartment renovation
The process of applying plaster.
Important: adding gypsum to lime mortar results in a decrease in strength. Excessive fat content of the composition will result in a large number of grinds and unbroken stripes; fat content is good for smoothing. Skinny compounds do not rub well and are not durable.
If you do not have fundamental knowledge in the field of preparing mortars, then it is better to use ready-made building mixtures. This will significantly save your time and effort. Because if the solution is prepared incorrectly, everything may have to be redone later.
The principle of working with building mixtures.
Grouting plaster with trowels can be done in 2 ways: in a circle and in a sweeping manner. By and large, both methods are parts of a general technology. The only difference is that if you don't require perfect quality, you can opt for round cutting. And for high-quality cladding, both technological methods are used.
Types of grout.
How to rub in a circle
The grater is taken in the hand and pressed tightly to the surface, circular movements are performed mainly counterclockwise. Thus, all elevations and tubercles on the plane are removed with the side of the tool. Small depressions will be filled with cut mortar and compacted to level the surface. The force with which the tool should be pressed is regulated arbitrarily and, as a rule, comes with experience. The instructions themselves are simple; on the more convex parts you should press harder. At depressions, the pressure weakens. As you work, solution will accumulate on the sides of the grater; it must be removed periodically. You should not wait until it flies around on its own, because you are in close proximity to the surface of the wall and the likelihood of the dried solution getting into your eyes is too high. You shouldn’t throw it away either; experienced specialists remove the mass with a wide spatula and immediately fill deep depressions or chips with it. Grouting plaster with floats is a rather long and painstaking process. Over time, the surface will dry out, making it harder to grout. In order to avoid these unpleasant moments, the wall must be constantly moistened with plain water. Professionals use a special “stone” brush for this purpose. With this technology, no matter how hard you try, circular marks from your tool will remain on the wall. If quality is not too important for a given room, for example, in a basement or utility room, then you can leave it that way. But to achieve an ideal result, you should go through the acceleration method.
The principle of operation of a grater on a hinge.
Mashing
This technology is used to achieve a uniform layer, without streaks; as a rule, such surfaces are suitable for painting. Take a cleaned grater, without any remaining mortar, and perform back-and-forth movements up and down, simultaneously pressing it against the wall.
Important: grouting is carried out on a damp surface. It is best to do this immediately after grouting in a circular manner, and do the work in parts, in sectors. Having rubbed no more than 1 m² in a circle, immediately rub this surface smoothly. An insufficiently wet surface is additionally wetted.
In addition to the fact that a perfectly straight tool is used for such work, its edges should be slightly rounded so that there are no scratches from the corners. According to building codes, walls in rooms with ceilings up to 4 m can have only 1 joint. This is quite easy to achieve. The work is performed in 2 strokes, the first from the ceiling to the level of the construction scaffolding, and the second from the border of the construction scaffolding to the floor. Such work should be started with a wooden or polyurethane tool, then to improve the quality of the grout, a trowel for plastering work with a felt or felt pad is used. To achieve a glossy effect, a metal plaster float is used before painting.
Sandpaper grater.
Smoothing the surface
Venetian plaster.
When using high-quality building mixtures and good tools, many specialists, after leveling the surface, immediately proceed to smoothing the surface, bypassing grouting. The tool used for this is almost the same. The most common economical option is a wooden trowel, covered with a sheet of soft, smooth rubber. On average, the size of the surface of the grater used for these purposes ranges from 60 to 100 cm. The rubber sheet can be solid or consist of several strips. But most importantly, it must wrap around the edges of the board and go up at least 20 mm, on all sides. For smoothing, a metal trowel can also be used to grout the plaster; in addition to directly ironing the cement coating, they are used for arranging a putty-free finish. Smoothing can only be done on a flat, damp surface. The process itself is reminiscent of smooth grouting, only smoothing is done in 2 directions. For walls, smoothing is first done in the vertical direction, after which the wall is smoothed horizontally. When performing work on the ceiling, the direction of sunlight from the window is taken into account. Initially, smoothing occurs across the sun's rays, after which it is smoothed parallel to the sun.
Textured plaster.
The video in this article shows the basics of grouting technology.
Polyurethane grater – optimal aid for plastering
Now let’s decide why it will be best for us to work with a polyurethane grater. The cheapest (and short-lived) graters are foam graters. Beginners take them first, and sellers are in no hurry to convince the novice master. This option is enough for a couple of grinding trips, and it will certainly break, because everyone remembers what polystyrene foam is, in which equipment is packaged when transported in a box. So after an hour of intensive work, the handle of such a grater will be in your hands separately from the canvas, and it, in turn, will be erased and begin to stick to the solution.
The wooden model is somewhat stronger, so it will not fall apart at the first moment. Only now the canvas will be sanded very quickly and will begin to stick to the mortar; in fact, the corners of the canvas will also be erased, which reduces the clarity in the treatment of the wall. The cement mortar will not be smoothed evenly by the rounded edges of such a trowel, and when it sticks, it will force you to work much more slowly, since you will have to apply less mortar in one approach. A polyurethane grater does not have such problems, let's take a look!
The peculiarity of polyurethane is its very good abrasion resistance, while the material is not “oaky”, but also not flexible. A grater made of such material, which is quite light in weight, significantly outperforms a wooden grater in this regard, with which you get tired in a couple of hours almost to the point of exhaustion. If we compare it with polystyrene foam, then we can call the polyurethane grater simply immortal; hundreds of square meters of walls are not enough to completely abrade it. For the work, the preservation of the pattern that is on its canvas is important; it wears out after about 40 squares.
The mesh on the polyurethane float allows the solution not to stick, which is why the grinding effect is achieved faster and easier, you will need significantly less effort to move. After it is abraded, the cement mortar will begin to stick to the surface, especially if it is runny. What are the advantages of a polyurethane grater? Thanks to the rigidity of this material, it is possible to make a canvas of small thickness and with sharp edges, for which there is also work. In any other materials other than metal, for example, such a move would be useless; the sharpness of the edges is almost instantly lost during the first hours of operation. In polyurethane, they will last a long time and will sometimes allow you to cut off an excess layer of mortar, for example, coarse sagging.
After this mark, the surface will be erased, and it will become harder to work, and the speed will disappear, the quality of the surface will begin to deteriorate, because the sticking solution, from which there will no longer be a saving mesh on the canvas, will make puffs and stains on the wall, the grouting of which will require longer friction such a grater. So at about 40 square you will have to go for a new grater so as not to run empty.
How to use a float to sand walls - step by step diagram
Step 1: Selecting Sandpaper for the Job
The work of grouting putty is carried out not with ordinary sandpaper, but with special meshes with an abrasive coating. They are specially created for our instrument. Like regular sandpaper, the mesh has different cell sizes and, accordingly, the density of abrasive coating. When choosing, first of all, take into account the composition of the putty with which your walls are finished; for soft putty, you can use smaller cells; for hard putties, on the contrary, larger cells with a massive emery coating are suitable.
Step 2: Correct installation of the mesh on the grater
First of all, the mesh or sandpaper must be well stretched on the working surface; in our case, a grater equipped with a nut fastener for grinding allows this operation to be carried out without difficulty. In order to ensure tension, initially use a knife or scissors to make an incision on the mesh or sandpaper opposite the mounting bolt. Thanks to the cut, the skin will fit under the fastening bar and will stay tightly there. When the first side is secured, you need to make the same cut on the other side and pull the skin onto the work surface as tightly as possible.
Step 3: Cleaning the walls, some subtleties
An important factor for achieving a high-quality result of wall treatment is the correct movements made by the master and, of course, sensitivity when pressing during work. First of all, you shouldn’t press the grater too hard; if you put too much pressure on the surface to be treated, you can simply create unnecessary “pits” that will have to be filled with additional putty. As painters say: you must feel the rhythm of the work. Also, when cleaning walls, it is necessary to make sweeping circular movements and figure-of-eight movements in order to immediately cover a significant area for processing. By clearing small areas of the area, we risk making holes on the wall with our own hands, which is strictly not recommended. Of course, high-quality processing may not be possible right away, but with each new square meter of wall cleared you will improve your skills and catch your individual rhythm in work .
Features of the use of graters and half-graters
Such tools are used for rubbing the wall after applying the finishing layer of plaster (covering). Movements must be carried out smoothly, with even pressure, “drawing” circles counterclockwise. Experts also use other types of movements: up and down, in the shape of a figure eight. Typically, wall treatment is carried out sequentially in small sections. After making the first section smooth, move on to the next.
You need to work on dried plaster, periodically wetting the sole of the tool with water. You can even spread the raw solution over the base with a grater, using it instead of a spatula. To work with decorative plasters such as bark beetles, other techniques are used: they stretch the solution over the surface, creating small grooves. To create a spiral texture, make appropriate movements with a plastic or sponge grater. The drawing will fully appear only after the wall has dried. Next, individual seams and irregularities are polished with a trowel.
Surface Preparation Tools
Let's start with the fact that walls and other bases need preparation before plastering.
What to do:
- remove paint, wallpaper, and previous coating from the wall (in whole or in part);
- repair chips and cracks;
- remove stains;
- cut down the ledges;
- embroider seams in stone or brick masonry;
- make notches on the concrete;
- clean the surface from dust;
- prime.
Preparation for plastering also includes measuring work, installing beacons, reinforcing or filling shingles.
Old finishes are removed by hand or with power tools.
Hand tool.
From hand tools you will need:
- hammer (possibly a sledgehammer);
- ax (for cutting down sagging, making notches);
- long chisel (beating old plaster, making notches, cleaning masonry joints);
- scraper (for cleaning masonry joints from mortar);
- Troyanka, zubchatka (types of chisels with teeth on the blade);
- scraping (removing gypsum coatings where access is difficult with other tools);
- spatula (removing wallpaper, paint, loose thin layers of plaster);
- metal brush (cleaning masonry joints, cracks, scratching the surface of bricks, cleaning rust from plastered metal products);
- jointing (sampling mortar from masonry joints);
- cloth-based sandpaper (removing thin-layer mortar).
Of the hammers, which differ in weight and shape of the impact head, the most suitable for plastering work are:
- cam (up to 1.5 kg, wide impact surfaces) for striking a tooth, chisel or treble;
- bush hammer (weight of the toothed head is up to 1.5 kg, the shape of the teeth is pyramid-shaped) for making notches, removing paint coatings, sanding, cutting down small protrusions;
- plaster hammer (weight from 400 grams, the head is not symmetrical, one half with a striker, the other with a pick) for cutting down old plaster, making notches, filling shingles.
Power tools for preparing walls.
It is better to prepare large surfaces using power tools with replaceable attachments:
- hammer drill (for installing dowels, and with an attachment in the form of a wide chisel, suitable for beating old plaster);
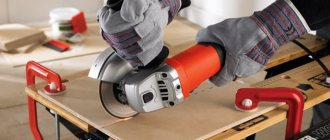
- a grinding machine LSM, PShM or angle grinder (angle grinder), simply a grinder (useful for cutting old coating into squares);
- an electric drill with a bumper function;
- vacuum cleaner (to remove dust).
To carry out measurements and markings for placing beacons, use:
- plumb line (with cord);
- building level (bubble);
- roulette;
- squares (metal and wood);
- metal ruler;
- marker or pencil;
- long strip with a smooth side edge;
- nylon cord (useful for measuring and installing beacons).
Separately, it is necessary to mention the laser level, with the help of which marking, measurements, installation of beacons and quality control are performed faster and easier.
You may also need:
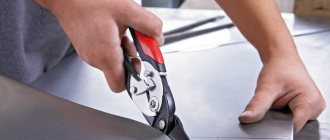
- a screwdriver or screwdriver for screwing in self-tapping screws before installing beacons or for taking measurements.
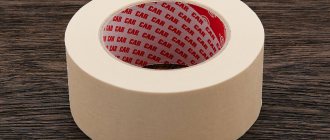
- scissors or a retractable construction knife (for cutting sickle tape, masking tape and other materials);
- Maklovitsa brush for wetting the surface, sweeping away dust, priming;
- roller (preferably foam) for applying primer.
Types of materials used to make tools
All existing plaster trowels, regardless of design and specific purpose, are made from the following materials:
1. Wood is a traditional material from which plaster trowels have long been made. But wood, in addition to its advantages - cheapness, ease of processing, also has serious disadvantages - it quickly wears out, roughness appears on it.
Because of this, the solution sticks to the working surface of the trowel and is applied unevenly. Moreover, during use, wood absorbs water from the solution and swells. And later it dries out and cracks. As a result, the plaster trowel becomes completely unusable.
Yes, they are light and when using them, your hands do not get very tired, but working with a grater involves quite significant loads on both the handle and the working sole. As a result, very quickly, after a couple of meters of wall area, the handle of the foam trowel breaks off, and its sole becomes covered with clearly visible scratches and dents.
3. Rubber - this material can be used as a component of the handle (this makes working with such a tool more convenient), and as a sole - here it is superior to both wood and polystyrene foam, but is still not sufficiently resistant to abrasion.
4. Polyurethane - the trowel can be made entirely of it, or only its working surface. This material is characterized by high wear resistance, water resistance, low weight and reasonable price.
5. Plastic is a good material, but its durability, especially fragility (primarily the grater handles) can vary greatly depending on the manufacturer.
6. Metal - most often a variety of aluminum alloys are used here. Such a tool is always very durable, can withstand significant mechanical loads, but at the same time is lightweight and durable. The working surface of such graters is replaceable. It is secured using a special clamp and a wing nut. Most often, an abrasive mesh is used with metal graters.
The listed materials can also be used in combination with each other. In addition, a sponge of different densities, felt, felt (for polishing) or a special mesh with an abrasive coating and cells of different sizes (for rough abrading of solution deposits) can be used as a replaceable working surface.
What is this?
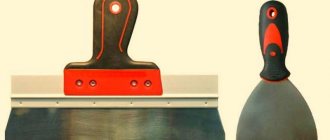
A plaster trowel is an auxiliary tool through which various compounds are applied to surfaces and preliminary leveling of the mass over the surface is carried out.
An experienced master can use such a tool to apply, distribute and smooth the mixture. Externally, the product is a rectangular block or board with a comfortable handle, the ends of which are fixed at the base. It is not a construction float, although the external resemblance is obvious. Unlike a grater, a trowel (also known as a trowel) has smaller dimensions.
2
Types of plaster floats
After applying the finishing material to the wall, it needs to be prepared for gluing or painting, made smooth and sanded, for which the following tools are selected.
Grater. If the dimensions in width do not exceed 80 mm, then it is used to level small areas, usually located near windows, doors, and under window sills, since it is more convenient to work with a short blade in such places. A 120mm wide tool is better suited for working in open areas. Based on the characteristics of the manufacturing material, many builders choose polyurethane trowel .
Foam products are of poorer quality and do not last long. Very often the handle breaks off, and the canvas itself is subject to rapid abrasion, which causes it to begin to stick to the base. But the cost of such a tool is lower. Therefore, it is used by beginners to practice technique when leveling small surfaces.
A more profitable solution is a polyurethane plaster trowel. Its large dimensions are perfect for effectively applying the solution to large areas and its further high-quality leveling. The tool can be made of wood, a fairly durable material. Therefore, it has a long service life, but over time the canvas becomes covered with longitudinal small grooves and begins to stick to the applied composition. When worn away, the corners lose their clear outline, which negatively affects the quality of processing at the junction of two walls, window sills, door and window openings.
The use of a sponge trowel at the finishing stage is justified when applying plaster using special methods, after which the surface acquires a unique, inimitable appearance. Typically its body, made of lightweight aluminum, has an ergonomic design. The grinding surface is made of sponge of various structures, soft or dense. Therefore, during the work it does not leave marks or scratches. It must be handled with care, avoid mechanical damage, and do not subject it to excessive loads.
Even after the work of professional painters, sagging or depressions are found on the surface. Therefore, to sand the walls to zero, a grout float with meshes specially designed for this case is used. They are attached to the body.
Depending on the composition of the applied material, meshes with different cell sizes and abrasive coating densities are offered. The fine-mesh structure of such nozzles is well suited for processing soft putties, while the larger one is suitable for hard ones.
Plaster graters
Today, you can find a wide variety of plaster floats on sale; their types are numerous, and the materials from which they are made can be different. And if previously plaster floats were made mainly from a piece of flat board, today there are: foam, sponge, polyurethane floats, rubber, metal and many others.
In addition, some novice plasterers confuse a plaster trowel with a trowel, but this is a mistake, since a trowel is needed for applying the plaster mixture, and a trowel, on the contrary, is for rubbing it after drying.
Types of trowels for plaster
As mentioned above, today you can buy trowels for plaster of various types, made from the following materials:
- Foam plastic;
- Polyurethane;
- Trees;
- Metal;
- Latex, rubber and other materials.
In this case, which plaster trowel should you prefer? In fact, this is not a simple question, since everything largely depends on the skills and experience with this tool. And if an experienced plasterer is given even an ordinary wooden trowel, then it will not be difficult for him to perform the most difficult work with it.
The very working surface of polyurethane floats is soft, which, unlike a wooden surface, makes it more convenient and easy to perform plastering work with it.
In addition, there are also plaster trowels made of foam, sponge and rubber. You should know that sponge plaster floats are intended for decorative work, and plaster floats made of rubber will allow you to level the surface of the walls as smoothly as possible.
The most common budget option for plaster floats is made of polystyrene foam. The service life of a foam grater is short, since its surface does not have sufficient strength. However, the low price did the trick, and foam trowels for plaster are the most popular today.
Origin story
This tool can be made with your own hands from wood.
The main purpose of the tools, united under the general name “plaster grater,” is to create a smooth surface for finishing walls.
Previously, builders and finishers made this tool themselves from wood. For these purposes, a wooden beam was taken, from which a flat plane 1-2 cm thick was cut out with a handle located on top, but such a product could last for a fairly short period of time, since the natural material, in this case wood, quickly absorbs moisture even with temperature changes or It just might crack after it dries.
How to apply it correctly?
Primer of walls
Thumbs Up Tip! It is recommended to work with a partner, as the mixture hardens quite quickly. It is best to divide the responsibilities: one person applies the mixture, the other rubs the design. The amount of pressure applied and the style of movement will determine the final look of the drawing, so it is better to have the same person erase.
This video will tell you in detail about the main methods of applying “bark beetle” to the wall.
Tools
To work you will need the following tools:
- Container for solution.
- Spatulas.
- Plastic grater.
- Electric mixer with attachment. Tools for bark beetle plaster
How to make a solution with your own hands?
Mix the dry mixture with water at the rate of 1 kilogram of mixture per ~ 200 milliliters of liquid. The water temperature should be within +15…+20 degrees. The instructions on the package will allow you to achieve the desired consistency as accurately as possible.
DIY plaster solution
Mix the solution with a mixer, gradually adding water until the consistency of thick sour cream is obtained. The mass should not drain from the spatula. The mixture settles for about 15 minutes and is stirred again.