03/23/2021 13,737 Ignition system
Author: Ivan Baranov
To start the power unit, high-quality ignition of the combustible mixture is necessary, for which a high-voltage charge is used. It is this charge that allows the magneto to be produced. You can learn more about the operating principle of this device and in what cases magneto repair is necessary from this article.
[Hide]
Capacitor faults:
- broken leads
- breakdown
- poor contacts of the capacitor body with ground and the insulated conductor with the breaker terminal
These malfunctions are determined on an ignition test device (IPD) or using a warning lamp. A test lamp connected in series with the capacitor and connected to a 220 V AC network does not light up when the capacitor is working, but after disconnecting the capacitor from the network, a spark appears when bypassing. If there is a break in the capacitor, the lamp does not light and the capacitor does not charge. When the capacitor breaks down, the lamp lights up. The damaged capacitor is replaced.
Diagnostics of technical condition
Diagnostics is carried out by performing the following procedure:
- The first stage is connecting the high-voltage cable to the voltage terminal.
- The second end of the cable is constantly held at a distance of about 0.5-0.7 centimeters from the device body.
- Maintaining position near the wire. Next comes a sharp turn of the rotor in the direction of rotation. The spark should jump as a result of this movement; if everything is in order, the magneto is adjusted correctly. If there is no spark or is too weak, there is a high probability that the installation requires a malfunction check. If necessary, adjustments are made.
Common malfunctions and their repairs
Here are just a few of the most common problems magneto owners may encounter:
- Failures during sparking. There are several reasons for this situation and ways to resolve the problem. Possible problems include: contacts burn, oxidize; the gap adjustment is violated; the lever cushion at the breaker is worn out; The capacitor element was broken. If an element fails, it is completely replaced. When the problem is in the gaps, they undergo additional adjustment. Contacts are also changed or completely cleaned. How to set up the magneto is described further.
- Complete lack of spark. This often happens because the transformer wiring has broken, there has been a short to ground, or the insulating layer that supplies the high-voltage cable has broken through. If problems arise with the transformer, the unit must be replaced. You can eliminate the short circuit itself or change the cable when an insulation breakdown occurs.
- A broken capacitor is the most likely cause of a spark that is too weak. In this case, the part must also be replaced.
Candle and armored wire
It is recommended to abandon the caps used for armored wires. It is better to use an alligator clip.
The armored wire itself also requires additional testing. This concerns two elements:
- Fastening in the mounting socket.
- Base for a candle.
Complete stripping of the wire from each end by 2 millimeters is an excellent reason for inspection and repair. You can check using a different armor wire instead of the one installed initially. If the spark plug is faulty, it is also replaced; the part is not repaired.
Part diagram
Capacitor
It is needed so that the contacts do not burn too much. It consists of two plates and insulation, the role of which is usually played by foil. Everything is rolled into one roll and placed inside the case. In some cases, if the housing is damaged, the capacitors can be adjusted using sandpaper. It is important that the structural parts do not overheat during operation. Adjusting the magneto after this will not help.
Be sure to read: How to make a lift in the garage with your own hands
Sometimes it is recommended to install two capacitors at once, then the operation of the mechanisms will be more reliable and stable.
About breaker contacts
If they become faulty, the first recommendation is to clean the surface using a special flat abrasive plate. The work can be done without problems with a flat file with a fine notch. Cleaning with sandpaper or glass paper will not give the desired result. The contacts wear out too quickly, and in this case a flat surface cannot be obtained.
From time to time, contacts also require cleaning from plaque and adjusting the gaps between parts . The main thing is not to lose a single part during disassembly. The contact spring is subject to malfunction or straightened in the opposite direction.
Coil or transformer
It is easy to repair the tractor magneto for such parts. This same part of the engine rarely fails; it can operate uninterruptedly for a long time. If the part has become unusable, then it must be replaced with exactly the same, but working model.
Rotor
The main thing is that it does not crumble or break during operation. From time to time the rotor can become demagnetized. If the part really turns out to be damaged, then it is replaced. The main thing is not to forget to remove metal fragments, sometimes they remain inside the magneto housing. Bearings require separate inspection and lubrication.
Breaker faults:
- burning or oxidation of contacts
- short circuit of an insulated contact to the body
- cam beat
- change in contact gap
- broken contact spring
Oxidation of the contacts is facilitated by a faulty capacitor. If necessary, clean the contacts with fine glass sandpaper. Worn tungsten contacts are replaced with new ones. The normal gap between the contacts should be within 0.2...0.25 mm. Defective contact reinforcement springs are replaced with new ones.
The insulation strength of an insulated contact is checked for breakdown at a voltage of 380 V.
Test bench construction
Let's check the existing magneto for operability and adjust it properly. To ensure the efficiency of the work performed, a drive will need to be designed for the magneto. We will make a desktop test stand. To carry out this operation we will need:
- Reversible drill with a special bracket for installing it on the surface of a table (workbench)
- Wrench - 11mm tube or socket (Eleven!)
- Phillips screwdriver
- Flat screwdriver
Screw the special bracket to the table surface. Insert a reversible drill into it and secure it. If there is no bracket, you will need an assistant to set the drill in motion. And this help may not be enough. So you better arm yourself with this bracket. Using the rotation direction lever of the drill, set it to rotate clockwise (if we hold the drill by the handle, the chuck should rotate clockwise). Set the drill to minimum speed.
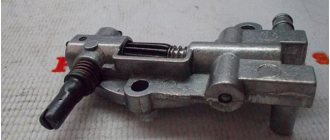
Remove the magneto from the engine housing along with the armor wire and spark plug. Remove the butterfly (the blade by which it is driven by the engine) from the magneto. To do this, use an 11mm wrench in the form of a tube or use a 11mm socket. Unscrew the magneto butterfly fastening nut and, without losing the key, remove the butterfly. Next, clamp the magneto into the drill chuck by its conical shaft (from where you just removed the butterfly). If necessary, a block must be placed under the magneto body to prevent it from turning relative to the axis of rotation. Make sure that the magneto will rotate in the desired direction if you turn on the drill (the direction indicator is carved on the magneto body).
And remember! Do not allow high speeds and do not move the armor wire away from the magneto body by more than 10 mm - this threatens the failure of the high-voltage winding of the coil! And don’t twist for too long! Only for a short time!
When you turn on the drill, the magneto shaft begins to rotate and bring the structure into working condition. Lean the spark plug against the magneto body and see how high-quality a spark is formed on the spark plug electrodes. If the spark is weak, try disconnecting the spark plug and remove the tip from the armor wire. Strip the end of the armor wire 2mm. With the drill turned on, look at how effective the spark is by holding the magneto body close to it. Try changing the speed to a higher one (closer to the speed of the motorcycle engine). On my magneto without improvements, the spark flashes 7-10 mm! The spark should be white-blue, without slips. Produced with a characteristic crackling sound. If you are okay with this, you can immediately move on to Part 2 of the article.
If you are not satisfied with the operation of the magneto (the spark is weak, the spark skips, the spark occurs every other time, and when the speed increases, the spark disappears altogether), we will adjust the magneto.
Magneto transformer malfunctions:
- insulation damage
- short circuits and breaks in the windings, leading to disruption of sparking
- nicks and rust on the core support surfaces
Breaks in the windings are checked using a test lamp. In the absence of external damage, the magneto transformer is checked for uninterrupted spark formation on the KI-968 stand.
Before testing the repaired magneto, check the correct assembly, the presence and tightening of fasteners, the smooth rotation of the rotor and sparking when rotated by hand.
In the assembled magneto, the angle of rotation of the rotor from the neutral position until the breaker contacts opens, the gap between the breaker contacts and the force transmitted by the spring to the breaker contacts are checked and adjusted. The magneto is also checked for uninterrupted spark generation, the condition of the high-voltage insulation, the correct alternation of sparks and the characteristics of the starting accelerator or ignition timing clutch.
How does a magneto work?
The device diagram will have the following description:
- Opposite the magnetic core shoes are the pole pieces from the rotor.
- The transformer core causes the power lines from the magnets to begin to close.
- When the magnet is in a 90-degree position during rotation, the main element becomes the gap between the tips and shoes.
- It is imperative that the lines of the magnet intersect with the turns of the windings of the transformer. Due to this, the electromotive force acquires induction. Ignition is also used in the processes.
The magneto distributes the current,
the emf acts on the device so that when closed contacts are used, a magnetic flux appears at the transformer core. As a result of opening the circuit, the current disappears from its primary type. Because of this, the magnetic field is sharply reduced.
Induction of EMF up to 25,000 Volts occurs when using a secondary winding. Self-induction of EMF up to 300 V will appear only if you open the contacts from the primary winding. The primary type circuit produces a self-inductive tone, which causes the magnetic current to disappear more slowly. Such situations are characterized by a decrease in the EMF for the secondary circuit.
Parts often begin to burn when sparks appear at the contacts. Connecting a capacitor to the structure is carried out in order to avoid such consequences. Then there is no spark between the contacts in the magneto, which is described above.
The rotor can be easily rotated to a 90 degree position. Afterwards the primary circuit is opened with a breaker. This moment is called the magneto outline.
Device diagram
The location of the transformer part inside the magneto on the tractor is characteristic. The part is pressed onto the shaft, helping to create a high voltage current. Another important part of the design is the rotor, which constantly performs the function of a permanent magnet rotating on two bearings. The cam is attached to the front of the rotor shaft. On the back there is a so-called leash. How each part works is easy to understand.
Be sure to read: Remaking the steering wheel at MTZ
When the magneto device is mounted on the engine, the wire is supposed to fit into the groove of the gear. The case is closed with a corresponding cover, which is used as a base for installing contacts from the breaker and terminals at the transformer windings. The breaker itself is also closed with an easily removable lid.
The primary winding must be connected to a moving contact that is insulated from the housing. The other end is connected to the contact, which remains motionless. The secondary winding must also be connected to the secondary winding at one of the ends. The spark plug works on a central electrode that connects to the other end. The side electrode of the spark plug is also connected to the magneto and starter housing.
Magneto setting
Each device has its own operating characteristics. They must be taken into account when setting up the mechanism.
For walk-behind tractors
When walk-behind tractors must operate uninterruptedly, the use of tractor magnetos will be the optimal solution. M-151 or M-137A are acceptable device options that can be installed in any conditions. Installation is carried out on the engine using flange connections. It is enough to use three small pins.
M-151 is a two-disc variety that contains the following components:
- Start accelerator.
- Housing supplied with distributor.
- Breaker plate.
- Transformer part.
- Roof.
- The part with the rotor.
- Frame.
Sufficient speed is transmitted to the rotor thanks to the starting accelerator. For this purpose, separate impulses are used. Starting and constantly rotating the engine results in a strong spark.
Such a device allows us to solve the problem associated with the fragility of the battery part with which walk-behind tractors are supplied. If you buy special adapters in advance, it will be easier to turn your idea into reality. The design is created independently or ordered by contacting specialized workshops. The adapter is created using autogen. Steel sheets with a diameter of up to 230 mm are used. The principle of operation does not change because of this.
In the case of MTZ tractors
M 124-B1 is a type of device that usually complements tractors. The magneto rotates to the right, 27 degrees being the angle at which the ignition is advanced. The PD-10 starter coupling half sets the mechanism in motion.
A two-contact magneto, along with any variety, includes the following components:
- Transformer.
- Intermittent.
- Rotary.
The rotor part is involved in the creation of alternating current. The energy is then sent to a transformer to raise the voltage to its maximum level. One of the last stages is the transfer of current to the breaker. Because of this, strength decreases. The magnetic current decreases. A spark discharge is created in the electrodes of the spark plugs, and the hot mixture is supplied with appropriate ignition. It's easy to figure out how to adjust the device.
Be sure to read: Belt for the Neva walk-behind tractor
Video: How to Adjust the Carburetor on a Stihl Petrol Mower
Adjusting the carburetor for working on a chainsaw
For the independent version of the carburetor, you must become familiar with its structure and indicate the procedure for performing the work that is carried out to correct the parts responsible for the proper functioning of the components of the device and its related parts.
It is necessary to carefully process objects by system parameter and determine whether these characteristics are very acceptable values.
About carburetor design
The carburetor is used to mix the fuel mixture with air while maintaining clearly defined proportions. If clear doses are not followed, motor health is at risk. When a lot of air is introduced into the air while the component is being mixed and the fuel remains low, the mixture is considered "poor".
Oversaturation should not be allowed, since a large amount of fuel compared to air can also cause malfunctions or damage to the engine. Carburetor adjustment is necessary not only before initial implementation, but also when identifying any differences in its operation. Before using the chainsaw, be sure to start it.
Carburetor spare parts
The carburetor design contains a standard set of parts, but may vary slightly depending on the manufacturer. Components:
- Foundation . This is a special tube that visually resembles an aerodynamic design. Air passes through it. In the transverse direction, the flap is located in the middle of the pipe. You can change your position. How to adjust the carburetor, How to change the trimmer piston. The more it is pushed into the passage, the less air gets into the engine.
- diffuser _ This is the designated part of the tube. Here's what it looks like to set up the carburetor on your chainsaw for installation. Increases the speed of air supply in the segment from which the fuel comes.
- fuel supply channels The fuel mixture is contained in the float chamber, then passes into the injector, from which it enters the injector.
- Float chamber . This is a separate structural element that resembles the shape of a tank. Designed to maintain an optimal level of fuel fluid before entering the air duct from which air comes.
Don't know which chainsaw to choose? Read our article.
Are you looking for cheaper, but reliable and time-tested models? Pay attention to Russian-made chainsaws.
Or research from foreign chainsaw manufacturers such as Calm.
What needs to be configured
Every carburetor owner should have the necessary tools to set up this system. There are three adjustment screws on the device. They have their own markings:
- L. Low speed correction screw.
- H. screw for high speed adjustment.
- T. regulates idle operation, in most cases it is used for experiments.
Related Posts
Chainsaw air filter
Before setting up the carburetor, you need to prepare the device:
- The engine warms up, i.e. starts approximately 10 minutes before repair, and turns off when starting work (see How to start a chainsaw).
- The air filter has been checked and cleaned.
- The chain stops by turning screw T all the way (see Chain oil).
For safe repairs, prepare a flat surface on which to carefully place the device and unscrew the chain in the opposite direction. Tachometer required. He detects a malfunction in the carburetor. When turning the screws, the sound should be perfect and absolutely smooth. If squeaky notes are noticed, the mixture is oversaturated.
Setup instructions
Carburetor tuning is divided into two main stages. The first one is called the main one. How to Adjust a Brush Carburetor Adjusting the Carburetor at Full Speed. how to adjust the carburetor by looking at the spark plug:. This is done with the engine running. The second is done when the engine is warm.
To successfully complete the carbon adjustment process, you will need to read your specific model's manual to determine advanced device configuration features.
First stage
The adjustment screws for the highest and lowest speed should be clockwise until the highest resistance is reached. When the screws reach the stop, they should be turned and left 1.5 turns.
Main stage
The engine starts at medium speed and warms up for about 10 minutes. The idle speed adjustment screw should be clockwise. Here's what it looks like: How to adjust the carburetor on a chainsaw. It is only available when the engine is running stably. You must ensure that the chain does not move during this process.
Chinese brush carburetor adjustment. Practice.
Correct installation of the carburetor
determined by engine power and spark plug color. Tune.
How to install a carburetor on a hedge trimmer
My first channel: Free consultation.
When idling, the engine may stop (reason here). In this case, immediately adjust the adjusting screw clockwise until it stops. Sometimes the chain starts to move. In this case, turn the adjusting screw in the opposite direction.
Acceleration test
If this does not happen or the speed increases too slowly, use the screw marked L. It rotates counterclockwise. Moderate movements should be observed as the rotation should not exceed 1/8 of a full circle.
Maximum speed
Increasing this value will cause the device's engine to stop, which will cause problems in the ignition system. The rotation of this screw should take into account the ignition processes of the device. If you have the slightest malfunction, the maximum speed should be reduced.
The final check is simple
Before this procedure, a complete adjustment of the carburetor components is required while operating at maximum speed. Then make sure the device is in standby mode. How to properly clean the muffler on a Huskvarna 128 r trimmer, very often the problem of loss of electricity lies on the surface, and people, without knowing it, try to replace the carburetor on a Huskvarna. When the correct parameters are achieved during adjustment, you can see that the carburetor design closely matches the following criteria:
Related Posts
- When idle is engaged, the chain does not move.
- Even by lightly pressing the accelerator, the engine accelerates at an accelerated pace. With a gradual increase in pressure, it can be seen that the engine speed increases proportionally, reaching the maximum permissible values.
- When the engine is running, you can compare its sound to a four-stroke unit.
If there are violations in the specified parameters or the device is not fully configured, you must complete the basic setup phase again. A story about setting up the carburetor body of a chainsaw. The chainsaw has a breathing apparatus. Sometimes actions are not performed correctly. In this case, the device may fail due to the loss of the correct node parameters. In this case, you will need to consult a specialist.
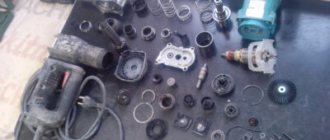
Remove the carburetor if parts need to be inspected or repaired.
The design of different carburetor models is almost the same, so you can use a standard design when working with them. All items should be carefully removed and then removed in the following order so that you can successfully place the items in place at the end of the renovation work.
Removing the Top Cover
- The top cover has been removed. To do this, unscrew the 3 screws in a circle.
- Foam is also removed as the top of the filter conducts air.
- The fuel hose has been removed.
- It immediately displays the drive thrust.
- The cable end is disconnected.
- The gas hose can be completely removed by pulling it away from the fitting.
To finally prepare the carburetor for major repairs or replacement of the smallest parts, you must carefully disconnect it from the main system . Sometimes this requires further disassembly. Carefully unscrew the components and secure them in groups, as these small parts are easily lost.
Instructions for the Chinese
To properly adjust the carburetor's carburetor, you must first remember the car's factory settings and then turn on the engine. In the future, you will have to leave it for a few hours to fine-tune your own settings. Sometimes the work is done once after ten minutes of engine operation, but many Chinese models require special monitoring.
Chinese chainsaw model
Adjustment procedure:
- Events start with idle time . Using the adjusting screws, you need to achieve a systematic speed of the engine, so you must first let it run at low speed. A deviation from the norm is the movement of the chain on the bar. In this case, adjust the extreme position of the outermost screws so that the chain remains stationary.
- Switch to medium speed . Sometimes the engine smokes at the same time. This defect can be corrected by tightening the screw to supply a thinner fuel mixture.
In this case, the smoke will disappear, but the engine speed will increase. The adjustments should be adjusted to the point where the engine turns when the throttle is applied, without any sudden jerking or interruption.
Watch the video clearly:
Conclusion
In order for the chainsaw to work correctly, it is necessary to carry out careful work to adjust the carburetor in exact accordance with their priority. Here's how to adjust the carburetor on How to adjust the needle. If the device has any malfunctions, you must completely disassemble it yourself. How to Adjust the Carburetor Screw N Set the speed as on different braids. In most cases, any parts that become unusable should be replaced.
Thanks to constant checking of the quality of carburetor settings and timely actions to improve its performance, there are no problems with the chainsaw.