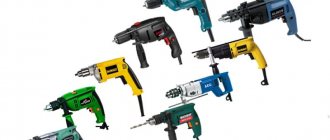
An electric drill is an irreplaceable thing that almost every man has. People who regularly use this tool periodically encounter it breaking down. If it is not possible to take the device to a workshop, you will have to do the repairs yourself. In this case, you need to familiarize yourself with what the electric drill circuit looks like and understand the repair tips.
An electric drill is a device that is found in almost every home.
Possible tool malfunctions
First, you need to familiarize yourself with the main types of electric drill faults. They can be:
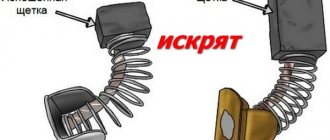
- Electric. Most often, breakdowns are related to electronics. There are times when the tool begins to spark due to overload. Some Bosch PSB models stop functioning due to the brushes grinding down.
- Mechanical. Sometimes bearings or gear mechanisms fail. In such situations, only complete replacement of broken parts will help.
Additional Information! The main signs of mechanical malfunctions include humming and a decrease in rotation speed.
Algorithm for finding and eliminating electrical failures
When searching for a breakdown, it is recommended to follow a certain algorithm that will help you quickly find the fault:
- If the device does not turn on completely, you need to open the case and check the cable connections. Perhaps one of them has become detached from the electrical circuit and therefore the device does not turn on.
- If everything is fine with the wires, you need to check the switch toggle switch. In some devices from Bosch and Makita, traces of oxidation appear over time and the device stops working.
- When inspecting the device, special attention should be paid to the brushes. They must press securely against the rotor.
Important! During inspection of the electric drill, do not connect it to the electrical network. Especially if the wire contacts are being checked.
Regular on/off button
Repairing or replacing a drill button is considered a simple process, but you need to have certain skills - if you open the side wall carelessly, many parts can fly apart in different directions or fall out of the case.
As written above, the button may not function due to oxidation or burnt contacts. To fix this, you need to disassemble it, following the following order.
- Carefully unhook the protective cover latches and open it.
- Remove carbon deposits on the contacts with alcohol, or clean them with sandpaper.
- Then assemble and check.
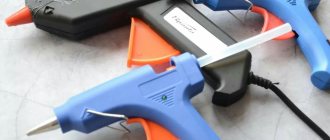
Necessary tool
An ohmmeter is an indispensable thing for determining the causes of malfunctions.
Before you begin repairing an impact drill, you need to familiarize yourself with the list of tools that may be needed:
- pliers;
- ohmmeter;
- grinding sandpaper;
- vice;
- straight and Phillips screwdriver;
- spanners.
A vise may also be useful for securing some parts.
Types of drill button connection diagrams
There are two types of electric drill connection diagram. It is necessary to familiarize yourself with the features of each of them.
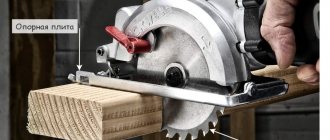
Wiring diagram for a shovel drill switch
The switch circuit will help you correctly connect the button to the tool.
As a rule, such a circuit is used by craftsmen when repairing a broken tool. With its help, you can check all the functional features of the switch. It also allows you to carry out repairs after determining the cause of the breakdown.
Most manufacturers supply a circuit diagram for connecting the switch along with the instructions for the product. However, there are times when it is not there. In such situations, people have to search on the Internet on their own. To find it, you will have to find out the exact model of the device in advance.
Circuit with reverse and speed controller
The connection diagram for a switch with reverse is used to connect a reverse button.
Some models from manufacturers such as Sparky or Interskol are equipped with switches with a built-in speed controller and reverse. It is quite difficult to understand such structures and therefore it is not always possible to determine the exact cause of their breakdown.
If such a button fails, it is recommended to simply buy a new one and connect it by referring to the diagram.
How to determine whether a button is working?
This requires a regular multimeter (tester) and a screwdriver.
READ How to Remove the Makita 2470 Rotary Hammer Mode Switch
The diagnostic process itself is performed as follows (using the general drill model DWT SBM-500), for example:
- Remove the drill body cover by unscrewing several mounting bolts;
- Remove the two screws on the power cord clamp;
- Remove the start button assembly, turn off the reverse switch (it's usually mounted on clamps that are just long enough to bend a little). The reverse itself is sold separately; if necessary, it can be replaced;
- Take a multimeter and set the switch to the beep position. Close the contacts of the tester to make sure that it works (the device should beep);
- Call button. To do this, place one contact of the tester in position 2 (it should be in contact with the wire), the second contact on the screw that presses the 220 volt wire. When the button is pressed fully, the device should beep. If this does not happen, the button does not work.
How to replace a button?
To do this you will need a flathead screwdriver and a regular pin or thin awl.
- The process of replacing the button itself is performed in the following sequence (using the example of DWT SBM-500):
- Unscrew the two screws holding the power cord and remove it;
- Insert the awl into the hole in the wire coming from the stator, remove the wire along with the awl.
- Follow similar steps to remove the second wire. If you are afraid of mixing up the wires when connecting a new button, we recommend drawing up a schematic diagram for connecting the drill’s power button;
- Take the new button and connect the power cord wires to it in accordance with the diagram. Then connect the drill to the button block. The wire from the stator is simply inserted into the holes until it stops;
- Attach the back button to the device;
- Place the device in place in the drill body, carefully lay the wires, press the power cord with two screws;
- Close the drill body cover and perform the test.
VIDEO INSTRUCTIONS » alt =»»>
Connecting a drill button with a speed controller
Many modern drill models, in addition to reverse, have a built-in button for adjusting the motor speed. This feature is very useful because it allows you to set different tool modes when performing different operations.
As for replacement, the whole process is no different from that described above. All you have to do is buy a new button for a variable speed drill and replace the old one according to the instructions.
By the way, if you want, you can always put a speed control button on a regular drill. Simply select a unit that suits the shape and size, as well as the appropriate power of the tool.
Source
How to connect a button yourself
Many people are interested in how to properly connect the power button, since it is impossible to connect a drill without a button. This is done as follows:
- Disconnecting the switch.
- Cleaning darkened and rusty terminals from carbon deposits using sandpaper or alcohol.
- Replacing the speed controller if it is faulty.
- Assembling the button and its connection, according to the diagram of an electric drill with reverse and speed control.
Important! Before removing and connecting the button, you need to make sure that the electric drill is not connected to the outlet.
Checking the electric motor
Breakage of the stator or armature of a drill can happen for various reasons. Most likely, this was caused by non-compliance with the operating rules of the device. For example, in many cases the tool is simply overloaded, working without breaks. In this case, the engine wears out much faster.
The second reason is usually the low quality of the winding wire, which is often used in budget products. Cheap drills break much more often than more expensive ones. Repair is carried out in this case using special tools.
As you can see, if you have an exact diagram of the device, you can repair a drill yourself. This type of work will not take much time if done carefully.
Good day to all! A button flew off the Interskol DU-13/650ER electric drill. I bought a new one in the Interskol store, they sold it as specially for this model, I paid 400 rubles, I came, disassembled the drill, but I couldn’t connect it. I connect the wires into the same holes as in the old one, but apparently the circuit is slightly different, and the drill does not turn on. The tester determined that the holes for the short circuit-open wires are in a different place than on the previous button. then where should the other 4 be connected? Maybe someone has encountered this, please tell me. Thank you!
An electric drill is an indispensable assistant in all types of home repairs: it can be used to perform a number of tasks from mixing paints, wallpaper glue to its main purpose - drilling various holes. The product's power button wears out quickly and has to be repaired or replaced with a new one quite often. To carry out this rather simple operation, the user needs a drill button connection diagram and knowledge of the most common malfunctions of this important part.
Checking the electric motor: causes of breakdowns and repairs
Drills, like many rotary hammers, often stop working due to motor failure. There are two reasons why it may fail:
- Incorrect use. Some people often overload the devices and therefore the motor stops working. In this case, it is easier to purchase a new drill.
- Bad coil wire. Most often, this problem occurs when using budget models. It is better not to replace the wire yourself. This is a job for professionals.
Regular on/off button
Repairing or replacing a drill button is considered a simple process, but you need to have certain skills - if you open the side wall carelessly, many parts can fly apart in different directions or fall out of the case.
As written above, the button may not function due to oxidation or burnt contacts. To fix this, you need to disassemble it for cleaning, following the following procedure.
- Carefully unhook the protective cover latches and open it.
- Remove carbon deposits on the contacts with alcohol, or clean them with sandpaper.
- Then assemble and check.
If everything works fine, it means the problem was in the contacts, otherwise the button needs to be replaced.
You should know that the special layer that is applied under the rheostat slider during manufacturing often wears off - in this case the button also needs to be replaced.
Quite often, the drill button connection diagram is used to check the functionality of the entire structure: only if it is available, can partial repairs be made or the button be connected correctly if it is replaced. The diagram should come along with the product’s operating instructions, but if for some reason it is not there, then you can search on the Internet.
How to replace brushes: work in a couple of minutes
The brush holder is removed when replacing brushes.
When using old models of Soviet IE drills, people are often faced with the need to replace brushes. To do this, you need to disassemble the device body and remove the brush holder. The plug is removed from it, then you can remove the worn brushes and insert new ones in their place. After this, the structure can be put back together.
An electric drill, like other tools, can break. Therefore, people who often use such devices should know the main breakdowns and the features of their elimination.
Replacing a button
For the procedure you will need a flat and Phillips screwdriver, as well as an awl. In the absence of the latter, a bag needle or any other thick needle will do. If the model is small in size, then for greater convenience you can also take tweezers.
- Loosen a couple of screws holding the network cable.
- We insert the awl into the stator next to the wire and carefully remove the core.
- We pull out the second cable in the same way.
- If the button is not on the clips, then unscrew the screws and take it out.
- We put the new key in place and connect the wires using an awl.
- We install the block on the drill, not forgetting about reverse.
- Carefully lay the wires and press them with screws.
- Close the casing.
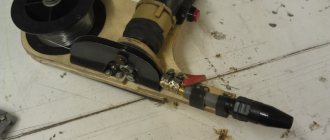
Interskol drill power button
In a good half of cases, the wires coming from the stator differ in color. If they are the same, then they will need to be marked so as not to be confused when connecting.