Stationary crane
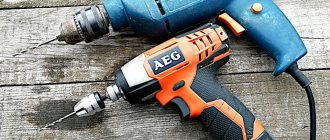
Self-healing of faucets requires a general knowledge of the internal structure. Manual models simply contain a motor inside, stationary ones. more difficult. Consider faucet repair repairs.
Stationary gear mixer
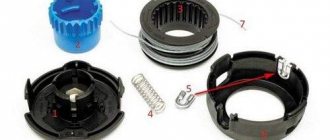
The gearbox looks like an impressive part of a stationary crane. Inside, under the cover, in front of the blade, on a bolted aluminum or plastic housing, there is a set of gears filled with fat. Pay attention to the complexity of the drive, pay due attention to maintaining the gearbox in good condition beyond repair; you will have to change gears, seals, and bearings. We will briefly list the subsoil:
- The main shaft is equipped with a drive gear that selects a pin.
- On top there is a clamping bevel gearbox with a profile cutout for a pin secured to the shaft with an o-ring.
- The main drive is in contact with the side gear, which is directly driven by the motor shaft.
- The bevel gear is pressed by a pair of bevel gears; If necessary, they are adjusted using a screw on the front of the stationary mixer head. Allows you to eliminate play and adjust the vertical position of the oar.
- Finally, the side gear is formed by two wheels sitting on the same shaft. Allows you to reduce the rotation speed while increasing power.
The lateral drive is suspended on two bearings, the structure on the sides is sealed with washers. To prevent the planetary gearbox from filling with oil, the shaft is equipped with a small obstacle. The disassembler can be easily knocked out of the seat with a soft hammer. Planetary gearbox is mentioned. The cover, inside which the gear shaft transmits the movement of the gear rotating around it, is equipped with a paddle. Allows the blades to rotate, rotate around the center of the drive shaft.
It would be appropriate to describe the correct adjustment of the oar position. The head of a typical stationary faucet tilts back, rising out of the bowl. There is a small screw on the hinge on the front side, the tightening of which adjusts the position of the blade. This is important because a stationary faucet often comes with a bowl. The paddle should not touch the material of the vessel; Avoid too much clearance. Americans use tuning (10 cent coin) to adapt. Russian standards offer rubles. The coin is placed at the bottom of the bowl, low speed is turned on. The paddle sometimes has to hurt the money a little. Adjust the height using the above screw.
There is a vertical gap. Check by hand, when switched off, the screw on the front of the stationary mixer head is spinning. After repair, surgery will be required, the bevel gears (at least one) are located on the gearbox.
Stationary mixer
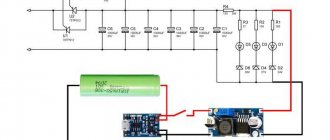
Under the cover is a typical motor switch, the speed of which is controlled by the amplitude of the applied voltage. The power supply is also the control circuit. The board is decorated with a pulse generator controlled by the voltage of the shaft speed sensor. At the slightest deviation of the parameters from the set, the microcircuit changes the repetition frequency of the pulses that control the base of the power transistor. The impressive aluminum heatsink will help you find the item on the board without hassle.
Network filters are stored at the input of the circuit, zener diodes supply voltage to the microcircuits, the power transistor operates from the load generated by a pulse transformer, inductor, the output voltage is rectified and filtered. The amplitude determines the rotation speed of the commutator motor shaft. Voltage is supplied to the windings, the brushes are located in a horizontal plane on the sides. To replace two screws, decorate the housing cover. The stationary tap is disconnected from the network, the plastic plugs are unscrewed using a screwdriver. There will be springs with tassels inside. The graphite is very worn. buy, install new ones. Feel free to grind the brushes to fit the mounting holes; this will not interfere with the correct operation of the device.
The speed is controlled by a thyristor circuit with a feedback circuit at the sparking level. Engine manifold, checking for serviceability. It's not a problem. You need to call each winding. First the stator, then the rotor. As a result, it is very easy to do:
- Disconnect the two wires that supply the motor windings from the control panel.
- Name the resistance between the contacts.
- Rotate the shaft by hand to the next section of the manifold.
- Name the resistance between the contacts.
- Repeat for all sections of the manifold.
The resistance in each case is equal to tens of kOhms. The Ohm order value is respected. further careful study is required. It is almost impossible to restore the rotor windings; we recommend tinkering with the stator. Determine the winding direction, thickness, type of wire, number of turns. After a few hours, you will be able to wind one spool by hand, with due patience.
Engine Speed Control Panel
When kneading gears, constant forces. Delay in taking action. the operating mode of the collector motor will be strange, will negatively affect the service life of the device, will irritate and frighten the owner, the quality of testing will be mediocre. To stabilize the mode, the engine is equipped with a speed sensor. The switching speed usually works in standby mode without testing. As soon as the kneading begins, the moves begin. A true sign of failure of the clock generator control circuit sensor. Checking the first one is simple:
- Remove the cover.
- Disconnect the sensor from the power source, control panel. Locate the three-wire connector.
- Connect the stationary faucet to the electrical outlet carefully to avoid electric shock.
- Engage first gear.
- Measure the sensor output voltage.
- Repeat the procedure for available speeds.
Readings are new every time. The condition is met. The power supply/control circuit of the pulse generator chip is checked. Finally, it is allowed to connect a voltmeter in parallel with the engine and remove the voltage there; if the engine is running, the problem is unlikely to be localized.
The board is repaired in the usual way. Most often, burnt elements are visually observed: they turn black, touch, and the body melts. Damaged capacitors swell. Electrolytic on the top of the cylinder with a cross-shaped groove. In the event of a fault, the capacitor bends outward. A common thing to remove from installation. Check integrity for integrity.
The main types of faults are listed. The microswitch breaks over time. The step speed is adjusted by a mechanical contactor. Disconnect the power board from the stationary faucet, lock it in each position. In addition, it is necessary to measure an insulation resistance of at least 20 MΩ. This is done for a simple reason: incorrectly issuing commands on the power board or controlling a stationary mixer will lead to an unpredictable result. For a long time you can look for a malfunction when there is no breakdown, when at first it is easy to understand the cause.
READ Converting Bosch 12v Screwdriver to Lithium
The mixer device is sometimes supplemented with fuses. It is clear that this is where we must begin. There are fuses that conduct current only in the event of failure of other board elements and those that are part of the motor power circuit. In the first case, to indicate a malfunction of the terminals, turn on the incandescent lamp. it is on, which means the search is ongoing. In the second case, the described technique will not work. Manufacturers replace fuses with low-resistance resistors that burn out if board components fail, while limiting the breakdown current is the best protection. However, the method obviously leads to losses in power supply circuits; Suitable for fuses controlled by varistors.
We hope that now it will not be difficult for readers to fix the faucet with their hands blindfolded. Correct the difficulties. remove the bandage.
Many users prefer to repair small household appliances, which include a faucet, on their own. It really doesn't matter which branded device you use. Brown or Scarlet, its internal structure is quite simple. However, dismantling these simple devices can present some challenges. How to disassemble a faucet if its body is not divided, as, for example, in many Bosch models? Let's try to understand this.
: how to disassemble a bosch 450w mixer
- Remove the cover.
- Disconnect the sensor from the power supply and the control panel. Locate the three-wire connector.
- Plug the stand mixer into the outlet carefully to avoid electric shock.
- Turn on first speed.
- Measure the sensor output voltage.
- Repeat the procedure for available speeds.
Readings are new every time.
The condition is met. The power supply/control circuit of the pulse generator chip is checked. Finally, it is permissible to connect a voltmeter in parallel to the engine and remove the voltage there; if the engine rotates, the problem is unlikely to be localized. The board is repaired in the usual way. Most often, burned elements are visually observed: they turn black, touch, and the body melts. Damaged capacitors swell. Electrolytic on top of the cylinder with a transverse groove. In the event of a fault, the capacitor bends outward. The usual thing. this is to clean up the installation. Check integrity for integrity.
The main types of faults are listed. The microswitch breaks over time. The speed is controlled by a step mechanical contactor. Disconnect the control board for the stationary mixer, lock it in each position. Moreover, it is necessary to measure the insulation resistance of at least 20 mega. This is done for a simple reason: incorrect commands on the switch, the operation of a stationary mixer will lead to an unpredictable result. For a long time you can look for a malfunction when there are no breakdowns, when at first it is easy to understand the cause.
The mixer device is sometimes supplemented with fuses. Of course, here's where to start. Current-carrying fuses are distinguished only in the event of failure of other printed circuit boards and those included in the motor power circuit. In the first case, turn on the incandescent lamp to indicate faulty terminals, which means we continue our search.
In the second case, the described method does not work. Manufacturers are replacing fuses with low-value resistors that burn if the circuit board fails, while limiting the breakdown current is the best protection.
However, this method obviously introduces losses in power circuits suitable for varistor controlled fuses.
We hope that fixing a mixer while blindfolded will no longer be a problem for readers. Solve the problem of. remove the bandage.
Many users prefer to repair small household appliances, which include a mixer, on their own. It really doesn't matter what brand of device you use. Brown or Scarlett, its internal structure is quite simple. However, dismantling these simple devices can present some challenges. How to disassemble a mixer if its body does not differ in appearance, as, for example, in many Bosch models? Let's try to understand this.
READ MORE: Comparison of Samsung Galaxy A10 and Huawei Honor 8A Prime: which is better? | NR
Basic faults
First, let's consider in what cases you should resort to disassembling and repairing the mixer. Common faucet problems with Braun (Brown), Scarlet, Bosch, Ros and other home appliance specialists include the following.
- Open the circuit inside the power cord. This defect may occur due to poor insulation. Frequent bends when assembling the cable for the box lead to disruption of the internal insulation and short circuiting of individual wires to each other.
- Problems with the start button. A common problem with brown faucets. If it sticks, then it needs to be disassembled and the problem fixed, in case of serious damage. install a new button.
- Electric motor: there are many options, the simplest one. malfunctions may be due to brush wear and loss of contact with the rotor. One or more speeds are not working: The main cause may be a faulty switch. Its contacts may burn or oxidize if used frequently. The repair is quite simple. you need to remove the regulator and inspect the contacts, clean them if necessary, and if the wear ends, replace them.
- Extraneous noise. There are only two options: bearings and no lubrication in the gearbox. We check the rotation of the bearing, if there are bells, then we need to lubricate them, but there is play. just a replacement. Oil can accumulate in the transmission due to the effect of kinetic energy on the worm gear tip. Carefully place the screwdriver between the gears and turn it a few times. the extraneous sound will disappear.
Knowing the typical malfunctions of a manual or planetary valve, you can repair the product yourself. you don't need a special tool. The main thing here. caution, patience and basic knowledge of product design.
Nuances of dismantling the crane
Before repairing the product yourself, you need to disassemble it. There are certain nuances that you need to know in order not to damage the device.
- The faucet body is made of durable injection molded plastic, has many special projections and hidden latches are made of plastic, which can be damaged if handled incorrectly.
- All structural recesses are securely covered with plastic plugs that must be removed with a thin screwdriver. For example, the 600-watt Braun Turbo faucet has a gap around the body that you must gently press to reach the latches.
- The fasteners are hidden under self-adhesive labels and stickers; to find them, simply press down on the surface, then remove part of the sticker and unscrew the screw or screw.
- The body design contains plastic latches, which must be handled very carefully so as not to break.
- When opening the device, take a photo so as not to mix up the wire connections during assembly. Each node must be installed in a specific location.
- Often the connection between the wire and the terminal is tight enough to remove them using a screwdriver or a special tool. Do not pull them with your hands so as not to break the structure.
- If the wire fits the mounting screw, the latter should be loosened, and during assembly, make sure there is an open area on the outside, only then tighten the screw.
- Disassembling the gearbox Release only if a malfunction is detected; in other cases, change only the oil.
- Check the integrity of the damper bushings. if there are slight integrity problems, replace them immediately.
- Extraneous noise. This is wear of the bearings; in order to replace them, you need to know the design of the device and have certain skills.
- After eliminating the breakdown, the assembly process is carried out strictly opposite to disassembly.
Nuances of disassembling mixers
Before you repair the product yourself, you need to disassemble it. There are certain nuances that you need to know in order not to damage the device.
- The mixer body is made of durable plastic molded under high pressure; it has many special protrusions and hidden plastic fasteners, which can be damaged if handled carelessly.
- All structural recesses are securely covered with plastic plugs, which must be pryed off with a thin screwdriver. For example, the Braun Turbo 600 watt mixer has a gap around the body that must be carefully pulled apart to get to the latches.
- The fasteners are hidden under self-adhesive labels and stickers; to find them, simply press on the surface, then remove part of the sticker and unscrew the screw or self-tapping screw.
- The case design also contains plastic latches, which must be handled very carefully so as not to break.
- After opening the device, take a photo so as not to confuse the connection of wires during assembly - each node must be installed in a specific place.
- Often the connection between the wire and the terminal is tight enough to remove them; use a screwdriver or special tools - do not tighten them by hand so as not to break the structure.
- If the wire fits under the mounting screw, then the latter must be loosened, and during assembly, check to see if there is a bare area on the outside, only then secure the screw.
- Disassemble the gearbox only when a malfunction is detected; in other cases, only replace the lubricant.
- Check the damping bushings for integrity - if there are minor integrity violations, replace them immediately.
- Extraneous noise is wear of the bearings; to replace them, you need to know the structure of the device and have certain skills.
- After eliminating the breakdown, the assembly process is carried out exactly the opposite of dismantling.
If you discover complex breakdowns, immediately contact professionals; they will repair your Brown, Bosch or any other mixer quickly, with reliable quality.
Features of disassembling a Bosch mixer
The dismantling process is carried out using similar mixer technology. Brown , Zepter was described above, but specific products from different manufacturers have their own, albeit small, nuances. In this section we will show you how to disassemble the tap from Bosch Turbofixx 400 W:
- Disassembly begins with removing the plug;
- Then we disassemble the body of the product;
- Remove the top cover and set aside;
- Then carefully disassemble all the components of the device into individual parts;
- Place the disassembled device on a clean table;
- Disconnect the wire terminals from the engine;
- Now carefully remove the clamp and disassemble the devices into which the nozzles are inserted;
- Check the engine operation, if everything is good, then start reassembling in reverse order, lubricating the shaft for quality operation;
- All damage is repaired during assembly.
This video will help me fix a Bosch faucet, which not only shows a complete disassembly procedure, but also focuses on commonly broken parts and provides options for repairing them.
To repair the damage yourself, you first need to disassemble the blender. This procedure has its own specifics. By following the recommendations of the experts, you can prepare your equipment for repair without resorting to specialized centers. This will allow you to save on the cost of the service or purchase of a new device.
Features of dismantling a Bosch mixer
The disassembly process is carried out using a similar technology for Braun and Zepter mixers and was described above, but specific products from different manufacturers have unique, albeit small, nuances. In this section we will tell you how to disassemble a Bosch Turbofixx 400 watt mixer:
- disassembly begins with removing the end cover;
- Next, we disassemble the body of the product;
- remove the top cover and set it aside;
- then carefully disassemble all components of the device into separate parts;
- place the disassembled device on a clean table;
- Disconnect the wire terminals from the engine;
- now carefully remove the fixation and dismantle the devices where the nozzles are inserted;
- we check the operation of the engine, if everything is in order, then we begin the assembly in the reverse order, lubricating the shaft for high-quality operation;
- all damage is eliminated during assembly.
This video will help you fix a Bosch mixer, which not only shows the complete disassembly algorithm, but also focuses on frequently breaking parts and provides options for their repair.
Features of disassembling blenders from different companies
Brown, Polaris, Redmond, Philips, Scarlet, Bosch models are widely used in everyday life. Some of them are disposable and cannot be repaired. Their disassembly is not provided.
Brown technique is understood as follows:
- Use pliers to remove the cartridge (nozzle holder).
- A thin screwdriver is inserted into the seam between the body and the outer shell. Lightly hit the screwdriver with a hammer, knocking out the welded layer. This action continues until the engine begins to move freely inside the housing. They do everything with great care so as not to break the clamps. Do not use a thick screwdriver as this may damage the outer casing.
- Press the clamp and remove the engine. Usually the control panel is distributed with the engine. If it does not give in, it is tightened with pliers along the bottom edge.
- There are latches inside to secure the lid. They are bent along the arrows.
- Use a screwdriver to adjust the speed.
- Unscrew the power cord assembly located inside.
Polaris models are dismountable and non-dismountable (for example, PHB-0713AL), the parts of which are glued or soldered.
The collapsible blender elements are disabled as follows:
- Unscrew the screws;
- Blade or thin knife with a latch, unfasten the stoppers;
- Carefully remove the elements.
The glued parts can be cut, but such a blender will not be able to return to its original shape during assembly.
In Redmond technology, all fasteners are latches. They must be carefully disconnected, otherwise there will be gaps at the joints during assembly.
Popular Randmond models are broken down as follows:
- Remove the top metal ring by bending the inner tabs;
- Remove the adjustment knob without much effort while holding the plastic rotation axis and spring;
- 4 screws are unscrewed;
- Remove and remove the bottom ring, carefully tighten the metal protective cap;
- Use a knife to cut the glue line around the entire body and remove the cylindrical part;
- Remove the guide bushing;
- Push the motor and PCB out of the housing.
Philips models are disassembled according to these instructions:
- On the side where the speed control knob is located, remove the decorative cover by driving it in with a knife or screwdriver. it is secured with double-sided tape;
- The next cover, secured with self-tapping screws, is removed with a screwdriver;
- The plastic gearbox is removed manually;
- On the reverse side, the protective cover is not unfastened; to do this, they press the lock buttons with a screwdriver, and bend the ear with a knife;
- This is followed by a glued cover that protects the motor. is disconnected with a knife.
At the last stage, the engine and control panel are removed.
Submersible scarlet models are disassembled in the following sequence:
- Remove the speed control cover using a screwdriver and remove it from the rod;
- Unscrew the 4 screws securing the cover;
- Remove the connecting sleeve covering the engine;
- Remove the motor and board.
The engine is the most vulnerable part of these devices.
Bosch stationary blenders are removed using a wrench and pliers.
Dismantling submersible marks has the following features:
- Mounting on external surface. fragile plastic latches;
- Internal parts can be fastened with bolts, self-tapping screws, or self-tapping screws.
Features of disassembling blenders from different companies
Brown, Polaris, Redmond, Philips, Scarlet, Bosch models are widely used in everyday life. Some are disposable and cannot be repaired. Disassembly is not provided.
The Brown technique is understood as follows:
- Use pliers to remove the cartridge (bit holder).
- A thin screwdriver is pushed into the seam between the body and the outer shell. Lightly hit the screwdriver with a hammer, thereby knocking out the welded layer. This action continues until the motor begins to move freely inside the housing. Everything is done with great care so as not to destroy the clamps. Do not use a thick screwdriver as this may damage the outer casing.
- Press the clamps and remove the engine. Usually the control panel is removed with the motor. If it does not give way, it is tightened with pliers at the bottom edge.
- There are latches inside to secure the lid. They are bent along the arrows.
- Use a screwdriver to remove the speed control cover.
- Bend the power cord clips located inside.
READ How to Disassemble the Rotary Mower Krn 2 1
Polaris models. Collapsible and non-dismountable (for example, PHB-0713AL), parts of which are glued or soldered.
The elements of collapsible blenders are divided as follows:
- Unscrew the screws;
- Using a blade or thin knife, unfasten the latches and plugs;
- Carefully remove the elements.
The glued parts are cut out, but such a blender will not be able to return the original appearance when composing.
All fastenings are done using Redmond technique. These are clamps. They must be disconnected carefully, otherwise, when drawing up the joints, breaks will appear.
Randmond models are broken down as follows:
- Remove the top metal ring by bending the inner tabs;
- With slight force, remove the adjusting knob while holding the plastic rotation axis and spring;
- Unscrew 4 screws;
- Tear off and remove the bottom ring, carefully assemble the metal protective casing;
- The adhesive seam is processed with a knife around the body and the cylindrical part is removed;
- Remove the guide sleeve;
- Pull the motor out of the case along with the board.
Philips models are disassembled according to the following instructions:
- On the side where the speed control knob is located, disconnect the decorative cover by killing it with a knife or screwdriver. It is secured with double-sided tape;
- The next cover, secured with screws, is removed with a screwdriver;
- The plastic gearbox is removed manually;
- On the reverse side, unfasten the protective cover; to do this, press the latch buttons with a screwdriver and bend the ear with a knife;
- Next comes the glued cover that protects the motor. It is disconnected with a knife.
At the final stage, remove the motor and control board.
Scarlet submersible models are disassembled in the following sequence:
- Tear off the speed control cap with a screwdriver and remove it from the rod;
- Unscrew the 4 screws that secure the cover;
- Pull out the coupling sleeve enclosing the motor;
- Remove the motor and board.
The engine is the most vulnerable part of these devices.
Bosch stationary blenders are dismantled using a wrench and pliers.
Dismantling submersible varieties has its own characteristics:
- Fastenings on the outer surface. Fragile plastic latches;
- Internal parts can be fastened with bolts, screws, self-tapping screws.
Motor speed control board
When kneading, the force of the oar is not constant. Delay in taking action. The operating mode of the commutator motor will become jerky, negatively affect the service life of the device, anger and scare away the owner, the quality of testing is mediocre. To stabilize the mode, the engine is equipped with a speed sensor. The gear shifter operates normally at idle without testing. Kneading is just beginning, the speed is going up. A sure sign of failure of the sensor and the clock generator control circuit. Checking the first one is simple:
- Remove the cover.
- Disconnect the sensor from the power supply and control panel. Locate the connector with three wires.
- Plug the faucet stand into the outlet carefully to avoid electric shock.
- Turn on first speed.
- Measure the sensor output voltage.
- Repeat the procedure for the available speeds.
The indications are new every time. The condition is met. Then the power supply/control circuit of the pulse generator chip is checked. Finally, it is allowed to connect a voltmeter in parallel with the motor and remove the voltage there; if the motor rotates, the problem is unlikely to be localized.
The board is repaired in the usual way. More often you visually observe burnt-out elements: they turn black, come into contact, and the body melts. Faulty capacitors will swell. Electrolytics on the top of the cylinder with a cross-shaped groove. In the event of a malfunction, the capacitor bends outward. Peeling off the attachment is common. Check integrity for integrity.
The main types of faults are listed. The microswitch breaks time. The speed is adjusted in steps by a mechanical contactor. Disconnect the ring in each position from the power board of the stationary mixer. Moreover, the insulation resistance should be measured, which is at least 20 megaohms. This is done for a simple reason: incorrect representation of commands on the electrical panel, control of a stationary mixer will lead to an unpredictable result. It takes a long time to find an error where there is no breakdown, when in the beginning it is easy to understand the reason.
The mixer device is sometimes supplemented with fuses. Of course, we need to start here. There are fuses that pass current only in the event of failure of other board elements, and those included in the motor power circuit. In the first case, turn on the incandescent light bulb to indicate troubleshooting in the terminals. It's on, which means we're still searching. In the second case, the technique described will not work. Manufacturers replace fuses with low-resistance resistors, which burn out if the board fails, and limiting current breakdown is the best protection. However, the method obviously introduces losses in power circuits suitable for fuses controlled by varistors.
We hope that now readers will not have to fix the mixer with their own hands while blindfolded. Correct the difficulties. Remove the bandage.
Many users prefer to repair small household appliances, which include a faucet, on their own. It really doesn't matter which company you use this device for. Brown or Scarlet, its interiors are quite simple. However, some difficulties may arise when disassembling these simple devices. How to disassemble
faucet, if it looks like its body is undivided, like, for example, many Bosch models? Let's try to figure this out.
How to disassemble the blender lid
The blender lid contains a gearbox that drives a knife blade located in the chopper bowl. The need to disassemble the cover arises if the coupling or gearbox has become unusable.
Step-by-step algorithm for disassembling the grinder cover:
- Take then remove the top sleeve.
- Disconnect the lower coupling.
- Carefully knock the gearbox out of the cover.
- If the transmission is glued, carefully run a sharp knife along the cutting line of the glue, without going too deep.
After these manipulations, replace the damaged gearbox with a new one.
The blender must be properly disassembled before troubleshooting. This will allow you to diagnose problems with internal components and take steps to return them to service. Submersible and stationary models are disassembled differently. It is important to work carefully, remembering the sequence of actions. The result of the repair and the accuracy of the assembly depend on this. In some cases, it is advisable to go to a workshop or buy new equipment.
Source
Many users prefer to repair small household appliances, which include a faucet, on their own. It really doesn't matter which branded device you use. Brown or Scarlet, its internal structure is quite simple. However, dismantling these simple devices can present some challenges. How to disassemble a faucet if its body is not divided, as, for example, in many Bosch models? Let's try to understand this.
How to disassemble a Brown blender without problems or losses?
A blender is a necessary and irreplaceable thing in any kitchen. In order for it to work for a long time, it requires care, like any household appliance. Experts advise periodically cleaning blender parts. The device may begin to act up after prolonged use. For both self-repair and cleaning of parts, you will need to disassemble the Brown blender. This is not difficult to do; even a person who is far from understanding the specifics of the operation of mechanical devices can handle such a task.
Preparing tools
Make sure you have all the necessary tools at hand in advance. Their list is simple, and you are unlikely to need to run to the store to buy one - these tools are in every home:
- pliers;
- a flat-tip screwdriver (if you don’t have one, use a regular penknife);
- hammer (small size will do);
- glue (on its label it should be written that it is suitable for gluing plastic and/or metal parts: usually it is hot melt glue or Moment glue).
All actions to disassemble the blender must be done extremely carefully. The device may simply break under a strong blow from tools, and a crack will appear along the body. This blender cannot be restored.
How to disassemble a Braun stationary blender
A stationary blender consists of the following parts: a container (bowl), a spinning shaft, blades for chopping, an electric motor, and a spindle. The principle of its operation is simple: torque is created by rotating the shaft and spindle. Then the rotating movements are transmitted to the blades of the built-in knives, which actually chop the products.
To disassemble a stationary blender, you will need to do:
- Unscrew the housing cover with a screwdriver. The cover is secured with ordinary screws.
- Carefully remove the cover. Below it are located the motor, spindle and torque shaft.
- Raise the spindle. Knife blades are attached to it. If knives become dull, they cannot be sharpened at home. But you can purchase replacement ones at a repair service or store. It’s easy to get the knives out of the spindle - just unscrew the nuts on the fastenings. After removing the old blades, install new ones. Don't forget to check that the nuts are tightened tightly. Otherwise, while the blender is operating, the blades may simply jump off the mounts.
- Check the torque shaft. Ideally, it should not have scratches, nicks or roughness. If there are any, this may cause the blender to break down.
- There is an oil seal at the attachment point of the blades and the electric motor. This is a kind of rubber seal. It is important not to damage the oil seal when disassembling the blender, and also monitor its condition. Experts recommend changing the seal at least once a year. If this is not done, the seal will become unusable, the speed of the blender will decrease, and the parts will begin to wear out faster.
How to disassemble a Braun immersion blender
An immersion blender is a “handle” without a bowl; the mechanisms and electric motor are located in the “handle” itself. To disassemble it, you need to do the following:
- Insert the tip of a flathead screwdriver (or pocket knife) into the seam between the casing and body. Using a hammer and a screwdriver, carefully knock out the seam along its entire length.
- Using pliers, remove the “chuck” (bit holder).
- Continue to carefully spread the seam along its length with a screwdriver and hammer until you feel that the engine moves freely under the housing.
- Now use the end of a screwdriver to slide the latches inside the case. The engine should then come out easily. Be careful with the latches - if they accidentally break, you won’t be able to put the blender back together. In addition, you should not take risks and take a thick screwdriver - this can damage the plastic body of the blender.
- Under the motor you will see a control board. To get it out, just pick up its edge with pliers. Do not overdo it - the board easily breaks if you press it hard with tools.
- Then bend back the rear cover latches. To do this, move them. There are only four of them in an immersion blender.
- Now remove the lid to the side.
This way, you can disassemble the Braun hand blender yourself or clean the parts inside.
How to disassemble the lid of a Braun blender
Separately, it is worth mentioning the lid of the Brown stationary blender. The thing is that this cover has a built-in gearbox. It is this that helps the blender be multifunctional: cutting, grinding, whipping.
But disassembling such a cover with a gearbox is not an easy task. Most repair professionals advise against doing this yourself. If removed from the cover incorrectly, the gearbox can easily become unusable. And yet, for the bravest, we will give instructions on how to disassemble the blender lid at home:
- The gearbox is secured in the cover with upper and lower couplings. Carefully insert a screwdriver under the top coupling and pull up. The coupling can be easily removed;
- the gearbox is removed from above. It will easily detach from the lower coupling if you slightly move the gearbox itself. The mechanism is metal. If it breaks, it must be replaced or thoroughly cleaned.
Features of disassembling Braun models
All Brown brand blenders follow the same principle. However, there are some nuances that you should pay attention to when repairing equipment yourself.
Braun 600 Watt Turbo
This blender has 15 speeds, as well as an acceleration mode - Turbo. Of all the Brown models, it is the easiest to operate and maintain. The engine is connected to the body with screws and can be easily removed if necessary.
Braun 4165
This is a type of immersion blender. To remove the electric motor from the “blender handle” you will have to resort to outside help. The engine is secured with four clamps. Pressing them simultaneously (pressing them inward) allows you to remove the electric motor. Therefore, it will be more convenient if one person presses the latches, and the second takes out the engine.
Braun 450 Watt
This model is the most popular among buyers. However, its repair is difficult at home. The control board is hidden deep in the “handle” of the blender. And when you open the housing and screw off the motor, it simply falls to the back cover of the blender. In addition, it is in this model that the casing is attached to the body using a pair of additional nuts. Which creates some difficulties when trying to open the case.
How to assemble a Brown blender
If you managed to disassemble the blender, this is already a victory. After carrying out the necessary repairs, cleaning the parts and checking their condition, it is necessary to reassemble the Brown blender to its original form. This should be done according to the same principle as the blender was disassembled, replacing the sequence with the reverse. However, it is important to pay attention to the following points:
- If during assembly you damage the plastic case somewhere or the factory seam does not fit together, use glue;
- screws and nuts must be firmly tightened at the fastening points to prevent their accidental unscrewing;
- The control board must be connected very carefully. This is the most fragile part of the blender;
- If you disassembled the gearbox on the blender lid, insert it tightly into the lower coupling first. If it doesn’t work, you can use gentle blows with a hammer to “seat” the gearbox more tightly into place. Otherwise, it simply will not come into action and will not unwind the clutch.
And finally, a piece of advice. Disassembling the blender takes time and some effort. If you are not ready to waste your nerves and energy, just contact a repair service. Today this service costs little money, and you will get results quickly.
Basic faults
First, let's consider in what cases you should resort to disassembling and repairing the mixer. Common faucet problems with Braun (Brown), Scarlet, Bosch, Ros and other home appliance specialists include the following.
- Open the circuit inside the power cord. This defect may occur due to poor insulation. Frequent bends when assembling the cable for the box lead to disruption of the internal insulation and short circuiting of individual wires to each other.
- Problems with the start button. A common problem with brown faucets. If it sticks, then it needs to be disassembled and the problem fixed, in case of serious damage. install a new button.
- Electric motor: there are many options, the simplest one. malfunctions may be due to brush wear and loss of contact with the rotor. One or more speeds are not working: The main cause may be a faulty switch. Its contacts may burn or oxidize if used frequently. The repair is quite simple. you need to remove the regulator and inspect the contacts, clean them if necessary, and if the wear ends, replace them.
- Extraneous noise. There are only two options: bearings and no lubrication in the gearbox. We check the rotation of the bearing, if there are bells, then we need to lubricate them, but there is play. just a replacement. Oil can accumulate in the transmission due to the effect of kinetic energy on the worm gear tip. Carefully place the screwdriver between the gears and turn it a few times. the extraneous sound will disappear.
READ How to Disassemble a Makita Drill
Knowing the typical malfunctions of a manual or planetary valve, you can repair the product yourself. you don't need a special tool. The main thing here. caution, patience and basic knowledge of product design.
How to disassemble a bosch, braun, scarlett and others mixer with your own hands - technoexpert
Many users prefer to repair small household appliances, which includes a mixer, on their own.
Indeed, it does not matter which brand of device you use - Braun or Scarlett, its internal structure is quite simple. However, some difficulties may arise when disassembling these simple devices.
How to disassemble a mixer if its body appears to be non-separable, like, for example, many Bosch models? Let's try to figure it out.
Spare parts for the mixer can be purchased from the TWiG online store.
First, let's consider in what cases it is necessary to disassemble and repair the mixer. Common malfunctions of Braun, Scarlet, Bosch, Ros and other mixers include the following among household appliance service specialists.
- There is a break inside the power supply cord. This defect can occur due to poor-quality insulation - frequent kinks when folding the cable for installation in a box lead to a breakdown of the internal insulation and short-circuiting of individual wires to each other.
- Problems with the start button are a common problem with Brown mixers. If it jams, you need to dismantle it and fix the problem; if it is seriously damaged, install a new button.
- Electric motor: there are many options here, the simplest one is that malfunctions may be due to brushes that have worn out and lost contact with the rotor. One or more speeds do not work: the main reason may be a malfunction of the switch - its contacts may burn or oxidize due to frequent use. The repair is quite simple - you need to remove the regulator and inspect the contacts, clean them if necessary, and if the wear is complete, replace them.
- Extraneous noise - there are only two options here: bearings and no lubrication in the gearbox. We check the rotation of the bearing, if there is a ringing, then you need to lubricate them, but if there is any play - just replace it. In a gearbox, due to the influence of kinetic energy, lubricant can accumulate at the end of the worm gear. Gently distribute it between the gears with the tip of a screwdriver and make several turns - the extraneous sound will disappear.
READ MORE: How to connect a laptop to a music center: step-by-step instructions
Knowing the typical failures of a hand or planetary mixer, you can freely repair the product yourself - you don’t need any special tool for this. The main thing here is caution, patience and basic knowledge of product design.
Before you repair the product yourself, you need to disassemble it. There are certain nuances that you need to know in order not to damage the device.
- The mixer body is made of durable plastic molded under high pressure; it has many special protrusions and hidden plastic fasteners, which can be damaged if handled carelessly.
- All structural recesses are securely covered with plastic plugs, which must be pryed off with a thin screwdriver. For example, the Braun Turbo 600 watt mixer has a gap around the body that must be carefully pulled apart to get to the latches.
- The fasteners are hidden under self-adhesive labels and stickers; to find them, simply press on the surface, then remove part of the sticker and unscrew the screw or self-tapping screw.
- The case design also contains plastic latches, which must be handled very carefully so as not to break.
- After opening the device, take a photo so as not to confuse the connection of wires during assembly - each node must be installed in a specific place.
- After eliminating the breakdown, the assembly process is carried out exactly the opposite of dismantling.
- disassembly begins by removing the end cap
- Next, we disassemble the product body
- remove the top cover and set it aside
- then carefully disassemble all components of the device into separate parts
- place the disassembled device on a clean table
- disconnect the wire terminals from the engine
- Now carefully remove the fixation and dismantle the devices where the nozzles are inserted
- we check the operation of the engine, if everything is in order, then we begin assembly in the reverse order, lubricating the shaft for quality operation
- all damage is eliminated during assembly.
If you discover complex breakdowns, immediately contact professionals; they will repair your Brown, Bosch or any other mixer quickly, with reliable quality.
The disassembly process is carried out using a similar technology for Braun and Zepter mixers and was described above, but specific products from different manufacturers have unique, albeit small, nuances. In this section we will tell you how to disassemble a Bosch Turbofixx 400 watt mixer:
This video will help you fix a Bosch mixer, which not only shows the complete disassembly algorithm, but also focuses on frequently breaking parts and provides options for their repair.
READ MORE: How to use a jigsaw
Nuances of dismantling the crane
Before repairing the product yourself, you need to disassemble it. There are certain nuances that you need to know in order not to damage the device.
- The faucet body is made of durable injection molded plastic, has many special projections and hidden latches are made of plastic, which can be damaged if handled incorrectly.
- All structural recesses are securely covered with plastic plugs that must be removed with a thin screwdriver. For example, the 600-watt Braun Turbo faucet has a gap around the body that you must gently press to reach the latches.
- The fasteners are hidden under self-adhesive labels and stickers; to find them, simply press down on the surface, then remove part of the sticker and unscrew the screw or screw.
- The body design contains plastic latches, which must be handled very carefully so as not to break.
- When opening the device, take a photo so as not to mix up the wire connections during assembly. Each node must be installed in a specific location.
- Often the connection between the wire and the terminal is tight enough to remove them using a screwdriver or a special tool. Do not pull them with your hands so as not to break the structure.
- If the wire fits the mounting screw, the latter should be loosened, and during assembly, make sure there is an open area on the outside, only then tighten the screw.
- Disassembling the gearbox Release only if a malfunction is detected; in other cases, change only the oil.
- Check the integrity of the damper bushings. if there are slight integrity problems, replace them immediately.
- Extraneous noise. This is wear of the bearings; in order to replace them, you need to know the design of the device and have certain skills.
- After eliminating the breakdown, the assembly process is carried out strictly opposite to disassembly.
If you discover complex breakdowns, immediately contact professionals, they will quickly and reliably repair Brown, Bosch and any other faucet.
Features of disassembling a Bosch mixer
The dismantling process is carried out using similar mixer technology. Brown , Zepter was described above, but specific products from different manufacturers have their own, albeit small, nuances. In this section we will show you how to disassemble the tap from Bosch Turbofixx 400 W:
- Disassembly begins with removing the plug;
- Then we disassemble the body of the product;
- Remove the top cover and set aside;
- Then carefully disassemble all the components of the device into individual parts;
- Place the disassembled device on a clean table;
- Disconnect the wire terminals from the engine;
- Now carefully remove the clamp and disassemble the devices into which the nozzles are inserted;
- Check the engine operation, if everything is good, then start reassembling in reverse order, lubricating the shaft for quality operation;
- All damage is repaired during assembly.
This video will help me fix a Bosch faucet, which not only shows a complete disassembly procedure, but also focuses on commonly broken parts and provides options for repairing them.
Source
Try fixing a broken blender yourself Bosch makes sense if your free warranty has expired . And only if you have a little knowledge of electronics and electrical engineering, you know how to use a tester and a soldering iron. But first you need to disassemble it without breaking it completely. So how to do this?
Disassembly Features
There are two types of blenders: hand-held (immersion) and stationary (countertop). You may need a wrench or screwdriver to disassemble the tabletop version, depending on the type of lower case cap. In this case, everything is simple: the screws or nuts are unscrewed and the cover is removed, which allows access to the internal device.
The situation is more complex with immersion blenders, as their external fastenings are often flimsy plastic latches whose location is unknown in advance, and the internal components may be further secured with screws, screws or bolts.
Some accessories
The bowl for the stationary mixer rotates. When rotating around the axis, the rims rotate in one direction, and the bowl. To another. This function was added in mind: the dough is kneaded faster, the consistency is homogeneous, without lumps. A fairly mandatory function for stationary mixers.
Button for instant detachment of attachments. To instantly switch attachments, simply press a button. Previously, Bosch engineers used to equip devices with a button that had to be pressed hard. Now it has a simplified design and is present in almost all models.
Overheating protection mechanism. This feature automatically switches off the engine when the load increases.
Special fastening. Needed to mount the mixer to the wall. This attachment is necessary for a small kitchen space.
A handle with rubber inserts is necessary for proper fixation of the mixer in the hand. Typically used on cutlery, by hand and without a bowl.
READ How to Cut the Outside Corner of a Skirting Board
Extended cord. Classic cord length. About a meter. However, for ease of activation, Bosch produces models with cord lengths up to 1.8 meters.
Cord storage slot. Essential for easy storage. Because of this, the cord does not need to be wrapped around the faucet itself.
Manual (submersible)
As a rule, models of this type are not installed on stands, do not have a bowl, and must be held in the hand at all times during operation. Some Bosch devices are cordless, meaning they can run on batteries.
Mixers of this level do not have a high power rating, and a large amount of dough may simply not be mixed. Therefore, before buying such a device, you should pay attention to the material and shape of the handle: it should be comfortable, fit easily in your hand and not slip. It is also interesting that all models are equipped with a special coating. Often additional applications go to such devices, for example, a whisk.
Disassembling the submersible model
An immersion blender consists of 3 main elements: an electric motor, a spindle and a control unit (board). Its repair consists of replacing the faulty part and removing dirt. Think about how to disassemble the Bosch MSM 7700.
To do this we need a small flathead screwdriver with a wide thin tip or a knife with a narrow blade. And also a small 3-4 mm hex wrench. If such a key is not found in the household, you can try using a Phillips screwdriver or flat head screwdriver of the appropriate size.
As a practice, let's start with the simplest thing. removing a small panel from the handle of the device. It is quite easy to bend the screwdriver and tear it off. Under it we will see two self-tapping screws that need to be carefully unscrewed with a hex key.
The case back is a bit more complicated and you need to be extremely careful not to break anything. It doesn't take much effort, but it is important to first understand what it is that is holding the cover in the mesh with the body and in which direction it is moving.
After completing this task, we will find two more screws inside, which also need to be unscrewed in order to continue further disassembly. Taking a closer look at the edges, we'll notice that the two halves of the body are held in place by a few more latches that can easily be pryed off with a flat-blade screwdriver to finally gain access to the motor and remote control of the immersion blender.
Problem solving
As mentioned above, you can only repair damage by replacing faulty components yourself. To do this, carefully inspect all elements and connections of the control board for expansion, oxidation or melting. It is also advisable to check all suspicious nodes using a tester.
First of all, you should pay attention to the fuse.
This fuse is designed for 100 operations, after which the device itself returns to its original state after some time and continues to function normally. If the fuse life is completely exhausted, it should be replaced with one of similar characteristics.