Cross saw, two-handed
The crosscut saw is the largest representative of hand saws. The length of this instrument reaches almost two meters. There are four standard sizes:
- one meter
- one meter and 25 centimeters
- one meter and 50 centimeters
- one meter and 75 centimeters.
The most popular tooth length is 20 mm. Even the smallest saw weighs quite a lot and working alone is quite problematic.
Today, many companies produce such saws, they are all slightly different from each other. Some specimens have teeth of a classic, triangular shape, with a sharpening angle of approximately 70°. However, craftsmen prefer to adjust the sharpening angle to suit themselves. It all depends on the wood; for example, it is more convenient to saw soft wood in the summer with a tooth sharpening angle of up to 35°. In this case, in winter or when sawing dry timber, it is worth sharpening the teeth at an angle of 50°.
Long saws (1.5 m and 1.75 m) are designed for cutting lumber. The teeth of such devices have a complex shape - between two M-shaped (Kremlin) cleaning teeth there are 2-3 ordinary ones, characteristic of cross-cut saws. They are sharpened and bred accordingly. These teeth cut the fibers during cutting, and the cleaning M-shaped teeth remove wood particles from the cut. An important point here is the fact that complex-shaped teeth should be fractions of a millimeter higher than simple teeth. If this nuance is ignored and all the teeth are reduced to the same height, then the M-shaped elements will tear the material, as a result of which sawing becomes significantly more difficult. At the same time, if you make too significant a difference, the cleaning teeth will not be able to remove sawdust from the cut.
Sharpening two-handed saws yourself or how to simply restore an old long hacksaw
If you have an old two-handed hacksaw Druzhba-2 in the garage, then before using it, it is recommended to restore its integrity
Before using the tool, pay attention to the following points:
- Handles - wooden handles may have dried out over a long period of non-use, so it is possible that they could freely fall out of the holes. You can restore the serviceability of the handles by dipping them in water for several hours so that they swell. You can also machine new handles for the tool, which won’t take a lot of time and effort.
- The presence of corrosion on the canvas - signs of rust should be eliminated, and then treat the device with machine oil
- Sharpening the teeth - after storing the tool for a long time in the garage, there is a high probability that the hacksaw needs to restore the sharpness of the teeth
https://youtube.com/watch?v=Ng4U1-VpUvQ%3F
If there are no difficulties with restoring the handles and removing corrosion, then sharpening the teeth is just the opposite. A large saw requires a lot of time and effort to restore the integrity of the links. However, there is an advantage to this, since large teeth are much more convenient to sharpen. Although the tool differs from an ordinary hand hacksaw, however, the principle of restoring the sharpness of the teeth is similar. A step-by-step description of sharpening teeth on a two-handed saw has the following format:
- First you need to fix the tool. It will not be possible to do this in the jaws of even the largest vice, so we use two corresponding board lengths. We place the boards parallel to the blade, leaving only the teeth visible. If you don’t have a vice, you can use a clamp
- Work should begin with setting the teeth. All teeth must be the same height. You can determine the presence of protruding links by eye, and to align them with the rest, you should work with a flat file
- At the next stage, it is necessary to align the teeth at the same angle of deviation from the plane of the blade. To perform the wiring, you will need a special tool. It is also recommended that you first make a template (layout) to check whether the links are sufficiently spaced (or buy one). The teeth should be spaced 0.5 mm from the plane of the blade or 1 mm from each other. The wiring process is performed one by one. Not many craftsmen know how often to set teeth. According to the rules, it is necessary to carry out setting no more often than 1 time per 5-6 sharpening of teeth
- As soon as the teeth are set apart, you can move on to the final and most important stage - sharpening. For this, a special triangular file is used, the size of which must be no less than the height of the teeth
- Correct sharpening is performed by moving the file away from you with medium pressure against the tooth. In the reverse position, the file should not touch the blade. It is necessary to pass the file confidently, but not quickly
- First you need to go along one side of the teeth, and then along the other. When sharpening, you should also choose the appropriate angle from 35 to 70 degrees.
Finally, all that remains is to treat the tool blade with machine oil and use it for sawing thick logs, trees and even lumber. When carrying out work, it is recommended to follow safety precautions to avoid injury.
This is interesting!
If you have mastery of working with a grinder, you can sharpen the teeth with a power tool with an abrasive disc.
https://youtube.com/watch?v=Zc6rsGb5BBs%3F
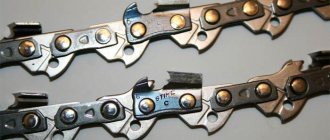
Teeth setting
The teeth deviate from the plane of the blade in a checkerboard pattern, for example, all even ones to the left, all odd ones to the right. Only very experienced carpenters are able to position saws on wood “by eye.” This skill comes after several hundred diluted saws. Less experienced craftsmen are better off using a special tool - a setting tool. The simplest version of the tool is a flat plate made of durable metal with a slot into which the blade fits tightly, with minimal clearance. The saw blade should be clamped in a bench vice. The teeth should protrude slightly from the jaws. The teeth, one after another, are clamped into the groove of the plate tool and bent in the middle part. The wiring angle must be constantly monitored. First, bend all the even-numbered teeth in one direction, then all the odd-numbered teeth in the other. Once the wiring is complete, you can spread the jaws to the width of the wiring and stretch the fabric between them. If any of the teeth are bent more than necessary, they will hit the vice. They need to be fixed.
Teeth setting
Canvases with hardened teeth are not subject to routing.
The old-fashioned way of sharpening
The method of sharpening hand saws with your own hands has not changed much since the time of our ancestors.
Below watch a video of how this was done “on your knees” using a needle file and pliers:
Wiring
Before returning the sharpness to the saw, you need to adjust the teeth, that is, move them apart. Setting is the installation of cutting teeth at a certain angle relative to the blade and each other. If you look at the set saw, you can see that they, alternating, deviate to the right and left from the blade plate itself. This configuration gives the hacksaw freedom to make deep cuts. It doesn’t get stuck because it doesn’t touch the walls with its entire plane.
To set the correct angle for each tooth “by eye”, you need solid experience, which not every carpenter has. It comes after many dozens of sharpened saws. For less experienced carpenters, there is a tool called a setting tool. Its most primitive version is a flat steel plate with a slot. A hacksaw is inserted into this gap with a minimum gap, under tension .
The wiring process looks like this:
- Secure the hacksaw in a vice like this. It is necessary to ensure that the teeth protrude 2 cm above the jaws.
- The teeth are clamped in the groove and then bent in the middle.
- First you need to bend all the even teeth in one direction, then bend the odd ones in the opposite direction.
- At the end, you can spread the jaws of the vice according to the calculated width of the spread and try to pass the saw between them.
- An excessively bent tooth will hit the vice. Use pliers to bend it a little further.
Checking the height of the hacksaw teeth
It is necessary to check the height of the teeth before sharpening the tool.
To do this, place a sheet of plain paper on a hard and flat surface, and press the cutters tightly until a clear imprint is obtained.
If there are teeth protruding from the general row, traces of them will be reflected on the print.
If there are higher teeth, they are carefully cut down with a flat file to the general level.
Saw teeth set
The teeth are set when it is necessary to ensure freer movement of the saw blade. The teeth, in turn, are bent in different directions at the same distance, using a set. With its help, the tooth is bent approximately at the middle of its height. The setting is a tool for setting the saw teeth; it has the shape of a plate in which the slot is located. You can also use an adjustable wrench, which can also successfully set the teeth.
To work with soft woods, the teeth need to be set apart more, in the case of hard woods - less. But this advice is unlikely to be useful to those who work directly in the forest. Under these conditions, the degree of hardness, density and moisture of the trees is hardly possible. In order to select the correct wiring, you will have to test this device in different conditions; the best option would be three tenths - five tenths of a millimeter in one direction. The general requirement is to set the teeth no more than the thickness of the blade on both sides. It is necessary to do the wiring before sharpening.
How to sharpen a hacksaw
To sharpen a hacksaw for metal or wood with your own hands, you need to:
- Carry out preparatory work.
- Determine for what purposes the saw is used.
- Perform sharpening with parameters that take into account the intended purpose of the tool.
Sharpening a saw with a file
Preparation
To sharpen a hacksaw for wood, you need to prepare all the necessary tools. Then remove possible types of contamination to clean metal and evaluate the possibility of restoring the canvas. Based on the inspection, a sharpening method is selected.
Sharpening
Sharpening a hacksaw for metal or wood for longitudinal or universal sawing is done in two ways:
- Direct. Using a file at an angle of 90 in the horizontal direction to the blade, layers are removed from the edges of the teeth. Then rearrange the blade in the clamp with the opposite side and do a similar treatment of the distant teeth.
- Obliquely. It differs from the direct method by the sharpening angle, which is 80. First, the teeth of one row are processed, and then the other.
To sharpen a utility saw, you will need a coarse needle file or a file with a diamond cross-section. The choice of method depends on the processing characteristics of the workpieces and the preferences of the master.
You can sharpen a hacksaw for wood at home as follows:
- Select a file with a triangular cross-section with special notches for ease of turning.
- Fix the blade at an angle of 45-50 to the working surface.
- Use a file in a direction parallel to the table at an angle to the teeth of 60 to 75 to sharpen.
To restore dull teeth, the odd-numbered incisors are sharpened first, and then the even-numbered ones. After the odd ones, the blade is turned in the opposite direction and the even ones are sharpened.
Basic rules of turning:
- the cutting tool should be moved evenly with the same force;
- To remove burrs, files with small notches are used;
- Upon completion of work, it is necessary to check the sharpness of the teeth.
Sharpening a hacksaw for wood
Teeth setting
Separating the teeth is required to prevent the blade from getting stuck in the cut. The process consists of bending the teeth relative to the blade in two directions at the same angle and distance. As a result of correct routing, free gaps should be formed, which will help simplify the movement of the blade during cutting when cutting.
The standard is considered to be a wiring distance of no more than 2 mm. Depending on the specific application, the bend is made as follows:
- for processing dry wood - from 0.3 to 0.5 mm;
- for raw wood - from 0.5 to 1 mm.
The selection of the bend angle is carried out on the basis of the following principle: a larger angle will allow you to saw with a wide cut, and a smaller angle will allow you to cut with more effort, but with a smaller cut width.
For bending, special devices are used. The canvas is clamped in a clamp and placed on the work surface. Then carefully bend the teeth using a metal die to such a distance as not to break them.
The wiring is done step by step as follows:
- Slots are made as marks to determine the thickness of the web.
- The tooth is fixed in the hole made and bent with a die to the marked stop point.
- A similar procedure is performed with all remaining teeth.
Height alignment
The height check is performed as follows:
- a sheet of paper having a single color shade is placed on a flat, smooth surface;
- place the canvas over it, press evenly so that the end surface of the canvas is parallel;
- remove the saw, then look at the uniformity of the pressure marks;
- If there are protruding teeth, carefully file down to a general level.
An even arrangement of teeth is required to make even cuts in the material. The uneven load on the teeth leads to increased wear. Therefore, after wiring, their alignment is required.
A few simple techniques for sharpening and setting hand saw teeth.
Watch this video on YouTube
How to make something yourself with your own hands. Home master website
There are several types of pollen. Depending on the direction of cutting the tree, they are divided into transverse, longitudinal and mixed.
The saw teeth must be thinned before sharpening. Gear wiring is either a special "wiring" with a stopper or a metal plate with slots. Carpenters often use a regular ax or chisel for this purpose.
The tooth bite should be no more than one and a half to two saw thicknesses. For dry wood, the width of the cut can be a quarter of the thickness of the saw, for wet wood. More than two.
EVERYTHING YOU NEED FOR THIS ARTICLE IS HERE >>>
If you make a mistake when turning the saw teeth and some of the teeth are moving to the side more than necessary, you can correct this by inserting two nails into the board at a distance of the width of the wire and running the saw several times. Between them.
READ How to Convert a Miter Saw into a Cutoff Saw
They sharpen dust by holding it in wooden clamps. If there are no clamps, you can simply place them on the table with your teeth and press them against the table with one hand. The teeth of the cross saw are first sharpened on one side of the wiring, then the saw is turned over and the opposite side is sharpened. Each tooth is sharpened on both sides, from top to bottom, at a 45-degree angle so that the pointed teeth meet the outside of the saw.
The teeth of the rip saw are sharpened sequentially, one after the other. The file is held at right angles to the saw. Only one short side of the tooth is sharpened. For sharpening mixed saws. The file is directed at an angle of 50-60 degrees and both sides of the tooth are sharpened.
If the saw breaks several teeth, it can be repaired. To do this, trim the damaged teeth with a chisel. Cutting new teeth can also be done with a chisel, and if you are lucky enough to get a stamp and hit, all your problems will be solved even faster. Having spent on the saw, taking a risk, determining the height of the teeth, insert the blade between the hammer drill and the die and hit it with a hammer.
Once all the teeth have been cut, the saw is held and sharpened.
How to saw with a two-handed saw - detailed instructions with description
At first glance, the process of sawing with a two-handed saw may seem easy and straightforward. However, as soon as a beginner takes up a hacksaw, it immediately becomes clear that this is a job for real and strong hands. However, you don’t have to have a mountain of muscles to properly cut wood with the Druzhba-2 saw. To do this, you need a little experience and also understand the principle of operation.
This is interesting!
Even if you have experience working with short-stroke hacksaws, a beginner who picks up a two-handed saw for the first time will be unpleasantly surprised.
If an experienced sawyer stands at the other end of the saw, then a beginner will have a hard time until he masters the principle of operation of the device. Instructions on how to cut logs and trees with a two-handed saw are as follows:
- First, the log must be secured by placing it on the “goats”. It must be taken into account that it is most convenient to carry out the work while standing on your feet, so even if the log lies on the ground, then in order to cut it correctly, you should place it on a special stand - sawhorses
- The section of the log that is sawn off from the main part should hang above the ground
- Both sawers take a comfortable position with their feet shoulder-width apart. The main thing here is to firmly support your feet, otherwise the possibility of injury cannot be ruled out.
- Ideally, it is recommended that one of the sawers position himself slightly higher than the other, for example, by placing a tray. This will speed up the cutting, but is not at all mandatory.
- By holding the handles of the tool, you can begin. The main thing when working with a two-handed hacksaw is synchronized work with your hands. The effectiveness of achieving the final result depends on smooth hand work.
- The principle of pair sawing is as follows: it is necessary to apply force only in one direction - to pull the blade towards you. There is no need to push the tool away from you, since this task is assigned to your partner. While the partner is pulling the blade towards himself, the hand of the first sawyer is resting
- In this way, not only work efficiency increases, but also rapid fatigue is eliminated
The speed of achieving results is influenced by many factors, such as the thickness of the log, the length of the blade, the quality of sharpening the teeth, as well as the synchronized work of the sawmills. It is worth noting that with the right approach to sawing, it is possible to achieve fast sawing comparable to the operation of a chainsaw.
This is interesting!
If the blade has signs of corrosion deposits, then before carrying out work it is recommended to clean the surface with fine sandpaper (to speed up the work, you can use a hand brush for metal), and then apply machine oil to reduce resistance when working with the tool.
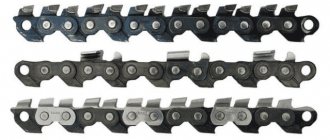
Types of sharpening saw chains
There are a number of tire sharpening technologies. In the field or at home, you can use a grinder or a file. This method is suitable for budget chainsaw models when high precision tooth adjustment is not required. The main disadvantage of this method is the need to control the mechanical pressure on the hand tool; with increasing pressure, you can remove an excess layer of metal and deform the teeth.
Professionals recommend using special machines for initial sharpening, and then a vice with guides for grinding and adjusting each link. This method helps save time, and when using holders adapted to a specific chain pitch, the likelihood of error is minimal.
How to sharpen using special equipment?
The most convenient way to sharpen a saw is to use special tools and machines. This allows you to quickly carry out work of any severity. When purchasing a chainsaw, it is recommended to immediately buy a template to determine the values of the end and top blade, and the front edge angle. In addition, you need a file to eliminate minor defects.
On a manual machine
Figure 2 – Sharpening on a manual machine
In practice, this method is usually used to trim the teeth after each long-term use of a chainsaw when working with hard wood. The “hand saw” looks like a regular beam saw with a small vice for mounting on a headset. Instead of a blade, there is a round file on it.
Before starting work, you should secure the tool to the headset and set the parameters in accordance with the features of the saw. This is done only manually using certain marks on the machine. Stopping at each blade, make 3-4 movements towards yourself to sharpen. This method is not suitable for restoring very dull saws.
On an electric machine
Figure 3 - Electric machine for sharpening saw sets
This is the most convenient way to sharpen a chainsaw bar of any brand. No special skills or abilities are required; the work process itself takes no more than 10 minutes. The machine is equipped with an electric drive, operates from a DC source with a voltage of 220-240 V
When choosing a device, pay attention to the following features:
- the presence of a function for sharpening teeth with different intervals of links, the volume of the upper edge;
- possibility of sharpening angle correction;
- replaceable grinding wheels included;
- stable cutting width.
The saw chain is fixed into a guide as part of the base platform; it also has a special mechanism for holding the teeth. It can move in a horizontal direction. The grinding wheel is lowered at an adjustable angle to the cutting edge; the degree of pressure can be controlled with a regulator. The sharpening element is directly immersed by the operator. For convenience and accuracy of work, all models have a measuring scale with which you can evaluate the degree of sharpening of all components of the chain teeth.
Bulgarian
This method is used only in the absence of other necessary devices for chain correction. It is optimal for rough straightening of teeth, but has a serious drawback - it is difficult to control the angle, and there is also a risk of damage to the connecting rivets.
To sharpen the chain, the angle grinder must be securely fixed in a vice. Turn on the tool, and then bring each cutting edge one by one and hold until shine appears. You can check the required angle using a caliper.
Angle of sharpening on the machine
A quality tool always has markings with which you can evaluate the quality of sharpening. When working, you need to focus on its indicators in order to maintain the performance of the headset. The table shows the main characteristics of the teeth depending on the chain pitch and the characteristics of the links.
Figure 4 – Recommendations for sharpening depending on the parameters of the chain
Operating rules
The principle of working with a two-handed saw is based on the fact that each participant takes turns pulling the tool towards himself. When the reverse stroke is made, then, on the contrary, he slightly pushes the handle, helping his partner to pull his side. At first glance, the procedure does not represent anything complicated, but there must be a certain skill. Otherwise, the following complications may arise:
- saw jamming;
- bends of the canvas;
- lumber rupture.
The actions of employees must be uniform and consistent. The cut must be carried out with equal pressure and pressure in the opposite direction. To make it more convenient, it is recommended to install the element to be sawed on special trestles, at a distance of about half a meter above the ground. Moreover, one of the participants should rise slightly above the other, for example, stand on a pallet. Thus, thanks to the formed angle, a deeper cut can be made in one stroke of the tool. If all the work is done correctly and harmoniously, then with a two-handed saw you can not only saw logs across their axis, but also cut them into longitudinal boards.
Sharpening the saw
Sharpening saw teeth is an art of its own, requiring faithful hands, a good eye, and attention. It is not difficult to learn this business, you must have the desire and strictly adhere to the following rules:
- The saw blade must be rigidly fixed in a special device made of wood, which is also firmly installed on a well-lit work table. Sharpening saw teeth on stools or knees does not give satisfactory results.
- You should use a personal file, followed by cleaning the sharpened edges of the teeth with a velvet file (with a fine notch) or a needle file. It is advisable that the file be new, sharp and with a mounted handle. If you don’t have one at the right time, you can use a second-hand one, but it must be cleaned with a steel brush and rubbed with charcoal so that the file does not become clogged or dull. When sharpening a tooth, the file must grip the metal and remove its layer depending on the force of pressure. And if it slides over the tooth without removing the metal, then the saw teeth are overheated or the file is worn out. In this case, it is necessary to repeat sharpening with a new file. If in this case it slides along the tooth, then you just have to take another saw.
- The handle of the file is clamped with your right hand, and its end is held with your left hand and the file is directed towards the teeth of the saw. How to use a file depending on the type of saw is described below.
- The pressure of the file on the teeth should be smooth and uniform and only in one direction away from you. When returning the file to its original position, it should not touch the teeth.
- You should try to grind the metal from the edges of the teeth to a minimum of the same thickness, moving the file the same number of times with the same pressure, which allows you to maintain the angles, pitch and height of the teeth after sharpening.
- Burrs form on the edges of the tooth on the side where the file exits, which reduce the sharpness of the tooth, and if they are not removed, then during the operation of the saw they chip and the teeth become significantly dull. To remove burrs, the edges of the teeth are sharpened with a file with a velvet cut and the burrs are removed from the side edges with a wet whetstone.
- After sharpening the teeth, you need to check their sharpness. Look at the point of the needle and the edge of the razor blade: although they are sharp, they do not shine in the light. And if they are dulled, then rounded surfaces appear on the tip of the needle and on the edge of the blade, which reflect light and shine well. This principle is used to check the quality of saw teeth sharpening. To do this, place the saw in front of your eyes and examine its teeth along the blade. If their cutting edges and tips do not shine, then the saw teeth are sharpened satisfactorily, and if some of the teeth are shiny (this often happens), then they need to be sharpened with a velvet file, remove the burrs and again check the reflection of light on their edges and tips.
READ How to Cut Chipboard with a Hacksaw
Crosscut saws. The teeth of cross-cut saws are sharpened using a finely cut triangular file with an apex angle of 60°.
To sharpen the teeth, the saw is clamped into a special device that allows you to set its blade at an angle of 45-50° to the plane of the work table. The file is led parallel to the work table at an angle of 60-75° to the saw blade and thus the left edge of A1A2B2B1 is sharpened in the first tooth.
The saw teeth are sharpened in several stages. First, a file is passed along the left edges of the odd teeth located in the far row, tuning the hands for the same movement. Then they pass the file along the right edges of the same odd teeth, finishing sharpening the main cutting edges with very sharp tips. After sharpening the odd teeth is completed, the saw blade in the sharpening device is turned over and thus the even teeth that are in the far row are sharpened. When sharpening the teeth of cross-cut saws, it is necessary to carefully ensure that each tooth has sharp main cutting edges with a dihedral angle φ = 60-75°, a short cutting edge and a sharp tip.
Rip saws. The teeth of longitudinal saws, in which the angle π
How to set a saw and what it is
Sharpening a hacksaw is not a complicated procedure that begins with a process called setting the teeth. This procedure is carried out with one simple goal - to provide free movement of the blade when working with the tool. The lack of routing leads to the fact that the tool will get stuck in the thickness of the workpiece being cut, which will cause inconvenience in work.
Setting the teeth of a hacksaw is a procedure that involves straightening the teeth in different directions. The main thing is that each tooth is bent the same amount as the previous one. The greater the deviation of the tooth from the plane of the blade, the greater the width of the cut. The greater the width of the cut, the higher the process of removing chips from the cut, which means the faster the useful work is done.
The possibility of jamming of the blade depends on the width of the teeth. The greater the width of the routing, the less likely it is that the blade will jam inside the workpiece being cut. Not many people know what the tooth spread should be. However, this parameter must be taken into account, since the quality of the tool’s work depends on it. The size of the tooth set primarily depends on the thickness of the steel blade. This parameter is usually from 0.5 to 2 mm. It all also depends on the type of wood (dry or wet) with which you plan to work:
- For raw wood, the deflection value should be in the range from 0.5 to 1 mm. The thicker the canvas, the greater the bend should be
- For dry wood, the deflection value is from 0.3 to 0.5 mm
To determine the size of the wiring, a special device is used - a template, which you can make yourself from a piece of timber. A photo of such a device is shown below.
Number 1 shows the template, 2 is the tooth set value, and 3 is the hacksaw blade.
When you know the amount by which you need to set the teeth, you can get down to business. To implement the action, special devices are used. It is not necessary to use these devices, as a regular screwdriver with a wide blade will do. The disadvantage of a special device for setting the teeth of a hacksaw is that the price of such a device in the form of pliers is quite high.
Instead of special pliers, you can use adjustable plates. This tool is designed with manual adjustment and stop. The straightening process begins with the fact that the blade needs to be fixed in the jaws of the vice, and then get down to business. First you need to go along one side, and then repeat the procedure on the other. Moreover, you need to bend the teeth not at the cutter itself (the base or sharp part), but from the middle.
https://youtube.com/watch?v=BlEuTPhu0uI%3F
This is interesting!
As soon as the teeth are straightened to the same distance, you will also need to carry out the procedure for leveling the height of the cutting parts. To identify which teeth have a greater height in relation to others, you should press the blade with the cutting part to a sheet of paper. An imprint will be displayed on a piece of paper, from which it is not difficult to identify which teeth need to be shortened. To shorten them, you can use a flat file.
How to sharpen a wood hacksaw yourself
For sawing building materials made of wood, as well as trees, a tool such as a hand saw . Despite the fact that electric and even gasoline saws, jigsaws and circular saws have long been developed, a hand hacksaw for wood remains an indispensable assistant in the arsenal of every craftsman. During active use of this tool, it becomes necessary to sharpen the teeth. We’ll look at how to sharpen a hacksaw on wood yourself at home in this material.
READ How to Cut Plywood with a Hacksaw
Why and when to sharpen
The tool in question is subjected to various loads during operation, which leads to dulling of the teeth. If you cut with a saw that has dull teeth, the result will be much less effective compared to a sharp one. In addition, using a saw with dull teeth is not recommended for the following reasons:
- Reduced tool performance. Not only the master’s strength will be wasted, but also his time.
- Reduced accuracy of work. It is impossible to cut wood materials smoothly with a hacksaw with blunt teeth, much less do it accurately.
- Danger of using the tool. During the work, the saw will get stuck, jam, and come off the cutting line, so such work can be dangerous for the master.
A sharp hacksaw is not only easier to work with, but also much safer. To determine that the time has come to sharpen the wood hacksaw blade, you should pay attention to the following factors:
- The canvas makes a characteristic dull sound. If a master often uses a hacksaw, then it will not be difficult for him to identify such a sound.
- The tips of the teeth are rounded.
- The file, when trying to cut wood, refuses to perform its task.
These factors indicate that it’s time to sharpen your wood hacksaw yourself. But before you take up the file, you should determine whether these links can be sharpened.
Saw layout
Sharpening a hacksaw for wood begins with a procedure such as setting the teeth. The alignment of the hacksaw teeth is carried out for such purposes as ensuring free movement of the blade without jamming. Setting is the bending of the teeth in different directions, alternately, by the same amount. This leads to an increase in the width of the cut, which means that during the sawing process the process of removing chips is accelerated.
It is important to know! The wider the tooth set, the less chance of the blade jamming.
The amount of tooth set depends on the thickness of the blade, and is usually 1.5-2 mm. To bend the teeth the same amount, you will need to use a special device. This device is a metal plate with a special slot. The blade is clamped in a vice so that the links protrude slightly. After this, the process of bending the teeth is carried out. The sharpened teeth must also be bent to the same distance.
How to sharpen a hacksaw for wood
To sharpen a hacksaw for wood, the blade should be secured in a vice in the same way. To sharpen saw links, needle files or triangular files with a fine notch are used. Not many people know how to properly sharpen a saw on wood, so you should pay as much attention as possible to this process.
- First you need to pick up a file. You should use a finely cut file, hold it with one hand on the handle and the other on the tip of the tool.
- The sharpening angle is determined, which usually ranges from 15 to 30 degrees. The angle is usually determined by eye, but if this is difficult to do, you can use special homemade devices, for example, a wooden block. To do this, the block is ground until it has the shape of a right triangle with angles of 30 and 60 degrees.
- The most important thing when working with a file is the pressure on it. To ensure an even sharpening, you need to make the same number of passes with the file on each tooth. With experience, you will learn to ensure that the top layer of metal is removed evenly.
- Using the prepared device, sharpening angles are controlled. The process is carried out in a similar way on the reverse side of the canvas.
Now you know how to properly sharpen the teeth of a hacksaw blade for wood. But the process does not end there, since the teeth will need to be aligned in height. If they have different heights, the uniformity of sawing will be disrupted. If there are links that are higher than the rest, then they are shortened using the same file. The check is carried out using a sheet of paper, to which the blade should be attached with the teeth down. After this, the sizes are compared and the shortening procedure is repeated.
How to sharpen a saw: practical recommendations
When carrying out work on sharpening a hacksaw, you should adhere to the following recommendations:
- The device is tightly fixed to the work surface in a vice.
- Ensuring good lighting of the workplace.
- To sharpen the links, files and needle files with different notches are used. The smaller the notch, the better. It all depends on the degree of dullness of the teeth.
- Metal removal is carried out only when the file moves away from itself in one direction.
- After the work is completed, it is necessary to check the quality. To do this, look at each link in the light. If the tooth shines, then it is sharpened correctly, as in the photo below.
In conclusion, it is worth noting that many craftsmen do not consider it necessary to sharpen a hacksaw. This is wrong, since the efficiency of the work depends on the quality of sharpening.
Sources:
https://profistroy74.ru/instrumenty/kak-pravilno-tochit-nozhovku-po-derevu-napilnikom.html https://instrumentyvdom.ru/ruchnoj/kak-natochit-nozhovku-po-derevu
How to sharpen a band saw correctly
Let us immediately note that if you do not have the experience and skills to perform such work, it is better to entrust saw sharpening to professionals. Violation of the geometry of the teeth of the cutting edge, the appearance of scale on the metal or incorrect routing significantly reduces the service life of the blade.
Having decided to sharpen a band saw with your own hands, it would be useful to first familiarize yourself with the key definitions, the knowledge of which may be required during the work process. So, for the correct formation of the cutting edge you will need:
- setting - deviation of the teeth from the plane of the main saw blade;
- tooth height - the distance between the top point and the base;
- pitch - the distance between the teeth, usually varies between 19-25 mm.
- sharpening angle – depends on the intended purpose of the tool; for example, the recommended sharpening angle for carpenter saws is 35°, for dividing saws – 18-22, for sawing timber – no more than 15°.
The sharpening angle is determined by the manufacturer, so when you edit the saw yourself, it is recommended to adhere to these parameters.
We provide detailed instructions that will help you sharpen a closed saw correctly without resorting to the services of specialists.
Wiring
Setting up band saws for wood is the first stage of restoring the profile of the cutting edge. During operation, the arrangement of the teeth may change, so until the correct geometry is achieved, there is no point in sharpening the saw part.
There are 3 ways to split the saw:
- classic - the teeth alternately deviate to the right and left;
- stripping - the 1st and 2nd teeth deviate in different directions, the third remains straight. This profile is created for sawing hard materials;
- wavy - the most complex option, resembling a wave in shape. Here, each tooth is given an individual shape, and this type of setting is usually performed only in specialized workshops.
It should be noted that when setting, not the entire tooth is bent around, but about 2/3 of the upper part. The procedure is performed on a special machine for setting band saws. The cost of such a tool is quite high, so it is bought if you need to set up several tools. Its presence can become the basis of a sharpening business.
Of course, it may not be possible to do everything correctly the first time, even on an adjusting machine, so at a minimum the profile geometry should remain the same as before the work began.
Sharpening
This is the main stage of cutting edge dressing and can be done in two ways.
Full-profile sharpening of saws is performed with a CBN wheel installed in a special sharpening machine.
This is a fully automated operation used by professionals. The operation of the machine for sharpening band saws for wood is controlled electronically, and the grinding wheel processes the entire band in one pass. The disadvantage of this method is that the CBN wheel is selected individually to the profile of the saw, so in order to edit different tools, the sharpening element must be included in the range.
Sharpening of teeth is done manually or using specialized equipment.
In the first case, you can restore the sharpness of the teeth in the shortest possible time, but the work requires certain skills. In the second - painstaking work: 4-5 movements along the edge of each tooth.
Diamond, CBN and corundum wheels are used for automatic sharpening
It is important to understand that when performing this procedure, only sharpness is given to the teeth; the geometry created after setting the blade must remain unchanged
Basic Rules
When sharpening a wood saw with your own hands, you need concentration, a good eye, and skills in working with a file. Despite the apparent complexity of the process, if you follow the recommendations, this manipulation can be done quite simply, although not quickly. To sharpen a hacksaw at home, you need to spend an hour or two, but you can do it faster if you get good at it.
Hacksaws are also sharpened with a grinder, but many craftsmen have a negative attitude towards this method. Firstly, it is unsafe, and secondly, you can damage the incisors more than sharpen them.
Preparation
The blade must be securely fixed in a vice. You can also sharpen on your knees or a stool, but holding the hacksaw is so inconvenient. The place where sharpening is carried out should be well lit; for safety reasons, gloves should be worn. Nothing extraneous, such as a TV, should distract from work.
To restore the performance characteristics of carpentry tools, it is necessary to use only a high-quality file. Usually a triangular file is used, and for the small teeth of a garden hacksaw a special tetrahedral file is provided.
The edges of the incisors must be cleaned with a needle file or a file that has a fine velvet notch. If you have to use a used file, then first clean it with a steel brush.
A small layer of coating is ground off the incisors. During their processing, the file should not slip, but cling to them well. If this does not happen, then the file is not suitable for processing or the blade cutters are overheated. For sharpening, you should take another tool. If the repeated attempt is unsuccessful, it is recommended to change the hacksaw.
Sharpening
To sharpen a hacksaw on wood with a file correctly, hold its handle with your right hand and hold the end with your left. The tool is directed at the teeth of the blade at an angle (like a bevel). The pressure should be uniform, smooth and only in a certain direction (usually away from you).
If possible, it is advisable to ensure that the removed layer of metal is of the same thickness. To do this, it is recommended to move the tool an equal number of times and with equal pressure. This way you can maintain the height, steps and angles of the teeth after processing.
It is necessary to remove burrs that appear on the edges of the tooth with a damp whetstone or with a file with a velvet notch. If left, they will reduce the sharpness of the teeth and chip when cutting wood materials, which will worsen the quality of the manipulations performed.
When sharpening is finished, check the sharpness of the teeth by sawing a piece of wood. If, when inspecting the saw blade, the cutters do not shine, then all actions were done effectively and the hacksaw is ready for use.
Teeth setting
The set of teeth is necessary so that the hand saw does not jam during the cutting process, so that it goes smoothly and easily. After using a hacksaw for a long time, you may need to set it before sharpening it. The essence of the process is to uniformly bend the teeth in different directions. After this procedure, free gaps should form on both sides of the canvas. The movement of a sharp-cutting tool in a cut will be much more efficient.
The greater the bend of the cutters, the less the risk of the saw getting stuck during operation. But you shouldn’t overdo it here, otherwise sawing will be extremely problematic.
For ease of bending, it is recommended to use special devices. The hacksaw is clamped well in a vice, and the device is mounted on the work surface. The main thing is that the teeth should not protrude completely, otherwise they will break.
General requirements for sharpening
Sharpening a hacksaw is a rather painstaking process in which accuracy is important. To make it easier, you should use only good files and needle files that are sufficiently sharp. If you have to sharpen your saw frequently, the best solution would be to have a separate set of tools for this job. Before sharpening, it doesn’t hurt to look at the teeth of the hacksaw. If their shade is darker than the canvas, then they are red-hot. It is impossible to sharpen such a hacksaw on wood.
When sharpening at home, you should remove the metal evenly. An equal number of passes with a file are made on each individual tooth, regardless of how worn it was before correction. In this case, you cannot change the sharpening angle, set by the inclination of the file, or rotate it around its axis. Movements should be made strictly from oneself, since it is with this technology that the efficiency of removing metal from a hacksaw is achieved, and the worker can confidently control the tool in his hands.
To avoid additional difficulties during sharpening, the saw blade should be firmly secured in a vice. It is desirable to have a source of direct light, which will allow you not to peer into the results of the work.
How to sharpen?
The process of sharpening a two-handed saw is carried out in the same way as in the case of an ordinary hacksaw for wood. Only with this tool everything happens much easier due to the large cutting teeth, you just need to prepare correctly. For self-sharpening you will need:
- rectangular file;
- template for precise setting of teeth;
- homemade wooden vice.
Since the blade of a two-handed saw is long, it cannot be clamped in an ordinary metal vice. You will need to design this device yourself. To do this, you need to fasten the saw blade lengthwise between two boards, tie them tightly at the edges with a rope and install the resulting structure on legs. Then you should make sure that there are no protruding elements among the teeth; they should all have the same height. If any tooth rises above the rest, you need to shorten its top with a file
It is important to maintain the length of the tooth relative to the base, so after grinding off the upper part, you need to make a corresponding cut deep into the blade
When sharpening, it is recommended to attach the file to a wooden block to avoid damaging your hands, and to carry out all work while wearing construction gloves. When the height of all the teeth is adjusted, you can proceed to setting them - bending the teeth in different directions one by one (one to the left, one to the right). This will increase the width of the future cut and make the work easier.
The template is a wooden or metal strip bent at a certain angle. Its flat base is applied to the saw blade, and the curved top determines the angle of the teeth.
After wiring, they begin directly to sharpening the cutting elements. To do this, a file is brought to the edge of each tooth and, using reciprocating movements, its edge is sharpened, like an ordinary kitchen knife. It is advisable to move the file away from you, this will create a sharper angle. When sharpening, you need to firmly press the surface of the file against the edge of the tooth; you cannot perform this action in a sweeping manner. Otherwise, the file may slip, which can result in serious hand injuries.
Having sharpened the edges on one side, you need to move to the other side and process the second edge of each tooth in the same way.
It is important to note that when purchasing a new tool, the width of the cutting edges on the teeth is different - one is narrower, the other is wider. Narrow edges only separate the fibers of the wood material, while wide ones cut them, which ensures fast and accurate cutting along the intended line. It is advisable to maintain these proportions during sharpening so as not to reduce the effectiveness of the tool.
It is advisable to maintain these proportions during sharpening so as not to reduce the effectiveness of the tool.
A simple device to help
It is difficult to sharpen a hacksaw efficiently without special tools and a machine, by eye. You have to constantly inspect the teeth to make sure that they are not deformed, but become sharp.
We recommend: How to properly brush your teeth with dental floss
If the saw is used frequently, it makes sense to make a device that makes sharpening several times easier and faster.
You will need:
- old boards;
- screws and a screwdriver.
Progress:
- We connect two boards slightly larger than a hacksaw to each other at an angle of 37 degrees. To fasten the parts we use two corners.
- Place the hacksaw on the board so that the cutting edge protrudes.
- We fix it using 3 bosses, self-tapping screws and a screwdriver.
- We fix the device itself on the table using 2 clamps.
Top 5 best saws
Buyers will find saws of domestic and foreign production in stores. The product rating is as follows:
- The saw is two-handed, the size of the working part is 1250 mm. The product is produced by Izhevsk. Model with a wooden handle, the tool is designed for working with large massifs. For release, steel grade 65 mn is used. The teeth are straight, step 2.
- MATRIX MASTER 23410, China. The blade size is 1000 mm, the product has a two-component handle. The saw is made of steel grade 65 mn, the coating is colorless.
- SIBRTECH, length 1000 mm. The handle is made of wood, colorless canvas coating. The teeth are straight, 2D, pitch 2.5.
- Two-handed saw, blade length 1000 mm, manufacturer Izhevsk. Straight teeth, step 2. Colorless blade, made of 65 mn steel.
- Inforce 1000 mm 06-08-06. The product is made in Russia and is designed to work with thick logs. The tooth pitch is 10, the handles are made of plastic. High-strength tool steel was used to make the blade; the anti-corrosion coating further increases the service life of the saw.
All two-handed models have a long resource. The tool, made of durable steel, quickly cuts wood. When a metal object is passed along the blade, the saw produces a sound similar to a howl, which is modified by bending the blade.