Most residents of the suburban area are familiar with the need to use various woodworking equipment, which is often used for domestic purposes in the garden. The modern market for hand-held and stationary construction tools is replete with various models of wood processing devices, the most popular of which include the sawmill. Moreover, such equipment is divided into bus, disk, frame and belt type devices, depending on the method of sawing wood used.
What is a tire sawmill used for?
Man has been using wood of various species for a long time to make structures and objects used in everyday life. At the same time, people constantly tried to improve woodworking equipment with their own hands. Hand saw , which not so long ago was considered the only mechanism for sawing wood at home, is slowly but surely losing its position, giving way to machines running on electricity or liquid fuel, which greatly simplify human labor.
No construction is complete without significant financial costs associated with wood processing: sawing boards, constructing rafter structures or manufacturing furniture. Naturally, all these items can be purchased at any retail chain, but this is not always justified from a financial point of view. A person who is used to doing everything with his own hands will be able to assemble a tire sawmill - a machine with which you can make any gazebo, wooden shed or garage box, bathhouse or log house and many other wood structures.
The main purpose of a self-made sawmill with a tire design is high-quality sawing of logs in the longitudinal direction for the production of unedged and edged boards, slats, carriages and other lumber used in construction. Homemade tire sawmills were developed for the production of small batches of wooden construction blanks of non-standard sizes and processing of different types of wood.
The installation of sawing equipment for the busbar structure does not require much space, which allows it to be used on a small plot of land. Naturally, such a sawmill cannot fully replace a rounded machine or cutter, but it is quite suitable for cutting timber and making boards yourself. Today, there are stationary equipment powered by electricity and sawmills, which can be moved using a gasoline engine, which is very convenient when harvesting lumber in the forest.
Design Features
We can assume that the tire sawmill has acquired its final appearance and is ready for sawing wood. Don't rush and don't expect to do everything perfectly quickly and accurately. The sawmill must undergo further testing, and the operator must learn to work on it. On this path, certain negative aspects may await you:
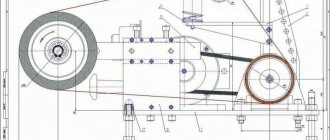
Sawmill electric motor connection diagram.
- The tire sawmill is heavier at the top. The center of gravity at a high altitude causes strong deviations in the direction of the tire. The lumber will have a noticeable “waviness”. The vibration is felt very strongly by the operator. There are two options: either place the engine lower from the sawmill, or increase the weight of the lower part.
- The sawmill moves along the guides only with great effort from the operator. If the wheels of the sawmill do not have excessive friction with the guides, then the cause of the inconvenience lies, again, in the location of the center of gravity. The design needs a counterweight to the engine.
- When sawing, the chain stops. A common occurrence when the clutch is adjusted incorrectly. You just need to tighten the clutch rollers or shorten the cable.
Initially, tire sawmills were made on the basis of a chainsaw.
This caused a number of serious inconveniences. Feeding wood and operating the chainsaw accelerator was only possible with the participation of two people. The design of the sawmill described above allows one person to work successfully on it. By moving the cutting part of the sawmill, the operator sees all the moments of sawing and can independently adjust the speed of feeding the bar onto the tree trunk. Typically, it takes about 5 minutes to cut a 4-meter log. A chainsaw will do this job a little faster, but the quality of the cut will not be as smooth as when using a tire sawmill.
Read also: How to use a circular saw video
A chainsaw sawmill can have a stationary tire arrangement. In this case, the log itself is served. It is not necessary for several people to be present. Supply is ensured through the use of chains from agricultural machinery. Such a chain is fixed to a movable cart on which the log is located. The chain is attached to sprockets, one of which should be located next to the operator and have a handle for rotation. Such homemade products work no worse than others. The only drawback is that such tire sawmills require additional load on the person’s hands and certain sawing skills.
Designs and types of tire sawmills
Today, you can consider two types of tire sawmills that you can actually make with your own hands:
- with the movement of the working unit relative to the wood being processed;
- with a longitudinal method of feeding wooden blanks.
At the same time, it is impossible to single out any model that will be the best, since both types of sawing equipment have both advantages and disadvantages. Thus, when moving the working unit along a log, a person has the opportunity to control the applied forces , thereby ensuring uniform progress and sawing wood at high speeds.
When feeding the log towards the sawing mechanism, cutting control becomes much more difficult. It is enough to push the tree slightly harder and this will immediately lead to a sharp increase in the load on the bar and chain. This may cause the chain to jam or the motor to overheat. But in such a mechanism there are no additional wires that move behind the main unit. Naturally, the final choice of sawmill design for making it yourself depends on the individual preferences of each person.
But regardless of the chosen design, you need to worry about building a high-quality foundation that will reduce vibration . Most often, metal channels or rails are used for the base of a homemade tire-type sawmill. The lower part of the frame is equipped with wheels to ensure free movement of the sawmill or the processed wooden workpiece.
How to arrange horizontal movement?
Sawmill assembly diagram.
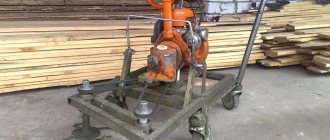
Now let’s solve the issue of moving the entire sawmill along the log. Unlike conventional band sawmills, where a log is fed to the cutting elements, the tire sawmill itself must move along the line of the intended cut. For this purpose, vertical posts are welded to a metal base, in the lower part of which wheels (or bearings) are located.
There are chainsaw-based sawmills that move on rails on corresponding wheels. This is an ideal option, since you don’t have to invent anything. In reality, it will be difficult to find all the elements to create such a movable sawmill base. More often, metal wheels are used that move along guides. U-shaped channels are used for guides. The wheels in this design must be adjustable in height (minimum 2 adjustable wheels). This design of the sawmill base will allow all support points to be located in the same plane.
The guide channels must be welded together into a single structure. You can also make a collapsible design of the guides, then the bus sawmill can easily be dismantled and delivered to the place of intended sawing.
Making a sawmill with your own hands
Before moving on to the assembly process, you need to worry about the availability of materials and tools from the following list:
- schematic drawing of a sawmill;
- metal channel or rail;
- pipes of different sections;
- Electrical engine;
- tire and drive sprocket from a chainsaw;
- welding unit and electrodes;
- electric grinder and drill;
- hammer, tape measure and chalk.
To make a tire sawmill with your own hands, spare parts from a standard chainsaw are used. The working part consists of a tire, an electric motor and a clutch system , which are placed in a separate housing.
Stages of assembling the sawing mechanism
Having assembled a tire-type sawmill on your own, a person will receive an indispensable assistant for solving everyday problems. At the same time, for its self-assembly there is a certain sequence of events .
- The first step is to make a rectangular frame. A tire is placed in the center of the base. Considering that this element will be subject to high loads, it is securely attached on both sides.
- In most cases, the driven sprocket already has a hole designed to mount the element on a steel axle made of a high-strength alloy. The axle prevents the tire from moving horizontally. To prevent vertical displacement, two bearings are mounted as tightly as possible to the tire on the axle on both sides.
- At the next stage, a bushing is put on, which clamps the bearings to a strip and the axle is welded to one side of the frame. On the opposite side there is an electric motor and a chain tension control system. In this case, you don’t need to invent anything, but you can simply use ready-made spare parts for a chainsaw.
- The drive drum is mounted on the shaft of the electric motor and secured using a longitudinal key.
- At the final stage, the structure is centered and securely fixed in the body.
When carrying out work with your own hands, close attention should be paid to mounting the engine , which will vibrate strongly during operation. Therefore, care must be taken to ensure that the frame for it has sufficient rigidity.
Assembly order
First you have to assemble the cutting machine. For a tire sawmill, a frame is made that resembles a cube frame. The chainsaw bar should be located in the central part of this frame. The tire must be secured on both sides.
The driven sprocket is usually mounted on a vertical holder. The opposite part of the bar is attached to elements that allow you to adjust the chain tension. But this is optional.
Sawmill adjustment diagram.
It is better to securely fix the tire, and organize the chain tension by moving the drive sprocket. This is not difficult to do: the drive sprocket is attached to the gearbox shaft, which is mounted on a metal base with longitudinal slots. It will be enough to simply release the fasteners and move the gearbox in the required direction.
We connect the gearbox drive shaft to the pulley (to a key). The second pulley will be located on the engine. The place for mounting the motor must be organized so that nothing interferes with the movement of the sawmill cutting machine. Rollers are used to tension the belts. The design of the belt clutch may vary. It is not necessary to make this element yourself: any design from agricultural machinery will do.
Installation of the structure on the base
After assembling the working unit, it needs to be secured to a metal frame , the manufacture of which with your own hands consists of simple steps.
- Two blanks are welded from durable steel tubes, shaped like the letter “P”. The upper parts of the resulting blanks are fixed to each other by electric welding or bolts.
- Four pipes placed vertically are welded in the center of the frame. On each element, several small recesses are made on the outer side at a distance of 20 mm relative to each other to a depth of up to half the diameter of the tube.
- Four tubes are also welded onto the working unit, the internal cross-section of which must correspond to the outer diameter of the pipes located on the base. The placement of elements must be done in such a way that the pipes on the working unit fit onto the tubes of the supporting base.
This design is necessary to ensure free movement of the sawing unit in a vertical position. Fixation of the working unit in the required vertical position is ensured using bolts.
How to adjust tire height?
And now you have to think over a system that allows you to adjust the height of the chainsaw bar above ground level. The simplest solution would be to place the entire cutting machine on vertical stands. For this purpose, two pipes are used, on which are cut pipes of larger diameter. Movement should be free, but without play. The outer (movable) tubes have holes to which nuts are welded. By screwing the bolts into these nuts until they stop, you will get a reliable fixation of the height. For convenience, notches can be made on the supporting posts at a distance of 1 cm from each other. Thus, you will be able to accurately determine the lowering height of the cutting element of the sawmill and obtain lumber of the required dimensions at the output.
