How to charge and discharge a screwdriver battery? How often? How to erase the “memory effect”?
What should you especially pay attention to?
How to properly store batteries if one is in a screwdriver and a spare is separate?
Do I need to measure voltage, and if so, how often?
Here it is important to consider what batteries are installed on the screwdriver (I mean by type), as well as whether it is a new tool or whether we are charging an old one.
If your screwdriver has nickel-cadmium batteries (battery), then yes, they have that same “memory effect”.
To bring the capacity level of such batteries to the required level, they must be fully charged and completely discharged at least three times, this way you will remove the “memory effect” and the battery will last a long time.
And lithium-ion batteries are another matter; they do not need “pumping” and they do not have a “memory effect”.
Immediately after purchasing the tool, we simply charge such batteries and that’s it.
They do not like deep discharge, so they need to be recharged periodically, even if you do not use the screwdriver for a long time.
When charging any batteries, you must observe the temperature regime, the temperature should be in the range from + 10 to +40 degrees.
Well, and most importantly, read the instructions for the specific model of the screwdriver you purchased; there is information about how to properly charge it.
Currently, nickel-cadmium batteries occupy first place in popularity among power tool manufacturers.
Ni-Cd batteries are lightweight, small in size, relatively low cost, but at the same time they have one significant drawback, the so-called “memory effect”.
Now take a break from reading for two minutes and watch this video to better understand what the “memory effect” is and how it occurs.
That is, we ourselves are to blame for the appearance of this effect by improperly servicing the battery - without waiting for it to be completely discharged, we put it on charge, and even worsen the situation by not allowing it to fully charge, we stop charging. So the battery “remembers” these values and operates within these values.
Hence the conclusion: you need to follow the operating mode of the battery - bring the battery to the most complete discharge, and only then charge it with the parameters recommended by the manufacturers.
A battery that is “sick” with memory effect can be “cured”.
For this, there are special chargers that, after connecting the battery, first connect it to the load, dissipating the remaining charge, and then the charging unit is turned on.
You can “cure” the battery on your own. In this case, you need to connect a 12-volt, 5-watt light bulb to the battery terminals and wait until it goes out. Then you should charge the battery completely.
You will have to carry out not two or three such cycles, you may have to do this procedure a dozen times and, although it is unlikely that you will be able to completely restore the original capacity, the battery will work better - that’s a fact!
Usually, when buying a screwdriver, we try to choose one that comes with two batteries and, naturally, the question arises, how to store a temporarily non-working battery?
A battery left unused for a short time (a week or two) can be stored at room temperature, fully charged, but not in a screwdriver.
If there is a long break in work (about a month), then it should be discharged, but not completely, otherwise irreversible processes will arise in it. It is enough to work with a screwdriver until the stage when there is a noticeable reduction in the number of revolutions at full load and send it to rest. Before use, the preserved battery must undergo a “full discharge – full charge” cycle.
When storing the battery without operation for more than a month, it is necessary to carry out the above cycles monthly.
How to discharge a screwdriver battery with a light bulb
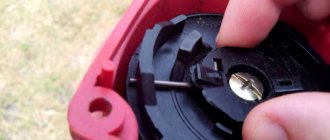
The simplest and, not surprisingly, popular way to completely discharge battery banks. You will have to disassemble the case. If there are screws on the handle, great. Just unscrew them with a screwdriver. In the case of a glued hull, you will have to break the structure a little. Take a hammer and lightly go over the seam of the handle. Don't worry, you'll soon have everything fixed with new glue.
When the handle is opened, you have access to the battery itself. Disconnect it from the screwdriver system and connect a light bulb with the appropriate voltage to the battery terminals. As a rule, this indicator is 12-13 V. You can find the voltage of your device either on the device itself or in the device instructions.
The lamp heats up and gradually “pulls” energy from the battery. The process will not take much time. If the light goes out, it means the battery is completely discharged.
Recently, 14-volt nickel-cadmium batteries have become increasingly common. Here you will have to use light bulbs with this power. Or other ways. Watch the video for more details:
The battery on the screwdriver runs out quickly
The problem with rapid self-discharge of the battery is quite common.
It consists of fast charging, which occurs in about 20 minutes and the same short operation. This situation may result from malfunction of the temperature sensor located in the removable battery. This temperature sensor may not be installed this way initially. It must be returned to the place of purchase.
If the battery begins to discharge quickly after prolonged uninterrupted use, which could happen after a fall, you need to get it repaired.
Technology for replacing Ni-Cd with Li-ion in a screwdriver
Lithium elements are durable, so many screwdriver owners are thinking about replacing nickel-cadmium products with them.
The replacement technology includes several steps that must be followed.
Determining the number of Li-ion batteries
Basically, the battery parameters are marked on the battery itself or on a screwdriver. To determine the number of required elements, you need to divide the voltage indicated on the tool by 1.2V (this is the nominal voltage of one nickel can).
To find out how many lithium parts will be required for replacement, the division is carried out by 3.7 V - this is a normal indicator for this type of cans.
It is recommended to round up the result obtained; this will not have a negative effect on the instrument, but will simply increase its power a little.
It is necessary to correctly select all the necessary elements for replacement
Selecting a Li-ion battery
Manufacturers offer lithium-ion and lithium-polymer cells. The latter are smaller and safer, but they are more expensive. However, they are not capable of delivering large currents. Therefore, experts recommend using regular lithium-ion banks.
It is better if the element has welded flexible bends, because such parts do not like elevated temperatures and unnecessary soldering. It is recommended to look at several options in stores to choose the most suitable model.
How does the battery voltage affect the operating time of a screwdriver?
The question of how the battery voltage affects the operating time of the product is of interest to many. To understand how much power a product has, you need to multiply the voltage by the battery capacity.
For reference! For example, a screwdriver with a 14.4 V battery with a capacity of 1.5 Ah will have a power of 21.6 W.
Ready-made 18650 battery assemblies
As a replacement, it is better to purchase ready-made 18650 battery assemblies. You can do this on Chinese online trading platforms or in other online stores.
BMS Protection Board Selection
Lithium-ion batteries require careful handling and compliance with certain requirements. The role of protection is performed by the BMS board. It is this element that does not allow the voltage to exceed more than 4.2 V and decrease below 2.55 V per battery during charging. In addition, the element keeps the maximum permissible current under control and maintains the necessary balance between the batteries.
The main parameters when choosing are the number of elements connected in series. On the Internet you can look at a table that shows all the necessary parameters and use it to select a suitable board.
You can make a replacement even at home, the main thing is to follow the sequence
Power supply for charging
For lithium-ion batteries, chargers are selected based on the number of batteries connected in series in the battery. The more there are, the higher the output voltage should be.
Battery won't charge
A screwdriver sometimes fails after prolonged use. Its working element may stop charging, which will lead to the impossibility of fulfilling the functional capabilities of the tool; the tool, roughly speaking, will “die”.
In order to extend the life of the instrument so that you do not have to remove it from visibility, you can try three methods in turn. Each subsequent one is considered more complex and costly. They are:
- restoration and increase in capacity after its reversible loss (memory effect);
- adding distilled water to the electrolyte;
- replacing some or all of the battery packs.
Removal and replacement
Here you will have to work with a soldering iron. Also, you will need an alcohol flux for rosin and tin.
Cut off the unnecessary element, then solder a new one in its place. Try to solder quickly so as not to damage the battery, as it may overheat. Be sure to check whether you have combined the pros and cons correctly. When soldering plates, it is better to use those that were already in the device.
To equalize all the potentials on the banks, charge them overnight, let them cool for one day, and then measure the voltage. It should be the same on all banks (up to 1.3 V). Operate the screwdriver until it is completely discharged and charge again. Repeat this 2 more times.
Battery life for screwdriver
The battery can last about three to four years if used and stored properly. In practice, this period is sometimes reduced to two years. It is very expensive to constantly change a tool, so it is better to immediately choose the best option for certain purposes.
There are 3 different types of batteries:
- Nickel-cadmium. The most affordable, but short-lived, especially if used frequently in cold weather conditions.
- Nickel metal hydride. A small device that does not have a long service life.
- Lithium-ion. The most popular ones are capable of not being discharged for a long time, but have a higher cost than the above options.
Regardless of the type of battery, their lifespan depends on the number of charges used and storage methods. That is, the more the tool works, the faster it discharges. At the same time, “downtime” in use negatively affects the service life, especially if you store the tool in a condition where it is worn out.
Method for restoring nickel-cadmium batteries. Tested - it works!
I don’t know if there was a topic (there probably was), but I’m tired of reading laments about dead banks and remarks like “to the trash heap”, “change banks”. Actually, the methodology is outlined here:
However, it is not technically literate and not everyone can understand English. Visual video here
The technique is briefly called ZAP (ZAPP battery, ZAP-ZAP, zapping, etc.) and we will also briefly and clearly call it zapping. In order not to shovel vague explanations in English, I will briefly tell you about the principle. Its essence is burning (purging) a can of a nickel-cadmium battery with short (0.3 sec) pulses of excess current for several seconds. Exactly over current. Those. tens of times greater than the capacity - tens of amperes (20-30 or more)
The essence of the method: During operation, the crystals in the NKD ACK cell grow, unite and grow together and form so-called dendrites (from the word tree), which is why the capacity drops (large dendrites have a smaller surface area than many small ones), and even sharply The scourge of all batteries is increasing - internal leakage (i.e. self-discharge). The main reason for the sharp growth of crystals (they grow constantly anyway) is overcharging. Overcharging is especially critical with high-speed charging methods. The storage mode also affects. Storage with a full charge is not recommended. However, there is one caveat here - NCD batteries have self-discharge, so storing them when fully charged is only possible with constant manic recharging. In general, this is relevant for the case of using the battery in buffer mode with trickle charging. However, in normal storage mode (set it and forget it), it is recommended (by the site ysuusy.com, not by me) to “blow out” the jars once every 3 months.
So, blowing with super current allows you to destroy (fragment) large crystals, burn connections between dendrites (cut “branches”) and, restoring capacity, sharply reduce self-discharge.
The method is effective for any sealed NKD batteries of a roll design (there are other methods with disk ones). The method is effective for batteries in any condition. Even discharged to zero, leaked, 20 years ago, etc. The whole question is only in the likelihood of recovery, the number of cycles and their combination and the completeness of success. Of course, the more neglected the account, the lower the likelihood of revival or full recovery.
Attention!!!! The method works Only for nickel-cadmium batteries! For metal hydride and lithium it does not work and can cause disaster! !!!!
So point by point.
- For power, you need to take a charged car or other high-current battery (from an UPSA or similar, from a car is better), even a charged battery from another battery. tool. The whole point is a strong current and voltage that significantly exceeds the rating of the battery being restored. A tester is also needed to monitor the voltage on the battery being restored.
- The voltage of the power source depends on the voltage of the battery being restored (this is all described in the link above). for batteries from 1.2V to 9.6V, a 12V car battery or similar is sufficient; for batteries from 9.6 to 20V, you need 2 12V (24V) batteries connected in series or an 18V battery to restore 12V. It can be higher (for high-voltage batteries) and lower for low-voltage batteries. The main thing is that the voltage difference is sufficient to develop excess current (tens of amperes). For example, you can take a welding machine as in the example in the video. The only thing that won't work is regular power supplies. even high-current with currents up to 10-15A. They are too frail for such titanic influences.
- A crocodile or other clamping device to ensure reliable contact at one terminal and hold the “zapping electrode” at the other. You can’t hold it with your fingers because it’s red hot.
- Zapping electrode. A piece of copper single-core or multi-core rolled into a tight bundle or other wire (wire) without insulation with a cross-section of no more than 1.5 mm sq (in my experience) and a working length (i.e. from the contact tip to the current supply node) of at least 60 -70 mm ( 6-7 cm).
- ! Necessarily! Means of protection. Glasses are a must, otherwise you may lose an eye. And also a fireproof substrate, a robe for yourself, etc. around - because sparks, God forbid, can happen by accident. set fire to or burn anything (for example, clothes, a table, etc.)
- I recommend restoring the account one by one, rather than the entire battery at once, if possible. Firstly, the result is higher and one 12V car battery is enough. However, it is not always desirable to disassemble (especially a glued battery) and crawl to each can.
- Attach one electrode to one of the battery poles (usually negative). Do not confuse the polarity under any circumstances!
- Start poking the other pole with the electrode at a frequency of 2-3 times per second. over time taken from the graph from the site above. I am attaching the graphs. Each donor voltage (12, 24, 36) has its own graph. The graph shows the duration of zapping depending on the voltage of the battery being restored. For example, for a 1.2 V bank and using a 12V car battery, you need to power up for 3-4 seconds with a frequency of 2-3 power-ups per second. Usually, it’s easier to count the number of pokes; for example, in our case it’s about 10-12 short pokes.
- Be sure to monitor the voltage! Immediately after starting, measure the voltage at the battery. For our case it should be about 1.3-1.32 V. No more. If it’s more, then you need to reduce the time or number of pokes next time.
- Especially important! The pokes should be carried out in such a way as to prevent even short-term welding of the sapping electrode to the pole of the battery being restored! Otherwise, you will end up with a complete burnout of the battery, with the internal electrode burning out from the reel with the active mass, and the battery element(s) can be safely thrown away.
- I recommend putting on a protective intermediate electrode on the battery pole (or cans) that you will be poking at, soldering a plate or hooking a crocodile, in general, a thread to protect the surface of the battery pole (but with very good contact). This is especially true when zapping an entire battery, and not a tank, because after zapping, especially multiple zapping, the surface of the pole will resemble the lunar surface and may require grinding (to maintain normal contact with the tool) and may even burn off.
- The procedure can (and sometimes should) be repeated up to 25 times. Until complete victory (or defeat). Sometimes the acc is restored, but not completely, or the capacity is there, but the self-discharge is still very high. Then you can repeat the procedure.
- Be sure to monitor the temperature! The intervals between zappa cycles should be at least 10-15 minutes for cooling and recombination.
Own experience. I have already tried it on several dozen elements and several batteries. They gave me 2 Makita batteries (10+10 cells) that completely died 4-5 years ago (then they ended up lying somewhere on the street, I took them because of the cases). I began to conduct experiments on them. The voltage on the banks was equal to 0 and was not raised by any charge (according to the nature of the current consumed, there was a short circuit inside all the banks) So. Out of 20, I burned 2 pieces (just by welding the electrode - they died making a popping sound). And 3 pieces after 12 zapping cycles completely restored their capacity! The batteries were 1.3Ah. Now the battery capacity in the analyzer is 1.25, 1.33, 1.28 Ah. Although there is self-discharge, it is tolerable (they hold a charge for 2-3 weeks, which of course cannot be compared with new Makitas where they last for months). It is necessary to recharge 3 more pieces, the capacity has been restored (10 cycles), but the self-discharge is high - 3-4 days and the discharge is zero. For the rest, after 10 cycles, self-discharge to zero within 10-20 minutes. But these are batteries that have been killed to an absolute state! With fresh ones the effect is very good. For example, the battery of a Skill screwdriver has completely restored its capacity and the self-discharge has decreased by 3-4 times (you can work, you need to refill it again). The dead Hitachi batteries restored their capacity and self-discharge to the same level as new ones. I zapped a few more people - happy!
There is another method. I haven't tried it myself yet. It is recommended for accounts that cannot be restored by zapping after 25 times. This method is freezing. The idea is to freeze the elements in the freezer for an hour or so. Then they quickly take it out and immediately begin to sharply and briefly, with some force, knock on the body of the can. It's not hard to hold the jar itself. The idea is that when frozen, the dendrites become fragile and, when shaken sharply, they are destroyed, crumble and crumble like ice, etc. You need to hit not with a sledgehammer, but in such a way as to transfer all the energy of the blow in the shortest possible time. That is, abruptly and quickly with a hard and not heavy object, for example, a carbolite (hello HTZ) or other impact-resistant hard plastic screwdriver handle, a small hammer, etc. You need to beat often and quickly until the dendrites thaw. You can repeat the cycles up to 5 times.
Ideally, in order not to organize pyrotechnic shows, you just need to make an electronic device. For example, giving impulses with a key on a field machine. Everything can be controlled by a microcontroller - monitor the battery voltage and temperature, repeat cycles with pauses until recovery, etc. change the number of pulses and control 10 cells at once in turn, and so on. But this is for amateurs. To put it simply, a field switch and a 555 timer, a start button and a voltmeter.
In general, you shouldn’t expect a miracle and the method is not a panacea, but it is effective and sometimes surprising! Comrades, write about your experience - it will be useful to everyone.
How to restore a screwdriver battery at home
Is it possible to reanimate all types of batteries? Nickel-cadmium blocks, which are found in almost all modern screwdrivers, are easier to repair.
The restoration process requires an understanding of the basics of electricity. That is, have school knowledge about the operation of rechargeable batteries.
To work you will need tools and materials:
- screwdriver;
- tester;
- soldering iron;
- tin (with low-corrosive flux).
To resuscitate the battery, a donor will be required. It may be included with the screwdriver, or you may need to find it yourself, for example, by removing it from another old device.
To begin the operation, it is necessary to fully charge (about 6 hours) both batteries and swing it. After this, remove the plastic cover from the restored part using a screwdriver. This procedure must be performed carefully so as not to damage the fasteners. Otherwise, subsequent assembly will require glue, like Moment.
Refurbishment of nickel-cadmium batteries for screwdrivers
The ni cd battery device is manufactured using the same technology, so any battery can be made a donor of this type.
Such devices are separate components - blocks, with a nominal voltage of 1.2 V and an energy capacity of 1200–1500 MA/h. They are found in screwdrivers from Interskol. Each block affects the power, that is, if its value is 12 V, the number of blocks is 10, 14.4 V - 12, etc. After changing the battery, the power may drop for the first time of operation, but then everything will be restored.
Restoring an 18 volt screwdriver battery
18 V is a common power, which corresponds to the presence of 15 blocks. As a donor, you need to choose an electrical device with a voltage of 14.5 V, that is, a 12 V car battery will not work.
How to restore and start a lithium-ion battery
For these types of batteries, you will need to remember where the positive, negative and charging contacts are located. The voltage control board located on the batteries most often fails, or rather, their stabilizers and protective diodes.
The voltage at the battery output is checked, if the value is significantly less than normal, resuscitation is performed.
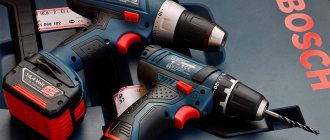
Second life of batteries in Bosch, Hitachi, Makita screwdrivers
The brands shown come with a lithium-ion battery. To revive them, you will need a soldering iron and sleight of hand, because if you do everything slowly, the service life may decrease, or the battery will completely explode.
All broken or frayed wiring inside the battery must be insulated, for example, with electrical tape or replaced in advance with new ones.
To restore, torn metal elements are soldered - strips that can be taken from old blocks.
To assemble, you need to return the cardboard spacer between the blocks and the board to its place. This will be required to prevent a short circuit. Then the contacts are isolated.
Why check the condition of a screwdriver battery with a multimeter?
To do this, use a multimeter or some device that has similar measuring capabilities. In addition to this device, you will need a screwdriver, a knife, a soldering iron with a soldering kit and pliers.
To accurately determine the causes of battery problems, establish the functionality of each individual power element. However, first check the charger. Using a multimeter, do this:
— turn on the device; — set the multimeter’s measured value switch to constant voltage; — install the probes into the corresponding sockets of the multimeter and touch them to the contacts (“+” and “-”) of the charger; - compare the value displayed on the display with the output voltage of the charger, which is indicated in the operating instructions or on the case; — if the values do not match, repair the adapter or buy a new one.
- fully charge the battery; — use a multimeter to check the battery output voltage. To do this, set the device switch to its constant value, and touch the plus and minus with the probes; — if the measured parameter does not correspond to the value specified in the instructions, then disassemble the battery pack and remove all batteries; - when there are no damaged cans, that is, they have not leaked or swelled, check the voltage at the terminals of each battery with a multimeter. Before this, you will have to solder the circuit with a soldering iron; — a load is alternately connected to the batteries for the same amount of time (say, a light bulb with the corresponding voltage); — the battery with the largest drawdown is damaged.
To test nickel-metal hydride and nickel-cadmium energy storage devices, they must be completely discharged. This will prevent the “memory effect”.
IMPORTANT! When checking batteries, keep in mind that for nickel-cadmium and nickel-metal hydride types of batteries, the output voltage should be 1.2-1.4 V, and for lithium batteries - 3.6-3.8 V.
When you find a defective battery, replace it with a new one. Also use a multimeter to measure the current. When it increases and exceeds 1 A in the first hour, this means that the battery is operational.
IMPORTANT! If there is no voltage at the battery output, then there is a high probability that the integrity of the circuit inside the unit is broken. Disassemble the block and look for the break point. First visually, and then with a multimeter.
Screwdriver batteries discharge quickly
Hi all! Shurik Makita 6281DWPE (14.4 volts), purchased in January 12. I don’t use it very often, but not too rarely either. You start working after a short break - and the batteries are dead! You put it on charge, it charges very quickly and discharges just as quickly during operation! When the charging indicator showed red (battery is charged), I managed to remove the battery and immediately put it back into charge. device - charging starts again; do this several times, and then you work with this account longer (is it possible to do this?). What is the reason? The previous Bosch GSR-12V did not have such problems: it plowed properly for three years, and then for a couple of years the battery capacity decreased. And after each charge the batteries held a charge for at least a month. Is Makita crap or am I just unlucky?
bondmich wrote: am I the only one unlucky?
bondmich wrote: Makita is crap or am I just unlucky
I have had this Shurik since 2010. , no complaints. Two friends have the same model, I haven’t heard any complaints from them. You were unlucky.
bondmich wrote: take out the acc and immediately put it back into charge. device - charging starts again; do this several times, and then you work with this account longer (is it possible to do this?).
So you ruined your batteries.
For Ni-Cd batteries, the charging process must not be interrupted under any circumstances. You must wait until fully charged (green light). You have stepped on the Memory Effect rake. Some stepped on them, including me, but I showed the other extreme - I discharged them to 0. We will pay for the experience for new batteries. A lot has been written about the use of different types of batteries. Happens. Don't get separated. Good luck!
I would start by measuring the voltage at the end of the charge, at what voltage the charger turns off, maybe it just undercharges the batteries. I just bought a replacement radiotelephone for home, the situation was different, but the meaning is clear - I charge the phone, but it discharges very quickly, the voltage is normal, the batteries are new, I measured the handset disconnect voltage, about 2.6-2.7 Volts (2 cadmium batteries) , temporarily repaired the old phone, and threw this one on the shelf, after three years I took it out (the battery died in the old one again), disassembled it, changed the values of the divider of the battery voltage measurement circuit, set 0.95 Volts to the can, I’ve been using it for a year now with batteries that went to included in the kit (before this they spent 3 years in the table).
In addition, if this happens with only one battery, then you most likely came across a dead can in the battery, it quickly goes into reverse polarity and the screwdriver stops turning.
bondmich wrote: The previous Bosch GSR-12V did not have such problems: it plowed properly for three years, and then for a couple of years the battery capacity decreased.
By the way, I still use the old Metabo PowerMax 4.8 Volt. I replaced the batteries about a year ago and installed the best on the market. The feeling is ambiguous, the old ones already sat down quickly, but while they were working, they held the torque well, the new ones work longer, but pull worse, apparently the internal resistance is greater than that of the original ones. A friend at the market said that the included batteries for branded tools are better than what you can usually buy from us.
In general, we start everything with voltage measurements, and ideally, if we take it to the market to those who replace batteries, they sometimes have instruments for measuring capacity, with it everything will become clear.
Battery cell recovery
Here I will give a story from Master Sergei on the restoration of a nickel-cadmium screwdriver battery. The owner began to complain about the short operating time of the electric screwdriver and that “the battery doesn’t hold up.” Disassembling the battery case showed that there are factory Ni-Cd banks from Liang with a capacity of 1000 mAh.
You can restore a Ni-Cd battery in a fairly simple way. You need to do several deep discharge and charge cycles. In such extreme modes, hard-to-reach areas of battery charge accumulation begin to operate, the output of which has deteriorated due to the memory effect, violation of operating or storage conditions.
Such problems arise not only with screwdrivers. The battery-powered radio-controlled model industry has long ago solved the problems of automated discharge/charge. There are special chargers for this.
Master Sergey had a Vista Power AK610AC. This is a charger with a charge function of 90 W and a load discharge of 20 W. This is a wonderful professional device with a touch screen! This can be found on Avito for about 5,000 rubles.
Instead of such a charger, you can use something more Chinese, for example the popular IMAX B6 at a price of about 2000 rubles.
It is best to start cyclic battery recovery by deeply discharging the battery and then immediately charging it.
After the first cycle, the discharge capacity was 707 mAh, and the charging capacity was 879 mAh. As you can see, the capacity decreased by 30% relative to that declared by the manufacturer.
Read also: How to make a hole in plastic
The second discharge/charge cycle showed figures of 781 mAh / 937 mAh. As you can see, this is 10% more than the previous values.
The third battery recharge cycle showed minor deviations from the previous second recharge. So this is enough. If you see on your batteries that the capacity is increasing, then you can continue.
Upon restoration of the battery, it was possible to restore about 8% of the originally declared capacity of the screwdriver. In principle, not bad, but I would advise replacing the battery banks with new ones with a larger capacity.
How to repair a battery for a screwdriver at home
A cordless screwdriver is a convenient mechanism that allows you to quickly complete repairs. Instead of a heavy drill on a wire, it is better to take a lightweight screwdriver that can cope with the same tasks without being tied to one place.
They have one problem - the batteries fail. There are many reasons for this:
- Long downtime. Modern lithium-ion batteries require periodic charging and discharging. They dramatically lose capacity if left idle for a long time.
- Temperature changes. Li-Ion does not tolerate high temperatures well. Therefore, there are recommendations for storing these batteries in the refrigerator. But they cannot work in such conditions.
- Overdischarge. The protection system can cause the batteries to discharge to zero and to resurrect them you need to apply a large current to the input.
If the battery wears out, you can buy a new one in the store. But you can try to restore the old ones. In 85% of cases they can be repaired.
Why do you need to completely discharge the screwdriver battery?
Firstly, nickel-cadmium batteries have some memory effect. The batteries remember the charge level you reached when powered up and take it as full the next time. In other words, you charged the battery to 70%, removed the screwdriver from charging and started using it. Now this 70% charge is perceived by the screwdriver as 100%. And so on every time until the electrolytes completely boil away.
Secondly, the need for {working discharge appears during battery resuscitation. If you want to restore the battery, you will have to discharge it completely first in order to find out which of the cans has failed. Here, too, you need the right approach and special methods.
Troubleshooting
The most common cause of failure is the failure of only one element. They are connected in series, which means that even a drop in capacity on one battery will lead to a complete malfunction of the entire battery. In this case we will need:
- Screwdriver. Usually the body is connected with Phillips screws. Some models have foolproof protection and may have stars with an anti-vandal system, triangles or even spanners.
- Multimeter. Any model is enough, even the cheapest DT-830. Since measurements are carried out in millivolts, Soviet pointer voltmeters will not be suitable.
Replacing faulty batteries
Replacing worn parts is considered the most effective method of restoring the entire battery. Before starting work, you need to purchase serviceable elements, and it is necessary to take into account the dimensional and technical characteristics.
The replacement process itself will not cause difficulties even for an inexperienced tool owner. All you need is a soldering iron and soldering materials. Moreover, in order to protect the battery from complete failure during work, it is necessary:
- try to leave the original ones as connecting plates or use a copper conductor of the same cross-section. This condition is associated with a high charge current;
- soldering should be carried out quickly to avoid overheating of the elements;
- the negative terminal of the battery is connected to the positive terminal of the next element, which corresponds to a series connection of the circuit.
Hi all! Today I will touch on the topic of construction and summer dacha activities. I’ll tell you how to repair or restore a screwdriver battery with your own hands. I must say that a screwdriver is a very convenient thing. Charge the battery and run without wires, turning it here and there. Only over time, such a twist turns less and less. This occurs due to the batteries losing capacity . We will talk about them.
General recommendations for repairs
How to restore a screwdriver battery? You need to have a basic understanding of electrical engineering. The battery circuit is simple. A regular series circuit (plus is connected to minus).
When repairing Ni-Kd, the following recommendations should be taken into account:
- They have a memory effect. The classic scheme for commissioning such batteries is 3 full charges and 3 discharges to zero. The new element must go through the same buildup.
- Similar element. So that it does not get out of the circuit and does not break the battery at all, the new element must fully correspond to the previous rating.
The lithium battery of a screwdriver can be repaired at home, if you consider the following:
- They cannot be soldered. Intolerance to high temperatures will result in a condition beyond repair. To do this, you need to use resistance welding (it heats the electrode for a short time without harming the battery). If there is no access to the CS, soldering is allowed with a very powerful soldering iron of 100 watts or more. The movement must be fast and precise.
- Same models. Now there are several main manufacturers of lithium batteries, which are used in popular foreign models of screwdrivers, such as Hitachi, Makita and domestic ones: Interskol, Zubr.
How to charge a Li-ion screwdriver battery and other important rules for its operation
- Remember - Li - ion is completely different from Ni - Cd !
- Place Li-ion on charge when there is residual charge 20-50%.
- Important! Li-ion discharge should not be allowed below 10-20% . This is a critical value. The lower the discharge, the longer Li-ion will work -
| Discharge depth | Number of charge cycles |
| 100% | 500 |
| 50% | 1500 |
| 25% | 2500 |
| 10% | 4700 |
- Li-ion works optimally in the range from -10 to +45°C. Charge at temperatures from +10 to +30°C.
- Once every 4 months, carry out a full discharge-charge cycle to calibrate the charge level sensor in the battery controllers. That is, discharge to almost 100% and charge for 12 hours.
- Li-ion should be stored at a charge of 40-60% . It is impossible to store 100% charged Li-ion, since in this case it will permanently lose 20% of its capacity in 3 months. If stored correctly - with a charge of 40-60% - Li-ion will irreversibly lose only 1% of its capacity over the same 3 months.
- If the screwdriver is equipped with two Li-ion, then charge one to 40-60% and store it as a backup. Once a month, use it as a worker - charge it to 100%, discharge it to 40-60% and leave it for storage again. The second Li-ion is the main worker. Once you've worked, charge it at the end of each day, even if it's less than 10% discharged.
Use a backup Li-ion if the main working Li-ion is discharged as a result of intensive work and there is no time to wait for it to charge.
That's all. Now you know how to charge a Li-ion battery for a screwdriver.
I gave one to each carpenter, and even hung it on the notice board in the shop.
And here’s another question: why did I switch from Ni-cd to Li-ion cordless screwdrivers?
Here are the advantages of Li-ion batteries over Ni-cd:
- at least 2 times higher specific capacity;
- self-discharge is several times less;
- no memory effect, which makes it possible to recharge at any time;
- withstands on average twice as many charge-discharge cycles, that is, it will live twice as long.
Are there any disadvantages?
- Li-ion is subject to aging. Well, are Ni-cds eternal? They also get old.
- Li-ion has low stability when operating at low temperatures. All this is in the past. Now Li-ion is made in such a way that it works even at -10°C. And some sources indicate that I can work even at -30°C;
- Li-ion chargers require the use of only the original charger. Well, what's wrong with that? All screwdrivers are sold with their original charger included.
- Li-ion has a high cost. Well, I wouldn’t say that anymore. I recently went to the store. Ni-cd batteries below 1 t.r. did not see. And on AliExpress you can buy an entire screwdriver with Li-ion for 3 thousand rubles.
And finally, if you work with a screwdriver professionally - don’t doubt it too much - it will crumble at the same time as the Li-ion battery. So you most likely won’t have to buy a Li-ion battery separately.
Just with reasonable, non-vandal use, a screwdriver should be enough for a couple of years.
And, yes, one more important rule. Don't skimp on screwdriver power. It corresponds to the battery voltage. Take a Li-ion battery of at least 20 volts. It will spin like a beast.
But buy a weak one - it will be of little use, and there will be no joy from saving a penny either.
In general, I collected screwdrivers with 25 volt Li-ion batteries. The carpenters couldn't be happier. Especially after Ni-cd at 14 volts.
Look like that's it. If you have any questions or disagree with something, write in the comments.
Replacing cans in the battery
How to repair a battery for a screwdriver? The easiest way to revive the battery is to replace one of the cans.
You need to find a defective element with low voltage. To do this you need to use a tester.
Instructions on how to check a screwdriver battery with a multimeter:
- A regular multimeter has two probes - red and black. There are two contacts at the opposite ends of the can (plus and minus).
- The tester selection lever is set to the “constant voltage” mode. If the multimeter has automatic selection of values, this is enough. If it is not there, you need to put the lever in position “20”.
- The probes are applied to the contact pads and the voltage is measured. The screen shows the actual voltage. If there is a “-” sign in front of the numbers, then the probes need to be swapped with each other.
- Each bank is checked using this algorithm.
When a broken element is found, it is simply unsoldered and replaced. You need to use a powerful soldering iron so as not to overheat the jar.
Battery restoration by replacing several elements
Restoring a screwdriver battery by replacing several elements can be successful for all types of batteries. It also does not pose any risk to them, as does manipulation with distilled water, provided that care is taken during soldering.
First, the output voltage of each “can” is measured using a multimeter, which in total should be 12-14 V. Accordingly, the voltage of one “can” should be 1.2-1.4 V. The U indicators are compared with each other, the most weak elements. Read more about how to check a screwdriver battery with a multimeter →
After this, the battery is inserted into the screwdriver and works until the moment when the power begins to noticeably decrease. The voltage readings are taken again, and those “cans” whose voltage difference is 0.5-0.7 V compared to the “stronger” ones should be desoldered, disposed of and replaced with new ones, similar to the old ones, having previously ordered them from the online store.
It is recommended to solder the battery chain using spot welding, but if this is not available, there is nothing left to do but use a regular soldering iron and do everything as quickly and accurately as possible, in order, if possible, to prevent the battery from overheating.
The “original” battery connecting plates should not be lost; they must be soldered back without reversing the polarity. In addition, all elements of the chain must have the same capacity.
After soldering is completed, insert the battery back into the screwdriver and carry out 2-3 complete charge-discharge cycles to equalize the energy potential of all batteries. In order for the updated battery to last longer, it should carry out such training 2-3 times a month. How to quickly and completely discharge a screwdriver battery →
Adding distilled water
Restoring the battery of a screwdriver with topping up must be done with a completely discharged battery. Non-CD batteries are covered with paper. If there was evaporation, there will be noticeable marks on the surface.
After measuring the voltage, you need to completely discharge all the banks using a 12 volt light bulb. After this, the voltage is measured again. Those elements where it dropped to 0.7 are faulty.
To add distilled water, you need to make a hole in the side of the jar. A groove is made with a very thin drill (0.5-0.7 mm). You need to make sure that it doesn’t go inside and damage the plates.
A small amount of water is poured into a syringe with a thin needle. After this, the hole must be sealed with epoxy resin or sealant.
Now the battery can be pumped up. Each block must be discharged to zero again by connecting 1.5 volt light bulbs to them. When the procedure is completed, the battery is assembled and it is necessary to carry out 5 charging and discharging cycles.
Restoring a screwdriver battery
It should be immediately warned that batteries with lithium-ion type cells cannot be repaired. They can only be replaced.
Basic methods for restoring the parameters of individual batteries :
- battery restoration through freezing;
- elimination of memory effect;
- adding evaporated electrolyte.
Battery restoration through freezing
You can try to restore nickel-cadmium batteries using the simple freezing method. Let's consider the procedure :
Read also: LED strip without resistors
- Place the completely discharged battery in a plastic bag and place it in the freezer compartment of a household refrigerator;
- After 10-12 hours, you need to remove the battery from the freezer;
- put it on charge;
- after which, you need to charge the battery, that is, turn it on until the energy is completely lost;
- repeat this operation 2-3 times.
If the attempt to restore the battery is unsuccessful, you must resort to other methods.
Elimination of memory effect
It is not very difficult to recognize such a defect. After the battery is fully charged, it quickly discharges and stops working. After some time it begins to function again.
First, you need to complete the charging process, preferably with a small current (if possible). Then, completely discharge at low load. Such actions will allow for subsidence of not only the top layer, but also all the plates completely.
For the load, you can use an ordinary light bulb with a power of 60 W and a voltage of 220 V. The discharge is carried out up to 30% of the nominal capacity of about 5 V.
This procedure must be repeated at least five times before using the battery. Of course, such a “treatment” will not completely restore the battery, but it will extend its life by at least a year.
Adding Electrolyte
It is believed that electrolyte evaporation is the most common problem with rechargeable batteries.
To solve this problem, you need to dismantle the faulty elements by cutting the connecting plates. After that, you need to make a small hole in the element body (up to 1 mm in diameter) from the negative terminal side. Then, using a medical syringe, add a few drops of distilled water. After that, be sure to properly seal the battery with epoxy resin. Insert the revived element into the existing diagram.
To equalize the potential of all elements, they need to be discharged with a 1.5 Volt light bulb. The charge-discharge cycle must be performed at least five times, only then use the tool.
Repair and replacement of battery elements
Do-it-yourself screwdriver battery repair can be more extensive. For example, converting Ni-Kd to lithium. To do this, you need to purchase several Li-Ion batteries and a charging board. The number of batteries must correspond to the original voltage rating.
As practice shows, most screwdrivers can be easily converted from one type of battery to another, without any problems. Thanks to its increased durability, resistance to constant use and larger capacity, your old screwdriver will last much longer.
How should I properly charge my screwdriver battery?
- Date: 06-09-2015
- Rating: 32
- Deciding on the right tool
- About the features of proper battery charging
- A little about battery types
- Attention. charger
- If the battery does not charge
Perhaps the most popular power tool among others is a screwdriver. Its functions are not limited to screwing in and unscrewing screws; it can be used to easily drill holes.
A cordless screwdriver is very convenient for carrying out absolutely any work, as it allows you to move safely without restrictive cords.
Network tools are not portable; it is not possible to use them if there is no outlet in the room. Cordless screwdrivers provide free movement and do not require a cord to interfere with operation. Questions may arise here: which device to choose and how to properly charge the screwdriver battery
?
Rules for working with the tool
After purchasing a screwdriver, read the operating instructions so that it will last for a long time. It will need charging immediately. How to properly charge a screwdriver battery? This depends on the type of charging elements.
Nickel-cadmium charges up to 3 times. The new power supply does not have full capacity, charging increases it to full capacity. During operation, subsequent replenishment is carried out after the power has been reduced to a minimum level.
Lithium-ion batteries do not have a memory effect, so they are powered at a convenient time, without being completely discharged.
To ensure your device is properly charged, pay attention to the ambient temperature. Its range is 10-40 degrees Celsius.
To ensure uninterrupted battery operation, follow these recommendations:
- do not allow overheating, this will have a bad effect on the operation of the tool; if this happens, stop working and cool the device;
- the battery is disconnected from the device and stored;
- if used rarely, charge the battery no more than once a month;
- When you turn it on for the first time, you cannot completely discharge the battery; a drop in charging will be indicated by a decrease in device speed.
Completing these points will allow you to use the unit correctly.
How long does it take to charge the battery? The charging duration is given in the passport. Often an indication system is included with the charger. She monitors the charging process and determines its completion. Typically the entire procedure lasts 7 hours.
What is “charge memory”
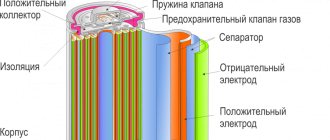
Diagram of a lithium-ion battery for a screwdriver.
The main thing you need to pay attention to when buying a screwdriver is the voltage and capacity of its battery. Most of these tools have a capacity of no more than 2.7A/h. Such tools are charged from a regular household network with a voltage of 220V, for which a charger is included in the tool kit. The voltage range in different models is from 6 to 22 V. A completely discharged battery requires an average of 5-6 hours to charge.
According to their power, screwdrivers can be divided into professional, semi-professional and household. The most powerful and durable are professional ones, but they are also the most expensive. And the most popular (they are also the cheapest) are household ones, equipped mainly with one or two nickel-cadmium batteries.
The main problem with these batteries is the so-called memory effect of their charge. For semi-professional tools, equipped primarily with nickel-metal hydride batteries, this problem is not so acute, and for professional tools with lithium-ion batteries, this problem practically does not arise.
The “memory effect” occurs when a container that is not completely discharged is again placed without recharging, but again is not fully charged. In this case, the battery simply ceases to “understand” how full its charge is. If this is the reason for the drop in battery power, then eliminating it is relatively simple. First you need to disassemble the battery pack, find undercharged elements in it and “overclock” them - charge them with more current than required according to the instructions, then completely discharge them and recharge them again, but not at full power. If the electrolyte from the battery has not evaporated, then the chances of successfully restoring the screwdriver battery in this case are very good.
Restoring capacity after a memory effect has occurred
I will say right away that it will not be possible to completely revive the battery in this way, but it may well be possible to restore a significant part of the capacity, after which the battery will be able to work for at least another year.
First you need to fully charge the battery. In this case, it is advisable to use low currents, that is, charge not with the original charger, but with a third-party one, which has the ability to supply a current of 0.2-0.3 A. For example, a battery with a capacity of 1.5 Ah needs to be charged with the specified current for about 5 hours .
Then you should perform a “soft” discharge. That is, connect some kind of consumer that will discharge the battery slowly. A regular 12V 6W incandescent lamp works well for this. This discharge allows all the plates in the bank to sag, which is what we need.
You will also need to connect the multimeter in voltage measurement mode. We need this so that we can determine how much our battery has already been discharged using the light bulb. It is necessary to discharge in such a way that approximately 30% of the charge remains in the banks. This corresponds to a voltage at the battery terminals of 5 V.
Then we also charge and discharge again. There should be a total of 5 charge-discharge cycles. And only after this will it be possible to use the battery on a screwdriver.
If this procedure does not help you, then move on to the next one.
Video
We invite you to watch a video on the topic of removing the charge from a car battery. How to make a discharge device for a safe process.
Everyone knows that a tool such as a screwdriver is often indispensable not only among professional craftsmen, but also in everyday life. At the same time, you must always keep in mind that its battery requires a certain approach during operation. This is especially true if your tool is equipped with a unit with nickel-cadmium batteries. It is because of them that there is a need to completely discharge the battery. Therefore, you need to know how to discharge a screwdriver battery correctly.
Read also: Folding workbench for home