In the process of making furniture yourself, the contractor may need to cut or trim the laminated chipboard for subsequent use. Of course, it is best to perform this operation by sawing, but if necessary and to reduce labor intensity, it is quite possible to cut laminated chipboard at home (using a jigsaw). Moreover, it is very important to implement this procedure in such a way as to minimize the number of chips and thereby create an even cut.
Why do chips appear?
Before cutting laminated chipboard or laminate using a jigsaw, it is advisable to understand why chips form when cutting sheet material. And the answer here is simple: everything lies in the design of the jigsaw, or rather in the design of the nail file.
So, during the cutting process, the file receives return movements (up and down). And if when the saw moves along the teeth (usually downwards), chips practically do not form, then when the tool moves in the opposite direction, the teeth seem to tear out the top layer of material, thereby forming an unpleasant chip. That is why you can observe an almost perfect cut on the bottom side of the chipboard and a chipped cut along its upper edge.
Reworking the jigsaw sole
When setting up a jigsaw, you first need to check the perpendicularity of the sole, since sometimes the clamp is not firmly fixed. Specialists often modify the sole of the tool, that is, they reduce the gap between the leg and the pressure pad. This eliminates "breaking" of the crust in the layers of material on top.
Read also: Reuleaux triangle in a circle
When using pads, it is important for every novice craftsman to remember that they should not scratch the surface of the part. In this case, they need to be replaced every five meters of cutting. Zero clearance can be achieved by attaching the cover plate to the jigsaw support leg.
The lining has only one narrow slot that fits tightly to the cutting element. Therefore, even a weak feed of the teeth can cut off small chips, and not turn out the chips of the top layer. The highest quality pads, which are guaranteed to last you a long time, are usually made from:
- sheet plastic;
- metal material;
- fiberglass.
Ways to minimize chipping
An additional reason for the formation of chips may be misalignment of the saw teeth. Therefore, the first thing you need to do is purchase a tool with a straight cut (often Bosh files). However, it should be taken into account that during prolonged use, such files overheat and may even bend during the cutting process. Therefore, it is necessary to take breaks from work to cool the cutting tool.
However, just replacing the saw blade is not enough and in order to cut laminated chipboard (laminate) with a jigsaw without chipping, you need to make minor modifications to the power tool. Namely, make sure that when the saw moves against the inclination of the tooth, the material does not pull out. For this purpose it is enough to make a persistent platform. You can come to this conclusion by trying to cut two sheets of chipboard at the same time. So there will be practically no chips on the lower element.
In order to make a stop pad for a jigsaw, it is enough to cut out a rectangle from any dense material (for example, laminate) with dimensions identical to the dimensions of the sole of the power tool.
Then, along the larger center line, you should make a notch and secure the resulting equipment to the sole of the jigsaw using insulating tape or double-sided tape. All modifications are ready and finishing work can be carried out in compliance with certain recommendations.
Recommendations for cutting without chipping
Firstly, as mentioned above, you should use a jigsaw file with a straight cut.
Secondly, in order to better control the cutting process, it is justified to apply a marking line on both sides of the chipboard and check the accuracy of the processing from above and below.
And thirdly, take constant breaks from work to cool the cutting equipment.
Sometimes the solution to this issue can be simply cutting through the laminated layer of material using a mounting knife, and subsequent work with a jigsaw will no longer cause large defects in the form of chips. However, this work requires the performer to have some experience and accuracy.
If you liked the material, I will be grateful if you recommend it to friends or leave a useful comment.
Source: domgvozdem.ru
What tools to use?
If the question arises of how to cut a tabletop, then first of all you need to decide on a cutting tool, and most often several tools are used.
For example, using a circular saw, you can get the perfect result, but this is quite an expensive pleasure, because a high-quality tool costs a lot of money. Therefore, this unit can be found mainly only in special factories.
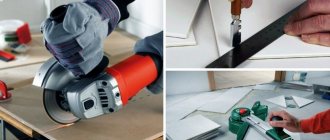
Grinder - has similarities with the previous tool, but the result will be far from ideal. When working with an angle grinder, many chips may form.
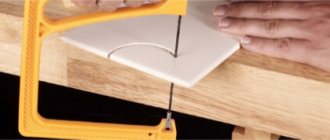
Usually, to cut a tabletop, two main professional and interchangeable tools are used - a jigsaw and a jigsaw.
Construction specialists divide blades or, as they are also called, saws into two main categories:
- tearing little by little on both sides;
- tearing strongly, but only on one side.
When working with a tabletop, you will need the option that breaks on one side.
Before starting the main work, it is necessary to thoroughly sharpen the blade of the tool so that chips do not form during the work. With a sharpened blade, before you start cutting the material directly, you need to make a groove, the depth of which will be about 2-3 mm. This will make it possible to complete the job without injuries or chips.
By the way, chipboard in the furniture industry and construction began to be used only in 1940 in the United States of America, but after a fairly short time the popularity of this material increased and spread throughout the world. Thanks to this, the industry has made a significant step forward, and all sorts of varieties of this material have appeared.
One of the most popular and frequently used types is laminated chipboard, which is not just a product of pressing sawdust with glue, susceptible to high temperatures, but also acts as an additional chemical and physical protection in the form of a melamine film.
Usually, when cutting chipboard, no complications arise, but with laminated chipboard, this seemingly simple process can become complicated. The fact is that countertops are often coated with multilayer HPL plastic from the manufacturer. This significantly complicates the sawing process. This coating can vary significantly in quality and basic properties, and it is not always a polymer coating. Therefore, when processing this material, many different nuances arise.
Step-by-step description of the process itself:
- Using a well-sharpened blade, a groove 2-3 mm deep is made. If there is a polymer coating of various types, it is recommended to slightly warm up the blade, and then immediately begin direct use. Due to the resulting pressure of cold steel on hard plastic, even if the sharpening is very good, minor microcracks and chips may occur, which is best avoided if possible.
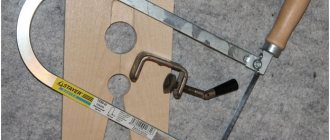
- Using a tool called a jigsaw, you need to make the cut carefully and smoothly. During operation, it is important to carefully adjust the direction of the blade. If there are places where the direction changes, it is better to use an ordinary hand jigsaw as a secondary, auxiliary tool. Or you can use the thinnest file in a jigsaw. But this is not always convenient.
After the work has been done, you can proceed to the final stage of sawing the chipboard.
Sawing process
In order to get started, you need to complete the preliminary steps and prepare:
- Gloves
- Safety glasses;
- Machine oil;
- Material for processing;
- Clamps that guide the roulette wheel;
- Construction pencil;
- The puzzle itself.
The sawing process looks like this:
- Strengthening the source material. In our example, the starting material is wood. A sample of the harvested wood and a guide, which can be acted upon by an ordinary flat strip, should be placed between the two clamps. The sample is placed at a certain height so that the jigsaw cannot resist while cutting. After this, using a tape measure, you need to accurately measure the desired width of the product that should come out and draw a pencil line of the cut. Then place the guide at the desired distance from the mowing line and secure it with clamps. A jigsaw with a guide set in the direction of the marked mowing line is also secured with a clamp. You have to fix it well, but don't overdo it. The same is done on the other side.
- Cut off. Turn on the jigsaw and get to work. Proper use of the device does not require excessive pressure on it, which could cause the product to heat up quickly and damage it. You should also not use the same file for a long time as it disappears very quickly. If very hard wood is chosen as the starting material, the surface can be pre-lubricated with machine oil. This will make the saw glide easier, the cut will be smoother, and the jigsaw will last longer.
Final stage
At the final stage, it is necessary to use another tool. To do this you will need a rasp or file, sandpaper, GOI posts, adhesive tape and a decorative corner made of duralumin.
The first step is to sand the wood. For this purpose, you can use a rasp or file, with which you want to remove excess. After this, use a sanding machine or regular sandpaper (zero grade will do) to bring the wood into a nice looking state. It is recommended to carry out this work even if you are not going to do anything after it. Due to the torn elements of the wood, the material will attract moisture much faster, which will cause faster wear of the material.
Having brought the tree back to normal, it is necessary to bring the plastic to the same condition. Usually, the use of special polishes is sufficient for this. But if one is not available, then you should not buy a new one, since to process one tabletop you will need very little of this product, and then it would be a pity to throw away the polish, and it is not economical.
The ideal option for processing plastic is GOI paste. It is available in almost every home, and is an absolutely universal remedy and quite effective.
Even if the cutting was successful and the grinding was of high quality, it is still better to play it safe so that even small millimeters do not make themselves felt in the future. Therefore, it is recommended to use a special furniture corner made of duralumin for decoration. It should be attached to its place, while the appearance will become neat.
Another little tip: when cutting a tabletop at home, you can use a guide tape with an adhesive layer, which will help the blade not deviate from the route.
Flat cutting rules
Therefore, in order to make a correct and even cut, you must follow the following rules:
- Carefully select a file that suits your source material.
- Prepare all necessary auxiliary elements.
- Secure the workpiece carefully.
- Take into account the correct positioning of the workpiece so that you do not have to correct defects. in some cases the canvas is placed face down.
- Practice device control techniques with the help of professionals or with the help of training videos.
- Follow safety precautions carefully.
In fact, processing products with a jigsaw is not such a difficult task that any novice carpenter can perform. Even if an even and neat cut does not work right away, do not despair: you need to soberly assess what nuances you may not have paid attention to. And don’t ignore the advice of professionals who can speed up the process of mastering the art of sawing with a puzzle and reveal some secrets. Try to improve!
Source
When making kitchen furniture, it is very important to know all the details. Thus, one of the most difficult moments during the work was and remains the intricacies of chipboard. The reason for this is quite simple: the board or simple chipboard is then perfectly sanded and coated with the necessary materials, while the chipboard is already coated and is unlikely to be replaced.
READ Chainsaw Husqvarna 137 Malfunctions
Tabletop. one of the most important components of kitchen furniture.
Most often the problem arises from the question of how to cut the tabletop, because there are all kinds of situations and the result must be perfect. To begin with, it should be noted that there are many cutting tools, and more than one will be used. Yes, a circular saw will give excellent results, but a high-quality unit costs a lot of money, so it can only be found in special factories. The grinder, in turn, despite the similarities, will give out a huge number of chips.
Experts divide canvases (files) into 2 categories: slightly tearing on both sides or severely tearing on one side. In this case, you will need those that are broken on one side.
The secondary instrument will be used on the surgeon's scalpel. You want a very sharp blade that will fit comfortably in your hand. With this blade, before sawing, you need to make a groove 2-3 mm deep, which will allow you to do the job painlessly.
How to cut a countertop using a circular saw
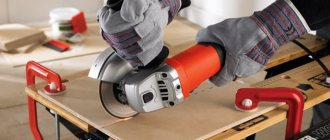
When working with a tool called a circular saw, you need a finishing saw blade with a fine tooth. A circular saw is more convenient than a jigsaw for making long straight cuts. However, during such work, much more chips are formed, since the side with the teeth cuts into the material and breaks off pieces.
But even when working with a finishing disc, many chips form on one side of the tabletop, which then must be subjected to lengthy processing. Moreover, it is not a fact that after processing there will be no millimeter chips or microcracks left, which in the future will render the material unusable or highly susceptible to moisture.
Therefore, it is better not to use this option for cutting tabletops. Better leave the use of a circular saw for another job. If this is the only option for you, then you will have to work hard at the stage of final processing of the sawn material.
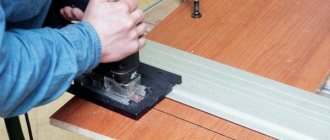
The milling cutter allows you to get the cleanest possible edge of the workpiece, while the quality will not be so easy to distinguish from the formatter, and sometimes it will be even better.
First, you need to cut the workpiece with a jigsaw, making an indentation from the marking line by 2-3 mm, and then align the line according to the template. Usually, for this purpose, a second piece of laminated chipboard is used, sawn on a format saw, so that it is of a suitable size.
It is necessary to use a copy cutter, that is, one with a bearing. This way you can get a very clean cut. Among the disadvantages of working with a router, there is a lot of hassle, since there is a need for precise markings, preliminary filing of workpieces and setting templates for the router.
Methods for cutting laminated chipboard without chipping
You need to saw a laminated board using a special machine (format cutting machine). But its price is too high (from 50,000 to 100,0000 rubles) when it comes to home use. An alternative could be budget options (hacksaw, jigsaw, etc.), which will take more time to cut but require less investment.
Using a hacksaw
Sawing with a hacksaw at home is quite difficult. First, you need to cut the measurement line with a knife and glue tape along it. This will protect the top layer from damage. Point the tool at an angle of 30 degrees. Carefully move the hacksaw back and forth without pressing hard. To cut laminated chipboard without chipping with a hacksaw at home, choose devices with the finest teeth. In case of damage, the cut area must be passed with a file, directing it from the edge to the center. Finally, rub with sandpaper (fine-grained) and hide the defects under the flexible profile.
Jigsaw
To cut chipboard smoothly with a jigsaw without chipping, you need to choose a device with a minimum tooth size. It is used for small areas of tiles, using smooth movements without pressure at low speed. If you are using a jigsaw for the first time, some cracks may appear on the back of the slab. With further use, the quality of the cut will improve.
Circular saw
The tool is a table with a toothed disk for chipboard. Among craftsmen it is called a circular saw. Cuts through wood better than a jigsaw. A good result without chipping is possible by sketching guide lines and securing the circular saw to the board. Chips should not appear where the saw cut into the slab. But the opposite side can be sawed through with fragments.
Using a router
A router is a power tool for manual wood processing. Suitable for cutting grooves, shaping, edges and drilling. Before using it, a sheet of wood is sawed with a jigsaw, departing 3 mm from the markings. You need to cut with a cutter together with a bearing, which forms the cutting depth to the required level. This is a labor-intensive process that only experienced specialists can do. There is a high probability of cutting the board crookedly.
Sawing with a format saw
The workpiece is placed on the table and fixed in a stationary state. The necessary markings are made on the sheet and the saw unit is turned on. When the disk reaches sufficient speed, the table moves forward along with the wooden slabs and hits the disk.
- tile position;
- depth of cut;
- cutting angle.
Chipboard cutting machines are divided into 3 types:
- light – for 5 hours of continuous operation;
- medium – up to 10 hours;
- heavy – up to 20 hours.
What does a cutting machine consist of:
- The bed is the mount on which the entire mechanism rests. A heavy frame will add stability to the device and eliminate vibrations. This is important for quality cutting.
- Saw unit - consists of 2 flat metal discs. The first one pre-saws the slab, and the second one finally cuts through it.
- Work tables. Three people take part in the process. The first is for the location of the unit, the second is for feeding the sawn slabs (movable), the third is for supporting the sawn parts.
- Carriage – allows the movable table to move. In this case, the workpiece is secured using a stop and rulers in the required position.
Sawing with undercut
The process requires a tire - a thrust ruler. It is secured to the board with clamps. Pruning is carried out according to the markings. The tire is installed along the line, and the cut is made 10 mm deep. The second cut is made through. With this method, there will be no chips on both sides, since the laminate is already cut on the bottom side.
Summing up
If you are faced with the issue of cutting a table top, then do not be afraid, since it is quite possible to do it yourself. If possible, then it is better, of course, to use the services of specialists and take the material for processing to a workshop, where all work will be carried out using special equipment and with particularly high quality.
When sawing a tabletop at home, to avoid chipping, use a suitable tool - a jigsaw, adhering to maximum precision and accuracy when working with the workpiece.
Some features of the process
You must first select the correct file for the puzzle. The variety of files allows you to focus on a parameter that will match both the material of the original part and the final desired result.
In general, a jigsaw can be with a pendulum and with normal movement. In the second option, for smooth cutting, the blade must be moved clearly vertically, cutting the material upward. Due to high speed, the network wears out more slowly.
READ Which Chainsaw Should You Choose: Stihl Or Husqvarna
When working with a pendulum tool, the principle is essentially the same, only the best material for processing. soft wood or plastic, steel may be difficult to handle.
For straight cutting, you need to choose a wide blade; it is better if the jigsaw has a “Soft Start” function, which will avoid sudden movements at the initial stage. If you need to cut a round hole, you must first drill the original version that comes with the file you need. The cut itself was made according to the markings. If the original version cannot be cut, this cutting method is required. To do this, the jigsaw is tilted at an angle to contact the material, this allows you to make a through hole and then make the necessary marks.
Cutting along the edge of the workpiece is allowed, but you need to make sure that it is initially uniform; without this, the jigsaw will spray crookedly. If the edge is uneven, only proper marking can correct it.
There is a risk of chipping when working with small sheets of wood. To prevent this, you should place the sheet face down.
The names speak for themselves. In the first case, the panels are installed vertically, the beam mounted on the guides acts as a bracket. The possibility of its rotation at a right angle allows you to saw off material in any plane. The horizontal version includes a table for sawing, the mechanism itself and a carriage that allows the file to move along.
hunter_cbx
Honestly, the title “How not to cut a countertop” would be more correct
