03/25/201603/25/2016 master
Modern power tools are popular because they allow you not to be tied to an electrical outlet during operation, which expands the possibilities of their use, even in field conditions. The presence of a rechargeable battery significantly limits the duration of active work, so screwdrivers and drills require constant access to a power source. Unfortunately, in modern tools (usually made in China), the power supply battery has little reliability and often quickly fails, so craftsmen have to make do with improvised materials in order not only to assemble a switching power supply, but also to save money on it. An example of such a hand-made product is a switching power supply (UPS) for an 18 V cordless screwdriver, assembled from the elements of a non-working energy-saving lamp, which can be useful even after its “death”.
The structure and principle of operation of an energy-saving lamp
The structure of an energy-saving lamp
To understand how an energy-saving lamp can be useful, let’s consider its structure. The design of the lamp consists of the following components:
- A sealed glass tube (flask), inside coated with a phosphor composition. The flask is filled with an inert gas (argon) and mercury vapor.
- Plastic housing made of non-flammable material.
- A small electronic board (electronic ballast) with a ballast, which is responsible for starting and eliminating flickering of the device. The control gear of modern devices is equipped with a filter that protects the lamp from network interference.
- A fuse that protects board components from power surges that could cause the device to catch fire.
- Housings - the ballasts, fuse and connecting wires are “packed” in it. Markings are placed on the case that contain information about voltage, power and color temperature.
- A base that ensures contact of the lamp with the power supply (the most common bases are E14, E27, GU10, G5.3).
Two spirals (electrodes) are connected to the lamp bulb, which, under the influence of current, become heated and emit electrons from their surface. As a result of the interaction of electrons with mercury vapor, a smoldering charge appears in the flask, which “gives birth” to UV radiation. By influencing the phosphor, ultraviolet light “makes” the lamp glow. The color temperature of the housekeeper is determined by the chemical composition of the phosphor.
Types of breakdowns of energy-saving lamps
An energy-saving lamp can fail in two cases:
- the lamp bulb broke;
- the electronic ballast (EB) (high-frequency voltage converter), which is responsible for converting alternating current into direct current, gradually heating the electrodes and preventing the device from flickering when turned on, has failed.
If the bulb is destroyed, the lamp can simply be thrown away, and if the electronic ballast breaks, it can be repaired or used for its own purposes, for example, used to make a UPS by adding an isolation transformer and a rectifier to the circuit.
Complete set of electronic ballast for energy-saving lamps Most EB lamps are high-frequency voltage converters assembled on semiconductor triodes (transistors). More expensive devices are equipped with a complex electronic circuit, while cheaper ones are equipped with a simplified one. The electronic ballast is “equipped” with the following electrical elements:
- bipolar transistor operating at voltages up to 700 V and currents up to 4A;
- protective diodes (mainly elements of the D4126L type or similar);
- pulse transformer;
- throttle;
- bidirectional dinistor, similar to dual KN102;
- capacitor 10/50V
- Some electronic circuits are equipped with field-effect transistors.
The figure below shows the composition of the lamp's electronic ballast with a functional description of each element.
Functional Description
Some EB circuits of energy-saving lamps allow you to almost completely replace the circuit of a homemade pulsed source, adding several elements to it and making minor changes.
Some converter circuits operate on electrolytic capacitors or contain a specialized microcircuit. It is better not to use such electronic circuits, because they are often the source of failures of many electronic devices.
What do the electrical circuits of housekeepers and UPS have in common?
Below is one of the common electrical circuits of the lamp, supplemented by an A-A' jumper that replaces the missing parts and lamp, a pulse transformer and a rectifier. Schematic elements highlighted in red can be deleted.
Electrical diagram of a 25 W “housekeeper”
As a result of some changes and necessary additions, as can be seen from the diagram below, it is possible to assemble a switching power supply, where the added elements are highlighted in red.
Final electrical diagram of the UPS
What power supply parameters can be achieved from an energy-saving lamp?
The “second” life of the “housekeeper” is often used by modern radio amateurs. After all, their hand-made products often require a power transformer, the availability of which poses certain difficulties, starting with its purchase and ending with the consumption of a large amount of wire for winding and the overall dimensions of the final product. Therefore, craftsmen have gotten used to replacing the transformer with a switching power supply. Moreover, if you use the electronic ballast of a faulty lighting device for these purposes, this will significantly save money, especially for a transformer with a power of more than 100 W.
A low-power switching power supply can be built by secondary winding the frame of an existing inductor. To obtain a higher power power supply, an additional transformer will be required. A 100 W switching power supply can be made on the basis of 20-30 W EB lamps, the circuit of which will have to be slightly modified by adding a rectifying diode bridge VD1-VD4 and increasing the cross-section of the inductor winding L0.
Homemade transformer power supply
If it is not possible to increase the gain of the transistors, you will have to increase their base current by changing the values of resistors R5-R6 to smaller ones. In addition, you will have to increase the power parameters of the base and emitter circuit resistors. At a low generation frequency, you will have to replace capacitors C4, C6 with elements with a higher capacity.
Converting an 18 V Screwdriver to Mains Power
How to convert a cordless screwdriver into a corded one - options for craftsmen
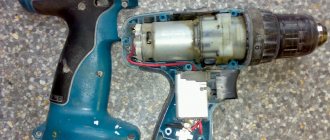
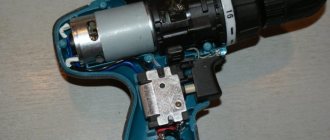
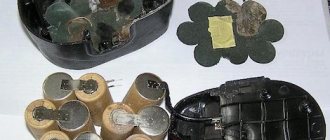
When the batteries stop working, some people wonder how to convert a cordless screwdriver into a corded one. It is impossible to repair batteries with damaged elements.
The price of new power supplies is almost equal to the cost of a screwdriver. It is rarely possible to find suitable elements; models are often discontinued.
But for caring and experienced owners, of course, the solution is to power the screwdriver from the network.
The converted instrument has one drawback: it is tied to an outlet. However, for indoor work this is not so significant. But there are more than just advantages. Now there will be no hassle about recharging the battery, there will be no downtime in the work. The current strength always remains measured and does not depend on the discharge of the battery, this means that the torque is always constant.
While you go looking for a power supply unit (hereinafter referred to as PSU), study the characteristics of the screwdriver, which are indicated on the case or in the passport. Look at the tension. A 12-volt tool is more common; finding a power supply for it will not be difficult.
If the tension is not easy, the search will certainly drag on. You need to know the current consumption, which is not indicated in the technical specifications. The purchased unit must produce an average current value (between the battery capacity and the standard charger). The data is obtained from the markings.
There are two main options for converting a 220-volt cordless screwdriver. The first is the process of using an external power supply.
Any rectifier capable of delivering the required constant voltage will do. Even if it is big and massive, there is no obstacle. After all, you don’t need to carry it around the room.
The block is installed near the outlet, and the cord to the instrument is made to the required length.
Remember that as the voltage decreases, the current increases if the power remains constant. This means that the cross-section of the low-voltage cord must be made more simple than from a 220 V network.
The second option is that the power supply is mounted in a housing from the battery. The only obstacle in the process of choosing such a method is usually the size of the transformer.
Mobility is maintained, the radius of use depends on the length of the power cord.
It is important to remember that the instrument is supplied with power , so the cord is reliable, and the input itself is made neatly and painstakingly insulated.
For an external source, available power supplies are used:
- charger
for car batteries; - PSU from an old computer;
- laptop charging;
- homemade power supply.
Converting a screwdriver to a network one
In the trade, of course, it’s cheap to buy an old charger. Nowadays, pulse chargers are mainly used, and old devices are often sold as unnecessary.
This particular charger, with the ability to manually adjust voltage and current, is perfectly suitable for any screwdriver, regardless of its operating voltage.
The whole modification consists of connecting a low-voltage cord to the output contacts of the charger.
The computer power supply is purchased from older models; it may have a shutdown button. It will not be useful, but this is exactly the version of the AT format that is needed.
On the radio market, a unit with a power of 300–350 watts is selected, which will ensure reliable operation of low- and medium-power screwdrivers. What remains for our client to do is the technical properties are indicated on the sticker on the case. The unit has a cooling fan and overload protection.
To convert a computer power supply at home into an external one for a screwdriver, we perform simple operations:
- disassemble the body;
- on the large square connector we find a greenish wire and at least some dark one;
- we connect both wires to each other and insulate them;
- on the other smallest connector we remove the wires to our client, leaving yellowish and dark;
- We solder a low voltage cable cord into the apartment.
To maintain polarity, you need to know: the yellowish wire is positive, the dark wire is negative. The tool operates with a voltage of up to 14 Volts from a computer power supply.
We power the screwdriver 18V from an ATX power supply
We power the screwdriver 18V
from an ATX
power supply
. I offer it to all owners of screwdrivers, usually those that have come out.
Converting a cordless screwdriver to a 220V network in homemade conditions
power unit
for
alteration
. AUTO ELECTRONICS-HERE-KITS.
Most laptop chargers have properties that allow them to be used as a power source for a screwdriver
. Chargers with an output voltage of 12–19 Volts are suitable. The only configurations that will need to be made are related to the output plug. It should be cut off, the wires should be stripped, and a cable of suitable length should be soldered into this list.
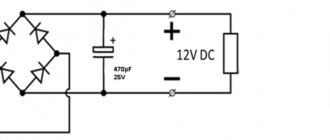
Persons who have an understanding of electrical engineering can make a homemade power supply. Its circuit is quite ordinary and includes a step-down transformer, a diode rectifier and two capacitors.
Our client is left with the parts they buy, as they call it, taken from old radio equipment. A transformer from a tube TV with an output of 24–30 V is suitable. The presence of a rectifying diode bridge is a must.
The capacitors used are not in short supply, from old equipment: one is 0.1 µF and the other is electrolytic at 4700 µF.
Attention! The structure must be enclosed in a housing. To protect against short circuits, it is imperative to install fuses at the input and output.
The mains power supply for the screwdriver is, of course, placed in the battery housing, as it is also called in the handle. Possible options:
- any PSU suitable in terms of features and size;
- Chinese 24 V power supply;
- homemade.
A power supply with suitable parameters is selected on the radio market. At home, you should carefully remove it from the case and place it in your own screwdriver, firmly securing it; all that remains for our client to do is to make the components.
If the wires are short, lengthen them so that they do not touch the iron parts. Place the transformer and the board separately. For better cooling, install additional radiators on the microcircuits.
It would also be a good idea to have holes in the housing to allow air to circulate and heat to be removed during operation.
Converting a cordless screwdriver to a corded one
In a radio parts store we buy a 24 V power supply, current 9 A. Screwdrivers operate on 12 or 18 Volts, so the task is to reduce the voltage to the required level.
To perform such work, little knowledge of radio engineering is required. The output voltage is maintained by resistor R10 with a nominal value of 2320 Ohms. Instead, you should install a 10 kOhm trimmer resistor.
How to configure the power supply is described below:
- remove the permanent resistor;
- set the resistance of the trimming resistor to 2300 Ohms for the device;
- solder the tuning resistor to the unchanged area;
- With the power supply turned on, adjust the voltage.
The design of a homemade power supply will be based on a 60 W Feron or Taschibra electrical transformer. You can buy them at an electrical goods store; they are designed for halogen lamps.
They do not require any modification. The removal of the secondary winding from the middle point made it possible to use two Schottky diodes instead of the usual 4. The operation of the power supply is controlled by the HL1 LED.
The diagram shows our client the necessary details.
Transformer T1 is wound independently. A non-scarce ferrite ring NM2000 with dimensions 28×16×9 is used. Before winding, the corners are cleaned with a file, and the ring is wrapped with FUM tape. The manufactured block is installed on a 3 mm wide duralumin plate and not simply placed in the battery housing. It also performs the common wire function.
Operational reliability and safety depend on the reliability of the installation of the electronic part. A soft multi-core cable is used as a network and low-voltage cable. If the device is outdoor, the ends of the cable should be connected to its terminals.
We treat copper wiring and brass contacts with soldering acid, then they are simply soldered. Almost often special clips are used - alligator clips.
In the screwdriver itself, there is no way to do without soldering; the crocodiles do not hold so well that the contacts do not become disconnected during operation.
Making battery-based power supply
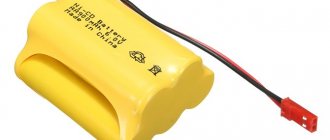
The best option is to use an old battery case. It is disassembled and the entire interior is removed. In this case, harmful substances are released, take care to protect the respiratory tract and skin. The body is washed with soda, running water and dried. On the inside of the contacts, solder the ends of the cable, observing polarity.
So as not to guess, we temporarily connect the cable, turn on the screwdriver and see in which direction the spindle turns, mark the wires. We make a hole in the bottom of the case and pass the wires through. Inside the case, the cord should be firmly fixed by wrapping insulating tape there. This thickening will prevent the wiring from stretching and breaking.
Then we solder the ends to the contacts.
We place a counterweight inside the body. The best material would be compressed rubber. It has the necessary features: the highest density, insulating qualities. So that the rubber does not dangle inside, we cut it out with a small overlap. To place the counterweight in the body, we bend the material a little and place it so that it will not oscillate and will serve as additional insulation.
To some of you, the counterweight may seem unnecessary, but not to that extent. The design of the screwdriver provides that the center of mass is in the handle. This loads the arm, but relieves the hand. When batteries are removed from the body, the center of mass shifts, increasing the load on the hand. Work becomes awkward and difficult. A homemade counterweight restores the center of mass close to the factory one.
Have you seen how easy it is to recycle a cordless screwdriver
online. The practice of craftsmen gave a hint of ordinary and useful tips for operation:
- after 20 minutes of work, you should give the screwdriver a five-minute rest;
- Fix the electronic cable on your hand so that it does not interfere with work;
- The power supply should be frequently cleaned of dust;
- do not use extension cords to connect the power supply to the network;
- The power supply must be grounded;
- It is prohibited to use corded screwdrivers when working at heights.
Compliance with these rules will extend the life of the refreshed instrument. Mobility has been lost a little, but the unit does not require recharging and works smoothly and confidently.
Source: https://vdiweb.ru/peredelka-shurupoverta-18-v-na-setevoe-pitanie/
Homemade power supply
power unit
A low-power switching power supply with power parameters of 3.7-20 W does not require the use of a pulse transformer. To do this, it will be enough to increase the number of turns of the magnetic circuit on the existing inductor. The new winding can be wound over the old one. To do this, it is recommended to use MGTF wire with fluoroplastic insulation, which will fill the lumen of the magnetic circuit, which will not require a large amount of material and will provide the necessary power of the device.
To increase the power of the UPS, you will have to use a transformer, which can also be built on the basis of an existing EB choke. Only for this purpose it is recommended to use varnished winding copper wire, having previously wound a protective film on the original inductor winding to avoid breakdown. The optimal number of turns of the secondary winding is usually selected experimentally.
How to convert a screwdriver to a power supply
First of all, you need to decide on the power supply. You can take a regular Chinese power supply. They are sold in radio parts stores. Almost all modern screwdrivers are designed to operate on 12 or 18 V, so you should lower the output voltage. There is nothing difficult about this if a person understands the topic.
You may be interested in this Features of a modular contactor
Modernization occurs as follows:
- A resistor with a constant resistance of 2320 Ohms is soldered from the purchased unit, which is responsible for the output voltage characteristic.
- A 10 kOhm resistor with adjustable capacity is soldered into this place.
- Set the resistance parameter to 2300 Ohms so that nothing burns out when turned on.
- Connect the device to the network.
- Set the required resistance through the regulator.
All that remains is to place the power supply in place of the battery or figure out how and where it will be located.
Important! During the entire process, it is necessary to monitor the voltage using a multimeter or tester.
After this, all that remains is to solder the power supply pins to the screwdriver contacts that touched the battery.
The power supply will fit compactly in place of the battery
How to connect a new UPS to a screwdriver?
To connect a switching power supply assembled on the basis of an electronic ballast, you need to disassemble the screwdriver by removing all fasteners. Using soldering or heat-shrinkable tubing, we connect the device’s motor wires to the UPS output. Connecting wires by twisting is not a desirable contact, so we forget about it as unreliable. First, we drill a hole in the tool body through which we will run the wires. To prevent accidental tearing out, the wire must be crimped with an aluminum clip at the very hole in the inner surface of the power tool body. The size of the clip, which exceeds the diameter of the hole, will prevent the wire from being mechanically damaged and falling out of the housing.
Screwdriver
As you can see, even after working out, an energy-saving lamp can last a long time, bringing benefits. On its basis, you can assemble a low-power pulse power supply unit up to 20 W, which will perfectly replace an 18 V power tool battery or any other charger. To do this, you can use the elements of the electronic ballast of an energy-saving lamp and the technology described above, which is what craftsmen use, most often to repair a faulty battery or save on the purchase of a new power source.
What to pay attention to:
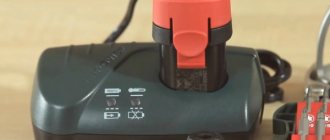
- Dimensions. It is ideal when the finished power supply is placed in a plastic case from a standard battery. No problems while working with a screwdriver.
- Current limit. If this parameter is not taken into account, then the required torque will not be achieved. You can clarify the value using the screwdriver's data sheet. If it is missing, use the battery that came with it. As a rule, the current is selected to be approximately 1.6 (±0.2) times greater than the capacity (in A/h) of the battery.
- Output voltage. It is worth considering that when connecting a load, for some power supplies it may drop by 1 - 2 V. It is not important for using electric tools, but you should know.
- PSU type. According to experts and practitioners, the best power supply option for a screwdriver is pulsed. The absence of a power transformer in the circuit reduces the weight of the product and reduces its dimensions. These are the most compact of all power supplies.
Having purchased the unit, all that remains is to remake the “box” in which the battery was placed. This is the only thing that even an amateur can do with his own hands.
- First. Drill a hole in the plastic (as easy as pie), insert the power wire (cord) inside the case and connect (solder) to the power supply terminals. The best option.
- Second. In the “+” conductor, install a semiconductor diode of appropriate power, the cathode of which is towards the electric motor of the screwdriver.
For those who have the skills to work with a soldering iron and a multimeter, “traditional craftsmen” offer so many circuits that choosing something suitable will not be difficult. Here are just a few from the entire list, which is not difficult to compile:
- Universal power supplies.
- Based on two- and three-pole resistors.
- Pulse.
- With filters.
- Blocks with amplification circuit and a number of others.
What do they overwhelmingly have in common? In addition to pulse modifications, there is a step-down transformer, since we are talking about a secondary (power supply for a screwdriver) voltage with a nominal value of 18 V. This is the main difficulty. It is possible to select Tr, but, unfortunately, not all parameters of radio components are indicated on the diagrams. If the resistance value is indicated, then the power is not indicated; not all types of semiconductors are designated and the like. And there is practically no information on the transformer - wire cross-section, number of turns, and so on. Therefore, you will have to do the calculations yourself.
But even a transformer can be made with your own hands, if you have the skill and desire. For example, take it from the power supply of an old PC. The main thing is that it meets the basic requirements listed above. There may be some differences depending on the modification of the computer. You can also use part of the LED lamp dimmer circuit. There are other options.
But all this is time + experience of independent design + theoretical knowledge. So it turns out that purchasing a power supply and/or remaking it, adapting it to work with a screwdriver, is much easier and faster. All other options for a person who is good at electrical/electronics are hardly acceptable, even if there is a diagram and its description. After all, you will also have to “etch” the board to accommodate all the radio components - how many people know how to do this?
There are ready-made power supplies (pulse) for 18 V available for sale, specifically for screwdrivers. Their price is low - from 846 rubles. Those who are not sure that they can assemble a power supply with their own hands should take this into account.
It remains to add that the decision to switch to power supply from a power supply has a significant drawback - “tying” to the outlet. But how relevant is this for a household screwdriver? And there are plenty of advantages - stability of torque, the ability to breathe “second life” into a tool for which it is impossible to find batteries, and no maintenance of the power source. And what it can be made from, what options there are, are described in some detail.
The decision is yours, dear reader!
