Tensioning the saw set and why this procedure is needed at all
During operation of a chainsaw, not only the engine, but also the saw unit heats up. This is due to the movement of the chain along the plane of the bus, as a result of which thermal energy is released, which entails the expansion of materials. The tire is large in size, due to which heat is quickly dissipated, and the cutting headset heats up to high temperatures and cools very slowly. The quality of cooling of the part is especially reduced when sawing hard wood of large diameter.
As the circuit heats up, its size increases due to linear expansion from exposure to high temperatures. As a result, the chain sag relative to the bus, which entails the possibility of the headset falling off. The consequences of its flying off the tire while working with a tool are extremely unfavorable, and therefore it is very important to always check the degree and quality of tension of the cutting set before operating the unit. This applies to absolutely all brands of chainsaws Shtil, Husqvarna, Echo, Partner, Makita and others. Moreover, tension should be taken into account not only on chainsaws, but also on electric saws.
The reasons why you need to maintain the quality of chain tension are as follows:
- Reduced efficiency of sawing wood. A tool with a loose chain has lower productivity. This is manifested by the fact that the time for cutting wood increases.
- Increased load on the engine, clutch, sprocket and tire - and this applies not only to a loose chain, but also to an overtightened one.
- Wear of the chain itself - if you operate the unit with an incorrectly tensioned headset, this entails accelerated wear. This is due to the fact that the temperature increases, so the teeth become dull faster and the links wear out.
- Unsafe operation of the tool - operating the unit with a loose or overtightened headset is not only harmful for the chainsaw, but also dangerous for the sawyer. In addition to falling off the tire while moving at high speed, the chain can also break (if it is over-tensioned), which ultimately can lead to fatal consequences.
Now you understand how important the procedure for tensioning the cutting set of a chainsaw is. And here it doesn’t matter how high quality the tool or chain is, because loosening the tension of the headset is a natural process.
Interesting to know! With frequent changes in temperature and use of the tool, not only the teeth of the chain become dull, but also the links stretch. It is by stretching the links (increasing the diameter) that it is necessary to carry out the procedure for adjusting the degree of tension.
Why is chain tension necessary?
The chain performs two functions at once - it directly cuts the wood and fixes the tire, preventing its arbitrary movement. The correct position and tension of the chainsaw chain allows you to fully operate the tool and avoid dangerous injuries during operation. If the saw attachment is not installed correctly, it can easily fall off during sawing, causing injury to the operator. Even with slight weakening, it gradually breaks the tire groove, which leads to failure of the driven sprocket teeth.
In this case, excessive voltage leads to an increase in the load on the rotor, reducing the service life of the saw. Therefore, it is important to regularly check the tension and, if necessary, tighten the special mechanism on the tool body.
Important ! Sagging can occur due to wear of parts. Usually this is wear on the teeth of the sprockets, or breakage of the outer edge of the tire groove.
Checking the correct tension of the headset or how much the chain needs to be tensioned
Before adjusting the chain on a chainsaw, you need to make sure that this procedure is necessary. You can check the need to adjust the tension level by pulling it out of the channel in the middle part of the tire. If the shanks extend out of the channel at a distance of up to 2/3 of their length, then such a chain does not need tension adjustment. Another way to check is when you pull back the headset, the ends of the three shanks should be visible.
However, such tests will not be performed correctly if they are performed while the headset is hot. The tension of the saw set must be checked before starting work, when the set has cooled down.
The chainsaw needs to tighten the chain when the user notices the following symptoms:
- Severe sagging of the cutting element on the tire.
- The occurrence of metallic grinding and creaking, indicating a weakening of the tension of the headset.
- The occurrence of vibrations indicating loosening of the tension. Vibrations contribute to rapid wear of the bar grooves, chain shanks, as well as the teeth of the tool driven and driven sprockets.
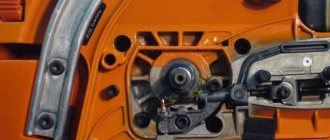
Checking and adjusting the tension should be carried out exclusively when the headset is cold, since setting the degree of chain tension on a fuel one will be done incorrectly. After you are convinced of the need to adjust the tension of the headset, you should get down to business. To ensure that the manipulations are carried out correctly, it is recommended to understand the structure of the tension mechanism.
Principle of chain tensioning
The principle of chain tensioning is as follows:
- use the standard wrench included with the chainsaw to loosen the nuts on the cover;
- then the screwdriver is inserted into a special groove, rotational movements are made and the chain is tensioned;
- the key must turn slowly and carefully - after a couple of turns, the degree of tension is controlled manually, then, if necessary, several turns are made again;
- When the chain is sufficiently tightened, you need to put the cover back in place.
To work with hard materials, specialists use carbide chains made from Pobedit material. They are not made entirely of pobedit, but with soldering from this material. Mainly used for longitudinal cutting of concrete, aerated concrete, and longitudinal cutting of especially hard wood.
A carbide chain has the proper degree of strength and is much less dull, but will cost 3-4 times more than a standard one. Sharpening a pobedite chain at home is impossible; this requires special equipment.
Read also: DIY crafts for your home workshop
Design features of chainsaw chain tensioners
To adjust the degree of chain tension on a chainsaw, the tool has corresponding adjusting screws in its design. The first two screws, which secure the tire, allow for rough adjustment of the tension level.
To set the exact tension of the headset, there is a special screw in the design of the tool. This screw is connected to the tire tension mechanism, which, when rotated, allows for more precise adjustment. To ensure rough adjustment it is necessary:
- To increase the tension, you need to move the tire away from the sprocket.
- To loosen the tension, you need to move the tire sideways towards the drive sprocket.
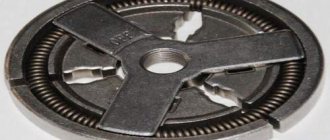
The chain tensioner mechanism has a simple design, consisting of a threaded screw on which a pin and gear are located. This spike engages with a hole in the tire and acts on it as the screw moves. The gears are designed to transmit force when the adjusting screw rotates to the tensioner screw. The simplicity of the design of the adjusting mechanism affects its reliability. On a chainsaw, this mechanism rarely fails, but even if this happens, the part is inexpensive.
The tension mechanism on chainsaws from different manufacturers may differ in design, but the operating principle is the same for all devices. The difference in the design of the mechanism affects the location of the adjusting screw, which can be located on the side (the most common option), at the end or at the bottom. Moreover, the screw head can have a straight shape for a slotted screwdriver or a hexagon.
Expert advice
In the first hours of operation, new chains stretch more than the old ones. Therefore, the tension should be checked after the first 12-20 minutes. work.
Over-tightening is fraught with excess load on the engine with loss of power and accelerated wear of the cutting set and parts of the chainsaw, primarily the drive sprocket and clutch.
After 3-4 chains are worn out, the tire should be replaced with a new one.
After 6-8 chains and 2 tires have worn out, you need to evaluate the condition of the drive sprocket. On different models they wear out after different service periods. The worn sprocket teeth are of non-standard size. Even if the chain does not slip along them, its service life is reduced.
After each tension adjustment, it is recommended to lubricate the driven sprocket at the end of the bar. For this purpose there are special holes near it. The oil from the pump gets there according to a residual principle, and sometimes it doesn’t get there at all. Therefore, along with a wrench and a screwdriver for tensioning, you need to have an oil can on hand. 3-4 drops are enough for lubrication.
Insufficient lubrication accelerates wear of the cutting set and stretching of the chain. The planned oil consumption differs for different chainsaws. For some models, 1 tank of oil is consumed almost simultaneously with 1 tank of gasoline. For others, 1 tank of oil is enough for 2 fillings of gasoline. A sign of good lubrication is the oily sheen of the chain and its smooth movement along the groove.
Do not use low-quality chains. They quickly stretch, damage the nodes in contact with them and require more frequent tightening.
Do-it-yourself adjustment of chain tension on chainsaws of different brands
The algorithm for setting chain tension for chainsaws from different manufacturers is almost the same. On some chainsaws the procedure is slightly different, but first let’s look at the general principle of setting the tension level of the headset.
- Initially, you need to make sure that the tool needs to adjust the tension level. After pulling the headset away from the tire at the top, you need to make sure that the protrusion of the shank does not exceed a distance of 3-6 mm. Do not forget that measurements and adjustment manipulations must be carried out on a cooled instrument, and only at a positive ambient temperature.
- If the chain has significant stretch, it cannot be adjusted. Such a headset must be replaced or repaired by removing several links.
- The chainsaw is placed on a table or other flat surfaces. This is necessary to increase the convenience of the procedure. When work is carried out in the forest, it is clear that it is not at all necessary to take a table with you for this.
- We loosen the tightening of the two nuts with a wrench at “13” for fastening the tire. Moreover, this weakening should be insignificant - no more than half a turn.
- The front part of the tire must be lifted up the plane and held in this position.
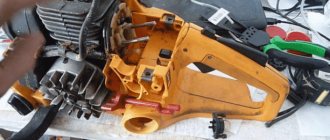
- Next, we find the adjusting screw, the location of which may differ on different models of tools, but it is located mainly near the junction of the bar with the body of the chainsaw. This screw must be rotated to adjust the amount of tension on the cutting set.
- The rotation of this screw is carried out using a screwdriver or a hex wrench, which also depends on the shape of the head. Moving the screw clockwise increases tension, and moving it in the opposite direction decreases tension.
- As the screw rotates, it is necessary to check the degree of tension by pulling the chain away from the bar at the top. As mentioned above, the output value of the link shank should be no more than 6 mm.
- The cutting set is also checked by manually moving it along the tire. It should move easily and without any physical effort. When the chain is pulled back and the protrusion of the shank is 6 mm, but the headset is difficult to move manually, then it is necessary to further loosen its tension.
As soon as the tension level of the chainsaw cutting set is adjusted, it is necessary to tighten the bar mounting nuts. This completes the adjustment procedure, and you can begin working with the tool.
Interesting to know! Adjusting the chain tension on chainsaws must be done not only during operation of the tool, but also when the unit goes through the break-in process.
A visual example of how to adjust the chain on Stihl chainsaws is shown in the video below.
Chain selection
The chain of an electric saw is as important an element as the engine. And its choice should be approached as responsibly as possible, this will help to avoid many problems during the subsequent operation of the tool. You need to choose a chain for a power saw based on the following parameters:
- Compatible with electric saw model. Despite the large number of alternative options, it is best to purchase a part from the same company that produced the tool itself.
- Purpose of use. If the electric saw is intended for household work at home or in the garden, then it is optimal to choose a part with a chain link pitch of 0.325”. For larger jobs, a high-performance 3/8" pitch chain will be needed.
- Its length should match the length of the tire. Stretching or sagging of the part during long-term operation is eliminated by removing part of the links.
- For large volumes of work, it is recommended to use high-performance saw elements with a sharpening angle of 30°. For complex processing, such as wet or frozen wood, use sharpening of the teeth at 10°.
It is also important to consider the material you plan to work with and the method of cutting it. So chains with a smaller sharpening angle are suitable for longitudinal cutting. Their productivity will not be as high, but their service life will increase significantly.
The choice of a tire for an electric saw should also be very careful. First of all, you should pay attention to the material: the stronger it is, the longer the part will last without breaking down. The following parameters are no less important:
- Length (distance between the stop and the toe) - the larger this indicator, the larger the tree will be cut. Lengths of 12-20" are mainly used.
- Groove width – for household saws, parts with grooves up to 1.3 mm are used; 1.5-1.6 mm on a more powerful tool.
- Shank - determines whether the tire is suitable for a specific model of electric stove. It is better to purchase a branded part, although shanks from different manufacturers are often interchangeable.
Only with the correct selection of saw elements will the further operation of the electric saw be effective, safe, and not requiring additional financial or time investments.
Chain adjustment on Husqvarna, Makita, Partner chainsaws
Below are video clips on how to adjust the tension of the cutting set on chainsaws from different manufacturers.
- Instructions for Husqvarna chainsaws
- Instructions for chain saws Partner
- Algorithm for setting headset tension for a Carver chainsaw
As you can see, the adjustment principle for chain saws of different brands is almost the same. The most important thing is to correctly perform the setup procedure so that the cutting set does not sag or is overtightened.
Reasons for circuit failure
A high rate of chain stretching is observed at the running-in stage. It is during this period that the cutting element grinds into the tire and drive sprocket of the chainsaw. During the break-in period, it is very important to regularly check the tension of the product, otherwise it may fly off while the tool is operating.
Some of the main reasons why a chain fails include:
- Poor quality product. Some manufacturers in China, in order to increase demand for goods, resort to reducing the cost of products by manufacturing products from low-quality materials.
- Impaired lubrication function. If lubricant is supplied to the chain and bar in small quantities or not at all, then excessive overheating of the product leads to the fact that the metal begins to expand and loses its properties.
- Inadequate quality of lubricant. The use of waste leads to the fact that the chain quickly wears out and stretches, which is due to the content of metallic substances in the waste.
- Poor quality of teeth sharpening. Operating a cutting tool with dull teeth not only reduces the performance of the tool, but also causes the chain to stretch faster.
Professionals also put forward their opinion that the durability of replacement elements is influenced by the nature of the chainsaw’s operation. The negative consequences of incorrect chain adjustment also affect accelerated stretching of the cutting element and its failure. If the product is overtightened, labor productivity will be reduced, since the motor will experience excessive loads during operation. In addition, the chain will fit tightly to the bar, accelerating its wear. If the product is weakened, then at any moment it can fly off the tire or break. To make working with a chainsaw easy and smooth, it is necessary to check the tension of the cutting device and the sharpening of the teeth at each refueling.
Tension mechanisms
The chain must be properly tensioned so that it can move freely along the bar by hand. To adjust the tension, a classic type of tensioner is used, which is used in budget class tools. This tensioner is a threaded bolt, as well as an adjusting component with a classic or side arrangement.
High-quality models of chainsaws are equipped with adjustment mechanisms, with the help of which tension can be achieved with one movement of the lever or by turning the adjustment disk. If a tensioner is used to tension the chain, the tightening torque is fixed using a locknut. Otherwise, the chain tension is fixed by blocking the bar in a given position by installing the cover. Both methods allow you to fix the product securely in a given position.
It is important to know! It is strictly forbidden to adjust the chain tension on a chainsaw when it is hot. The product must be cooled, otherwise the procedure will not be performed correctly.
It is necessary to learn in more detail how to properly tension a chainsaw chain, since this point is very important; the performance of the tool and human safety depend on it.
Read also: Designer metal products
Installing the chain and adjusting its tension
Installing and adjusting the chain is technically simple. Moreover, it does not matter what class your tool belongs to: household or professional. In order for the installation of the chain on the chainsaw to be successful and as correct as possible, it is recommended to carry out the manipulations for the first time according to the instructions below.
Initially, it is necessary to install a new chain on the tool, having first dismantled the old element. The process of dismantling the old cutting product and installing a new one involves the following steps:
- To begin with, the chainsaw should be placed on the table, turning it so that the bar is at the top. After this, the threaded fasteners are unscrewed, after which the protective cover is removed, the tire is dismantled and the guides are cleaned of sawdust and dirt.
- After removing the old and worn-out product, it is necessary to determine how to correctly install the new element on the chainsaw. Determining the correct placement of the product will not be difficult, since the pointed teeth should be on top in the opposite direction from the tool itself.
- After this, you need to put the chain on the bar, and install the latter in place, securing it with threaded fasteners. It is important to make sure that the tension mechanism of the cutting device has sufficient free play.
After installing the new product, you will need to tension it. This is done in two ways: fast or frontal. The most acceptable is the frontal method of tensioning the product. The tensioning process is carried out in the following sequence:
- The nuts that secure the tool tire are unscrewed. Slightly loosen the fastening nuts and lift the tire by the edge.
- The adjusting screw is used to tension the chain to the required value, after which the tire is fixed by tightening these nuts.
- Finally, check the tension.
A quick way to adjust the tension is to tighten the wing nut handle and then loosen it. After this, the tensioner screw is screwed in clockwise until it stops. Finally, the wing nut is tightened again and the handle is lowered.
Ways to check the degree of tension
Checking the tension level is important, as the consequences of incorrect adjustment can be fatal for the sawyer. The quality of chain tension adjustment can be determined by:
- When moving the product manually, it should not jam or show signs of difficulty in its movement.
- The cutting element must be checked for looseness by grasping the link and trying to pull it up. The normal tension value should correspond to the exit of the shanks from the tire (in its middle) of no more than 2/3.
- When moving the device, there should be no creaks or other extraneous noise.
In conclusion, it should be noted that you should never adjust the chain while it is hot, as this will certainly lead to a number of negative consequences. As a result of such actions, it may be necessary to replace not only the tire and chain, but also the drive sprocket.
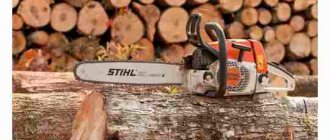
Regularly tightening the chain on a chainsaw is necessary not only for efficiency, but also for the safety of the worker. On most devices (especially the Stihl brand) there is a special device on the side, as in the photo, that helps bring the links to their normal position.
How to tension the chain?
How to adjust the tension of a headset with a keyless system
Increasingly, owners of new chainsaws turn to service centers with the question of how to adjust the chain tension on a tool with a keyless mechanism. Today, chainsaw manufacturers have improved the mechanism for adjusting the tension of the cutting set, thereby eliminating the need to use keys and screwdrivers.
If the unit is equipped with a modern tension mechanism, then to adjust the chain you will need to manually move a special wheel. The movement of the wheel contributes to the displacement of the tire, which is achieved through a special mechanism consisting of a sprocket and a tension washer. The main advantage of such a system is that the adjustment is performed without the use of additional tools, which means the time spent on performing the procedure is reduced. But such mechanisms have many more disadvantages:
- The complexity of the design, which contributes to the occurrence of breakdowns, as well as difficulties with setup.
- Difficulties with installing the saw set.
- The adjustment stroke is small, so a slightly stretched chain cannot be tensioned, as is the case with conventional tensioning mechanisms.
The method of adjusting the tension level on chainsaws with a keyless system is also called the tool-free method. In fact, this system is much easier to deal with, but the main difficulty is that if the headset wears out slightly, it will need to be replaced.
Interesting to know! Experts recommend that it is better to under-tighten the chain than to over-tighten it. When it is tightened, excess load on the engine occurs. In addition, the degree of friction between the bar and chain increases, and as a result, they heat up more and wear out faster.
How to rivet a chain?
Riveting is the joining of a broken chain or the creation of a complete chain after adding links, and the term is also used to refer to the process of shortening a chain. For rivets, it is recommended to use special rivet machines and machines.
Video on how to rivet a chainsaw chain with your own hands:
The following video shows the process of riveting chains on the machine:
When to tighten the chain
Working with a heavily slack chain is completely unacceptable.
A chain that “jumps” during sawing can break the groove of the bar and disable the teeth of the driven sprocket.
The voltage must be checked before starting work. During operation, critical attenuation can be determined by two signs:
- The chainsaw
begins to jump and twitch in his hands; - The sound of operation changes, a metallic ringing and knocking appears.
In this case, turn off the engine and check the voltage.
