Beton-House.com
Website about concrete: construction, characteristics, design. We combine the experience of professionals and private craftsmen in one place
Working with a concrete mixer
At first glance, it seems that preparing a concrete mixture in a mixer is simple - pour in cement, crushed stone and sand, turn it on and off, and the mixture is ready. But actually it is not.
Working with a concrete mixer requires certain knowledge. Otherwise, you will not be able to prepare a high-quality mixture. We will tell you about preparing concrete in a concrete mixer, the proportions of the components, the correct methods and techniques of work.
- Concrete recipe
- Safety requirements
What other questions will we touch on in the article?
We will also pay special attention to safety. Let's touch on the issue of mixing other materials in a mixer - taking into account that forced-action mixers for preparing concrete are used on an industrial scale.
If they ask: “What should concrete be mixed in?”, then we will most likely talk only about the gravitational type. The video in this article (below) shows the process (albeit with minor errors).
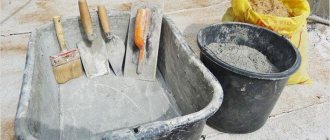
An alternative to a concrete mixer is preparing concrete manually using shovels
Forced action mixers are designed more for large volumes and light mixtures. Due to the fact that their price is high and they are large in size, you can hardly find such devices at home.
Inexpensive and convenient stirrer for home
Forced action concrete mixer and gravity unit
There are no fundamental differences in the order of mixing the solution in these machines. The only difference is in the operating principle of the units. The forced one actively mixes with blades, and the gravitational one uses the rotation of the drum itself and the force of universal gravity.
The main thing here is to take the right time. The forced one does its job 2 times faster.
The forced-type concrete mixer has different sizes and modifications:
- rotary;
- cascade:
- planetary.
Such units can operate continuously, when the components can be loaded and the finished mixture can be unloaded at the same time. You can safely buy such equipment if you want to open a mini concrete production plant. But more often these installations are bulky and are used in production.
Preparing the concrete mixer for work
As stated in the preface, our article is also aimed at those who are just getting acquainted with the work of concrete mixers. Therefore, we will not limit ourselves to telling you how to mix concrete in a concrete mixer. Let's consider the steps at the beginning in case you purchased such a unit for the first time.
Buying a new concrete mixer
New concrete mixer in shipping packaging
When bringing the concrete mixer to the site, first read the operating manual. This is rule number one, although it is rarely followed - usually the instructions are studied only after breakdowns or problems are discovered.
I note that it sets out most of the issues that we cover in this article, including: how to properly prepare concrete in a concrete mixer (if the manufacturer is reputable and responsible).
Then we perform the following steps:
- We unpack and remove all equipment and materials that were intended for transportation.
- If it was delivered disassembled, then we assemble it according to the instructions.
- We inspect the mechanism to see if there are any visible damages.
- Remove the preservative grease.
- If this is indicated in the instructions, check the presence of lubricant in the gearbox and add if necessary.
Geared concrete mixers
- For models with a ring drive, check the presence of lubricant on the ring and drive gear. If necessary, lubricate it.
The ring and drive gears that need to be lubricated on ring mixers
- We connect the unit. In this case, we use cables with a core cross-section corresponding to the power consumption of the device. Be sure to connect the grounding. For safety reasons, it is advisable not to be satisfied with the presence of a grounding wire in the power cable (it may not be grounded, but only grounded), but additionally connect a reliable ground to the housing. The connection line must have automatic fuses and RCDs that cut off the current supply in the event of a short circuit.
A cable with such damage is unusable
Attention. Pay attention not only to the cross-section, but also to the insulation of the cable. It should protect it from mechanical damage that is inevitable at the construction site.
- We install the mixer on a level surface; skew is undesirable, as it causes additional vibrations. The base must be solid. An unstable installed unit may spontaneously “move”, or even preparing a solution in a concrete mixer will end with it tipping over - and this can lead to injury.
Example of an overturned concrete mixer
- We do a test run. Many people do not recommend turning on the mechanism with an empty drum. But in fact, the mass of the drum quite loads the motor. After checking the operation at idle, we load the mixer with sand for testing. We rotate the drum for several minutes at different angles of inclination of its axis.
If the check did not reveal any malfunctions in its functioning, which include:
- Uneven rotation of the drum with jerks.
- Difficulty turning the drum relative to the vertical.
- Extraneous noises and creaks.
- Activation of electrical safety devices.
- Rotation of the drum in the opposite direction indicated by the arrow (for three-phase electric motors is not important, this can be eliminated by switching one phase)
- Also pay attention to the electric motor - it should not get very hot and emit a strong foreign smell (burnt insulation).
You can prepare for the first batch of concrete.
Preparing the mixer for use
The procedure for preparing concrete in a concrete mixer begins with preparing the unit. If there is a long break in the operation of the concrete mixer, we carry out the same operations as when checking a new machine.
If there was no break, then you can limit yourself to inspecting for the absence of damage and the presence of grease on the crown. In addition, in order to easily clean the inner surface of the drum after finishing work, it is advisable to lubricate it with any lubricant.
In industrial conditions, an aqueous emulsion based on any mineral and synthetic oils, petroleum products or their wastes is usually used for this purpose. Working with your own hands at home, you can use “working off” (oil drained from the car during a change). After this, the mixer is ready for use.
After work
We will immediately describe the actions after the production of concrete in a concrete mixer has been completed. There are no special requirements - we just thoroughly clean the mixer from residual solution and dirt using water, and disconnect it from the mains. If you do not remove the fresh mixture, then later, after it hardens, it will be difficult to do this - especially in the places where the blades are attached.
In the construction industry, for this purpose, in addition to mechanical cleaning, a weak solution of hydrochloric acid is used. You can use the same method at home. But chemical cleaning cannot be done very often, as it has a negative effect on the metal.
If you are planning a long break in work, then it is advisable, in order to avoid corrosion, to lubricate the moving parts with thick lubricant and cover the surfaces with it.
Caring for the concrete mixer after work
Types of concrete mixers
Maybe you've already bought a concrete mixer, or maybe you're just about to. We are all human and tend to do the opposite: we go to the store and fall into suspended animation at the sight of a variety of goods. I understand your feelings and now I suggest you do the right thing. First, let’s see what kind of units there are for “homemade” concrete mixing, and how they differ.
Helpful information:
- How to properly insulate a balcony from the inside with your own hands
- Brick laying mortar
- How to place a bed in the bedroom
- Sewerage for a private home: how to do it right?
- Cement mortar: find out how to mix it correctly
- How to choose the right hammer drill for your home
There are only three types. See:
The first group is gravitational
Everyone knows what they look like because everyone has seen them in their neighbors. But perhaps you didn’t pay attention that such concrete mixers can be electric or manual. Manual drive is when you have to “turn the drum” (as in the Field of Miracles) with your hands. Yes, it’s a little complicated, but it’s still easier than kneading with a shovel. But an electric drive is the best option to save energy and get quite a decent result.
The operating principle of gravity mixers is based on the force of gravity. The blades, which are fixed inside on the sides of the drum, lift the mixture up, and it falls down again. By repeating these steps many times, the components are evenly mixed with each other.
The second type of concrete mixers is forced
Other forces are already at work here. Apparently, the ingredients are forced to be mixed. It looks like this: sand, cement and water are poured into a vertical container and they begin to mix with the blades that are inside. In general, the whole process looks like in a home blender when you make an ice cream shake. Introduced? Such machines run on electricity and spend much more of it than their gravitational counterparts.
I heard ancient legends say that concrete mixers with a crown drive are powerful, invincible, make sounds like a mountain rockfall, but are reliable and loyal to man. That's right, I agree. Such units are much easier to repair and are not expensive. The machines operate on a rim drive from a 220 volt network and are very economical. In the photo below you can see the crown, which is located around the entire circumference of the tank. It rotates due to a gear driven by a motor.
There are also gear type machines. They are more reliable, but failure of one gearbox part requires a complete replacement of the engine. The rotation of the tank occurs due to the shaft, which is connected to the gearbox.
What more can be said about the variety of concrete mixers. Well, for example:
- They may vary in drum size. So, you can find miniature specimens with a capacity of 70 liters. The most serious ones have a 500 liter drum. For domestic purposes, the best option is a capacity of about 150-180 liters.
- There are mobile units on wheels, and there are stationary ones.
- A decisive characteristic may be the ability to connect the machine to a 220 volt household power supply. Some concrete mixers only operate on 380 watts.
- The devices also differ in drive power. It comes from 0.37 to 1.5 kW.
For information, I will add a third type of concrete mixer, which is called vibrating. But this is a fairly large and complex structure connected to a silo, which is used in industry. The mixing process in such a unit occurs due to vibration forces. It is unlikely that you will want one of these in your home. Although, who knows.
Calculation of concrete composition
Concrete recipe
The main thing is the correct calculation
First, let's prepare the initial data. In production, they determine exactly what strength is needed and conduct research on all components of the mixture.
It is enough for us to know what class (brand) of concrete we need to make, and the brand of cement used. This will be our initial data. Then you can use an online calculator or find tables where the proportions are indicated. Below is one of these tables.
Attention. Nowadays concrete is classified not by grade (average compressive strength in kgf/cm2) but by class. The class is a 95% guaranteed strength in MPa. You can convert either using tables, or by dividing the mark by ten and finding a close number that differs by 2.5-5 downwards in the classes. For example, M100 is B7.5, M400 is B35.
| Ready concrete class | For cement M400 | For cement M500 | ||||
| Ratio by mass (kg sand; crushed stone, per 1 kg cement) | Ratio by volume (l of sand; crushed stone per 1 liter of cement) | Yield of the mixture by volume based on the volume of cement (l of mixture from 1 liter of cement) | Ratio by mass (kg sand; crushed stone, per g cement) | Ratio by volume (l of sand; crushed stone per 1 liter of cement) | Yield of the mixture by volume based on the volume of cement (l of mixture from 1 liter of cement) | |
| B7.5 | 4,6;7 | 4,1;6,1 | 7,8 | 5,8;8,1 | 5,3;7,1 | 9,0 |
| B12.5 | 3,5;5.7 | 3,2;5,0 | 6,4 | 4,5;6,6 | 4,0;5,8 | 7,3 |
| B15 | 2,8;4,8 | 2,5;4,2 | 5,4 | 3,5;5,6 | 3,2;4,9 | 6,2 |
| IN 20 | 2,1;3,9 | 1,9;3,9 | 4,3 | 2,6;4,5 | 2,4;3,9 | 5,0 |
| B22.5 | 1,9;3,7 | 1,7;3,2 | 4,1 | 2,4;4,3 | 2,2;3,7 | 4,7 |
| B30 | 1,2;2,7 | 1,1;2,4 | 3,1 | 1,6;3,2 | 1,4;2,8 | 3,6 |
| B35 | 1,1;2,5 | 1,0;2,2 | 2,9 | 1,4;2,9 | 1,2;2,5 | 3,2 |
This is an approximate recipe for concrete with ordinary sand and crushed stone. If we prepare lightweight concrete based on expanded clay or expanded perlite, the numbers will naturally change. Since our article is not devoted to calculating the composition, we will not delve further. The reference materials you need are easy to find.
In addition to cement, crushed stone and sand, we also need water. Its quantity depends on the amount of cement. You should not add it by eye, since the strength of the finished concrete is negatively affected by both its deficiency (all the cement will not mix) and its excess. There is such a thing as the water-cement ratio.
The optimal water-cement ratio fluctuates around 0.6-0.4 and depends on the aggregates and hardening conditions. Therefore, let’s take the average value - 0.5, that is, there should be twice as much water as cement. When adding a plasticizer, it can be reduced (the instructions in the additive will indicate by what percentage).
In addition to the plasticizer, other additives are added to the mixture:
- hardening accelerators and retarders;
- pigments;
- compositions for performing work in winter (including regular salt);
- polymers to impart special properties to the mixture;
- microfiber for added durability.
When mixing, it is best to focus on volumetric proportions. Measuring the quantity with a bucket or measuring cup is easier than weighing all the components before loading.
Component proportions
Before mixing the concrete solution, the optimal ratio of components is selected, taking into account the area of use of concrete:
- Mixtures with minimal ultimate strength are poured into the foundation pad or formwork;
- For structures with maximum permissible loads, we prepare a mixture using a grade of Portland cement ≥ M 400;
- Water is added in a volume of ≤ 50% of the volume of binders. A standard batch of concrete in a concrete mixer should maintain the following proportions: 1.0 : 3.0 : 6.0 : 0.5 (Portland cement – sand – aggregate – water).
For any volume of the concrete mixer, taking into account the inclined position of the device’s tank, the loading of the dry mixture should not exceed 1/3 of the total volume of the tank. Standard volume – 180 liters. To mix concrete grade M 400, you will need 14 kg of fresh Portland cement, 42 kg of clean sand, 84 coarse crushed stone, 7 liters of clean water. As a result, you will get 60 liters (147 kg) of liquid concrete solution.
Preparing the mixture
Preparation and procedure:
- Preparation of fillers, binders, mixing fluid;
- Preparing a concrete mixer;
- Loading all components into the tank;
- Mixing, adding plasticizers and modifiers;
- Unloading the finished mixture;
- Putting the concrete mixer and tools in order.
Important: the sequence of adding substances to the concrete mixer must be strictly and strictly observed - first load water, then dry aggregates, and mix them. If you change the order and loading order of the components, the consistency of the mixture will be disrupted. Allow 1-2 minutes between adding fillers.
The solution should not remain in the concrete mixer for a long time, and the standards limiting the time of its use are specified in GOST 7473-94. The mixing time depends on the water-cement ratio, and for forced mixing concrete mixers - 50-120 seconds, and if you mix concrete in a gravity-type concrete mixer - 60-150 seconds.
Preparing the mixture
Loading a concrete mixer
Having decided on the recipe, you can start working. We will describe the operations of how to properly mix concrete in a concrete mixer.
Advice. In many cases, it is not worth preparing a full drum at once. If the mixer has a decent displacement, then you may not have time to place a large amount at once. We calculate the volume so that one batch is enough for 1-2 hours, during which time the mixture will not have time to harden.
Then we proceed like this:
Attention. All operations for loading components and unloading the mixture are performed with the engine turned off. Under no circumstances should we insert tools or hands while the mixer is operating. This may cause injury even though the rotation speed is low.
- If we are going to introduce additives, then we measure them, as well as the amount of water required to dissolve them (this water is taken into account in the total volume needed to prepare the mixture) and mix.
- We put the stirrer drum in the loading position, add crushed stone and part of the water (with the volume in which the additives are dissolved). Thus, we will ensure that before introducing cement into the mixture, the surface of the crushed stone will already be well moistened, and the cement paste will envelop it well. With this mixture, turn on the mixer for 15-20 seconds.
Crushed stone well moistened with water
- Then add sand, cement and the remaining water in small portions, the drum rotates all the time.
- When all the ingredients are loaded, tilt the drum to the mixing position of 35-40 degrees. If we are stirring an incomplete drum, we can lower it even lower - the main thing is that the mixture does not splash out. In general, the best mixing quality is achieved when the drum axis is horizontal. But in this case, the number of components that can be loaded decreases - and, consequently, the yield of the mixture. Continue stirring the mixture for 1-2 minutes.
Optimal drum position for mixing
- Do not delay the mixing time too long. For the task: how to prepare concrete in a concrete mixer with high quality, the rule “longer means more thoroughly” does not work. The fact is that with intense stirring, the water that is needed to mix the solution evaporates.
- When you have finished mixing, do not rush to unload the entire solution at once. Check the quality, at least visually. Most recommendations: how to prepare concrete in a concrete mixer suggest this method. Take a shovelful of the mixture and place it in a wheelbarrow or on a platform. Run the shovel across the top. A good mixture should be uniform and smooth and hold its shape. If any shortcomings are visible, then throw the solution back into the mixer and turn it on for a while.
Mixing quality check
Unloading the finished solution
Safety requirements
Although we covered issues of safe work above, we will touch on this topic again. Still, work should bring joy and not harm health.
Keep track of the following items:
- Make sure that the unit is in good working order, and take special care of its electrical equipment. The power cable must be intact and grounding must be connected.
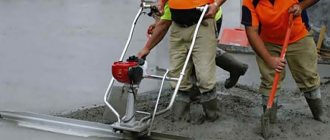
- Clothes and shoes for work should not only be comfortable, but also not have hanging ends (floor, belts) that could be caught by the stirrer mechanism. It is better to use overalls, as in the photo.
You can work in this outfit (although girls should tuck their hair under a cap)
- Clear the area where you are working from anything unnecessary, so as not to accidentally trip or get caught. The same applies to the paths along which we bring or transport the components of concrete and the finished mixture.
How much concrete can you mix with a concrete mixer in a day?
How many? Controversial issue. Because it may even depend on your mood. But suppose you are ready to work all day without a break. Let's see what else the yield of a useful product depends on and calculate:
- Depending on the volume of the pear (sometimes 45, 60, 120, 160, 180 l).
- Engine power (that is, how quickly the machine mixes one portion and how long it can work without interruption).
- Human factor (how quickly the mixture is loaded and unloaded).
There is a simple calculation algorithm. If you're interested, you can do the math. To do this you need the following numbers:
- Total time of 1 working cycle (this includes loading, mixing and unloading)
- Number of cycles (mixes) per hour. This happens without any rest at all. Let's divide 60 minutes by the time it takes to complete 1 batch.
- Amount of concrete produced in 1 hour. That is, we multiply the number of working cycles by the volume of the finished mixture in 1 approach.
Now we calculate: we multiply the time that you are ready to work by “the amount of concrete produced in 1 hour.” So how? On average it should be 3 cubic meters per day.
Anchors for concrete
Is it possible to mix clay in a concrete mixer?
Clay mortar prepared in a concrete mixer
For light solutions, forced mixers are more preferable. The thing is that in a gravity concrete mixer, coarse aggregate, lifted up by the blades and falling down, intensifies the process.
Plaster or clay mortar is prepared without crushed stone, but its components will still mix as they fall down from the blades (just as if we were working with a shovel). Therefore, in principle, it is possible to mix clay in a concrete mixer, but it will take longer than for concrete. Not one or two minutes, but five to ten, or even more.
Attention. Many mixers are not designed to last long. Therefore, take breaks after 10-15 minutes, allowing the electric motor to cool down.
That's all we wanted to tell you about what concrete to mix and how to mix it. We will be glad if we made your work easier and suggested methods of correct and safe work.
Recommendations for mixing the solution
Each master will certainly give you his recommendations if you ask him. And I will give too, even if you don't ask. And if you don’t ask anyone and no one gives you sensible advice, then how can you make concrete?
- Before starting work, be sure to check the equipment for operability, turn it at idle, listen to how the engine works. Inspect the electrical cable for damage. Wipe off protective lubricant if the machine is new.
- Be sure to place the concrete mixer on a level surface. It would be correct to place some kind of shield and check the horizontal level. Make sure there is no distortion. This can create vibration and, as a result, increased load on the engine, which can even lead to engine failure.
- If you are unsure of the recipe, do a test batch first. Let it be half of the whole portion. If you are a beginner and it seems to you that the solution is a little dry, do not rush to add water. Concrete that is too wet will separate into fractions and its quality will deteriorate significantly. It can also crack when shrinking. Add water in small portions and observe. Better yet, buy a plasticizer. Its consumption is only 50 g. for 1 bucket of cement.
- Do not start the machine with material loaded. Correctly, first turn it on and only then start adding ingredients.
- How to determine that the solution is ready? Unload some of the compound and make notches with a trowel. The solution should hold its shape and the ridges should not blur. The cement mixture itself must be evenly mixed, smooth and plastic.
- To prevent the solution from sticking to the walls, it is recommended to pour 1 bucket of gravel after loading water and cement. The stones will allow you to mix the cement evenly and remove the adhering layer from the walls and blades.
- Do not forget to rinse the container with water after each batch. Pour 1 bucket and swirl for a few seconds. This water can then be used for a new batch of concrete.
- If sand and cement stick to the inside of the tank, this can reduce the content of these components in the finished solution. "Underweight" can affect the quality of concrete. Therefore, either do not allow sticking, or add 10% more of these components.
- If it happens that the concrete has dried up, use drastic measures (but do not abuse it, otherwise you will break the device). Throw broken bricks into the tank and swirl until the container is clean. Then shake it all out of the drum and rinse it with water.
- Don't forget to wash the outside of your car. It will be nice for you and others will see what a caring owner you are.
How to check the quality of a concrete mix?
To test the concrete mixture, a steel cone 300 mm high with an upper hole of 100 mm diameter and a lower hole of 200 mm diameter is used.
The mixed concrete is placed into the cone through the top and a rod is used to compact the concrete and remove any voids inside the cone. The cone then rises.
By placing a plank on top of the cone, you can measure how far the concrete “settles.” For mixture B20, a drop of about 50 mm is acceptable.
If you are mixing multiple batches of concrete to make a floor slab, it is absolutely essential that each mixture is exactly the same as the last.
For example, if the second mixed batch is wetter than the first, both will dry at different rates. When this happens, you will get shrinkage and cracking.
The strengths of each mixture will also be different since they dry at different rates.