Features of repairing angle grinders of various brands
This article offers ways to find faults in angle grinders of various models without repairing an angle grinder (angle grinder) on your own. Here you can find answers to questions about the procedure for disassembling gearboxes of grinders of the most popular models, replacing gears, bearings and their repair. Recommendations are given on the procedure for pressing in and unpressing gears and bearings, and methods for repairing devices.
Along with general malfunctions, angle grinders of various brands have their own characteristics. This occurs not so much from differences in the designs of angle grinders, but also from the non-component materials used.
It is important that at first, who made the instrument. Knowledge of the design features of angle grinders allows you to repair angle grinders yourself, but not quickly. The information below will help you repair any brand of angle grinder.
Along with original tools, the construction market is flooded with cheap fakes. It makes no sense to think that counterfeits are made exclusively in China. Power tools from Chinese manufacturers are in no way inferior in quality to those from European countries, or in other words, Southeast Asian countries.
High-quality tools from Chinese manufacturers for European consumers undergo several stages of incoming control. For third countries, Chinese manufacturers do not control tools. But the instruments are produced on the same lines, in the same factories, by the same people. This is why there is such a difference in price.
To repair an angle grinder in makeshift conditions, you need to have a diagram of this angle grinder without understanding it. Repairing a Bosch grinder differs from repairing an Interskol grinder. You can find grinders under the brands Makita, Hitachi, Metabo.
Some general useful tips for organizing the repair of an angle grinder
Before we start repairing the angle grinder, let’s look at some useful tips:
- Before you start disassembling the angle grinder, carefully read its description, assembly diagram and the order of work.
- Be sure to follow the sequence of technological operations.
- Strictly follow safety precautions.
The most common reason why an angle grinder breaks down is a broken wire near the handle. First of all, you need to check the presence of voltage on the button, this is done with a regular voltage tester. Then we check the button itself for functionality.
How to remove a needle bearing or a damaged journal bearing race
Grinder gearboxes use various bearings. They are subjected to heavy loads and do not cause malfunctions.
Bearing failure is determined by an increase in spindle shaft play. Having disassembled the gearbox housing without dismantling the large gear shaft, the needle bearing is visible.
The needle bearing is not used in many angle grinders. In the same grinders in which it is installed, its dismantling is carried out in several ways.
Having taken out the destroyed part of the bearing , there is an option to remove the inner race using a machine tap. Clamp a machine tap of a suitable diameter into the screwdriver chuck and do not try to screw it into the bearing race until the tap rests on the bottom of the housing. Continue to slowly screw the tap into the cage. It will lift the clip along the threads.
The second method is that the remaining race of the destroyed needle bearing can be removed using a special bolt not a retaining ring.
How to Remove a Bearing from a Grinder Gearbox
Features of repairing angle grinders of various brands
This article offers methods for finding defects in angle grinders of different models without repairing an angle grinder (angle grinder) with your own hands
. Here you can find answers to questions about the procedure for disassembling gearboxes of angle grinders of the most popular models, replacing gears, bearings and their repair. Recommendations are given on the procedure for pressing and unpressing gears and bearings, repair methods and devices.
Along with general malfunctions, angle grinders of various brands also have their own characteristics. This occurs not only from differences in the designs of angle grinders, but also from the materials and components used.
It is also important who made the instrument. Knowledge of the design features of angle grinders allows you to repair angle grinders with your own hands efficiently and quickly. The information below will help you repair any brand of angle grinder.
Along with original tools, the construction market is flooded with cheap fakes. And don’t think that counterfeits are made exclusively in China. The quality of power tools from Chinese manufacturers is in no way inferior to those from European countries or Southeast Asian countries.
High-quality tools from Chinese manufacturers for European consumers undergo several stages of incoming control. For third countries, Chinese manufacturers do not perform tool control. But the instruments are produced on the same lines, in the same factories, by the same people. That is why there is such a difference in price.
To repair an angle grinder with your own hands, you need to have a diagram of this angle grinder and understand it. Repairing a Bosch grinder differs from repairing an Interskol grinder. There are also grinders under the brands Makita, Hitachi, Metabo.
Content
Some general useful tips for organizing the repair of an angle grinder
Before you start repairing your angle grinder, let's consider a few useful tips:
- Before you start disassembling the angle grinder, carefully read its description, assembly diagram and work order.
- Be sure to follow the sequence of technological operations.
- Strictly follow safety precautions.
The most common reason why an angle grinder breaks down is a broken wire near the handle. First you need to check the presence of voltage on the button, this is done with a regular voltage tester. Then we check the button itself for functionality.
How to remove a needle bearing or a damaged journal bearing race
Grinder gearboxes use various bearings. They are subject to heavy loads and cause malfunctions.
Bearing failure is determined by an increase in spindle shaft play. By disassembling the gearbox housing and removing the large gear shaft, you will see the needle bearing.
The needle bearing is not used in all angle grinders. In the same grinders in which it is installed, its dismantling can be done in several ways.
Having removed the destroyed part of the bearing, the inner race can be removed using a machine tap. Clamp a machine tap of a suitable diameter into the screwdriver chuck and try to screw it into the bearing race until the tap rests on the bottom of the housing. Continue to slowly screw the tap into the cage. It will lift the clip along the threads.
READ Why Brushes on Grinders Spark
The second method is that the remaining race of the destroyed needle bearing can be removed using a special bolt and a retaining ring.
How to remove helical gears of an angle grinder gearbox
Repair of the grinder gearbox begins with the dismantling of the helical gears. It is the gears that become the main cause of malfunctions of the grinder
. In grinders, you most often have to change the small drive gear attached to the rotor shaft.
The helical gear can be attached to the rotor shaft in two ways:
- The gear is secured with a keyed connection and clamped with a nut.
- The gear is attached using a threaded connection. Moreover, both right-hand and left-hand threads are used.
The large driven helical gear is mounted on the spindle shaft in two ways:
- The gear is pressed onto the shaft.
- The gear is secured using a keyed connection.
In addition to replacing gears, angle grinders often require replacing one or another bearing. And there are at least three of them in the design of the grinder.
Design features of foreign angle grinder manufacturers
In this chapter, we will look at the design features of angle grinders produced under the Bosch, Hitachi and Makita brands, as well as do-it-yourself angle grinder repairs.
Bosch angle grinder repair
Bosch grinders are a reliable tool that does not cause much trouble to the user. But not every user treats the tool correctly. Bosch angle grinder repair most often involves replacing bearings.
Structurally, all Bosch angle grinders are made according to the same design. The spindle shaft pos. 25 is pressed into the driven helical gear pos. 26 and rests in the gear housing pos. 821 on the needle bearing pos. 51.
When a bearing is destroyed, a bearing race remains inside the housing, which is not easy to obtain. We recommend two methods for removing the needle bearing race. They are described in the section “How to remove a needle bearing”.
If the teeth of a pair of gears are worn out or licked, both must be replaced and only in pairs. When dismantling the gears, remember that the drive gear is attached to the rotor shaft on a thread, and the LEFT gear is secured with a nut. The driven large helical gear, pos. 26, is pressed onto the spindle shaft, pos. 25.
Hitachi angle grinder repair
Hitachi grinders have gained particular popularity among Russian consumers. And this is natural. There are practically no handicraft fakes of Hitachi angle grinders on the market. The simplicity of the design makes it easy to carry out repairs of any complexity.
Grinders from Hitachi are highly reliable and rarely come to the attention of repairmen. The main reason why a Hinachi angle grinder needs to be repaired is a gearbox failure, namely, the wear of gear teeth.
Replacing bearings on an angle grinder. Replacement of bearings angular polishers.
bearings considered
rolling in
an angle grinder
, with disassembly and reassembly I tried to maximize my income
Repair of an angle grinder. We remove the backlash. Repair, Angle-grinders.
Over time in my grinder
play appeared
in the gearbox bearing
, and the disk began to live its own life, so
The grinder gearbox is easy to disassemble. To disconnect the gearbox housing, pos. 3, from the stator housing, pos. 37, the carbon brushes must be released.
Unscrew the four screws, item 1, securing the gearbox housing and stator housing. Separate the gearbox housing and the stator housing. The gearbox housing will be disconnected together with the rotor, pos. 8.
To remove
gearbox cover pos. 23, you need to unscrew the four screws pos. 24. The driven helical gear pos. 33 is fixed on the spindle shaft pos. 26 using a key pos. 25 and is driven off with a puller. Bearing pos. 21 is removed with a puller.
Makita angle grinder repair
A special feature of the Makita family of angle grinders is the quick-release protective cover pos. 19.
Makita grinders are more likely than others to be repaired. But the reason is the high percentage of counterfeits that have flooded the Russian market.
READ How to cut tiles without a tile cutter and grinder
A true Makita is a reliable, durable tool. But, like all angle grinders, it suffers from failure of the gearbox and its gears.
Reducer gears are replaced if they become jammed or destroyed.
To repair a Makita 9069 or Makita 9558 HN angle grinder, you need to disassemble the angle grinder.
If the gearbox is faulty, and this is determined by the appearance of play in the spindle shaft, jamming of the gearbox, or slipping of the driven gear, then the gearbox should be disconnected from the stator housing. Release the carbon brushes, pos. 35, unscrew the four screws, pos. 10, and disconnect the gear housing from the stator housing, pos. 37.
At the next stage, unscrew the four screws pos. 18 holding the rotor cover pos. 15. The driven gear pos. 14 is removed using a tool. The drive gear, pos. 43, is secured by a keyed connection and secured with a nut, pos. 42. The rotor shaft bearings pos. 3 are removed using pullers.
Design features of angle grinders from domestic manufacturers
Among domestic manufacturers, a special place is occupied by the products of such well-known brands as Interskol, Fiolent, Lepse.
Angle grinder repair Interskol
With proper use, Interskol grinders can work for years.
Along with the infrequent failure of the grinder gearbox
, in which the weak link is a pair of gears and a bearing, cases of malfunctions in the stator have been noted.
To replace the gears of the gearbox, it is necessary to disassemble the gearbox housing, pos. 19, by releasing the cover, pos. 6.
The driven gear pos. 11 is pressed onto the shaft pos. 8 and is removed using a press. The bearing pos.9 is removed with a puller.
You can repair the stator of an Interskol angle grinder yourself if you know the necessary data. When disassembling a burnt stator, you must count the number of turns of the wire used and its cross-section.
Repair of angle grinder Lepse
Grinders under the Lepse brand are marked with the LPS Lepse Kirov 1.8-230-A. These grinders trace their history back to the famous Soviet-made grinder IZH. An amazingly durable tool with the most vandal-proof design.
The advantages of the Lepse grinder are the ability to replace worn carbon brushes without disassembling the body of the machine.
Repairing Lepse angle grinders in terms of replacing brushes is simple. Through special windows pos. 45, closed with caps pos. 48, carbon brushes pos. 47 are inserted into the brush holder housing pos. 46.
When repairing the gearbox of a Lepse angle grinder, it is necessary to dismantle the gear pair.
The driving small helical gear is mounted on the rotor shaft on a key and secured with a nut.
The driven gear, pos. 15, is screwed onto the spindle shaft, pos. 10, and secured with a nut, pos. 18.
Repair of angle grinder Fiolent
Recently, Fiolent grinders have become especially popular. What attracts us is not only the affordable price, but also the reliability of the tool.
It is recommended to start repairing the Fiolent angle grinder with your own hands by studying emerging faults. If you need to disassemble the Fiolent angle grinder, then in order to remove the driven gear, pos. 11, it must be pressed out from the spindle shaft, pos. 8.
To remove the spindle shaft bearing, you must first remove the large helical gear. These are minor inconveniences.
Replacing the rotor bearings requires the removal of the small helical gear, pos. 22.
What repairs can a user make to an angle grinder with his own hands?
Although the grinder is not a particularly complex tool, the user cannot perform repair work on all components.
Along with simply replacing the bearings or gears of the gearbox, there are malfunctions that cannot be made without special equipment or devices.
- To press out the driven gear you will need a press. It will not be possible to wind the rotor without tools.
- Such malfunctions include rotor failure. For the average consumer, such a malfunction ends with a trip to the service center.
- Advanced users can revive a burnt out rotor with certain skills and concepts. But sometimes it’s easier to buy a new one than to rewind.
READ How to Cut a Corner with a Grinder
For most users, repairing an angle grinder with your own hands is limited to a certain range of faults.
Systematization of faults in the electrical part of angle grinders
- The simplest fault that causes the angle grinder to not turn on is a broken power cord. Most often, a break occurs in the power cord near the plug or at the entrance to the instrument. The malfunction can be easily resolved by replacing the power cord or removing the broken piece of wire.
- Increased heating in the area where carbon brushes are installed. Most often, such a malfunction occurs due to shortening the carbon brushes below the nominal size. The length of carbon brushes cannot be shorter than 8 mm.
- The grinder's power button goes down. The malfunction is due to burnout of the internal contacts in the button. Eliminated by completely replacing the switch with a new one.
- Some models of angle grinders use a device that allows you to smoothly regulate the speed of the angle grinder. The angle grinder's speed regulator improves the smooth operation of the angle grinder and prevents the working tool from biting. Repair of the angle grinder speed controller consists of completely replacing it.
Grouping of faults according to the mechanical part of the angle grinder
- The appearance of extraneous noise in the grinder gearbox, heating of the gearbox
. The malfunction is associated with the destruction of the support bearing, wear of the gear teeth of the gearbox, and drying out of the lubricant. Eliminated by replacing gears when tooth wear is high. If there is slight wear on the gear teeth, you can try to fix it. The tooth profile is corrected manually by filing using a round file and a drill. The lubricant is replaced with a new one every time the gearbox is repaired. New lubricant is applied to thoroughly washed parts. - Bearing replacement is required when it is damaged or large play appears. In some models, the bearing is mounted on the spindle with interference. Replacement requires special equipment, in particular a press. Parts need to be cooled or heated.
- Replacing the bearings on the rotor is required when large runout occurs. The presence of increased runout can be easily seen on the rotor commutator and by the wear rate of the carbon brushes.
Simple faults and methods for diagnosing and eliminating them yourself
If your grinder does not turn on when you press the “Start” button, then the test begins by inspecting the power cable at the point of entry into the tool.
Unscrew the lid of the angle grinder and check the integrity of the power cord using a tester or phase. Strictly follow safety rules.
If the power cord is intact and the angle grinder does not turn on, replace the “Start” button.
If the grinder does not work when installing a new button, check the quality of fastening of the carbon brushes and their tight fit to the rotor commutator.
Do-it-yourself complex malfunctions and repairs of angle grinders
The following types of breakdowns require certain knowledge and skills to eliminate them:
- Seized or damaged bearings.
- Licking or destruction of gear teeth of the gearbox.
- Open circuit or short circuit in the rotor or stator.
- Failure of control circuit parts.
- Destruction of the gearbox housing.
A few words about lubrication
The reliability of the gearbox and its durability largely depend on the timely replacement of lubricant and its correct selection.
The Russian fuel and lubricants market offers a wide range of lubricants. Among them, lubricants from Russian manufacturers stand out.
Modern tool manufacturers strongly recommend using only their own lubricants. This is the manufacturer's policy.
Among Russian lubricants, we recommend using lubricants specially designed for gearboxes.
But the quality of work of an angle grinder is affected not only by correctly selected lubricant, but, to a greater extent, by its timely replacement! Do not delay replacing the lubricant; monitor its condition.
How to remove helical gears of an angle grinder gearbox
Repair of the grinder gearbox begins with the dismantling of the helical gears. It is the gears that become the main cause of malfunctions of the grinder gearbox. In grinders, you most often have to change the small drive gear attached to the rotor shaft.
The helical gear can be attached to the rotor shaft in two ways:
- The gear is fixed with a key connection and is not clamped with a nut.
- The gear is attached using a threaded connection. Moreover, both right-hand and not left-hand threads are used.
The large driven helical gear is mounted on the spindle shaft in two ways:
- The gear is pressed onto the shaft.
- The gear is attached using a keyed connection.
In addition to replacing gears in angle grinders, it is often necessary to replace one or other bearings. And there are at least three of them in the design of an angle grinder.
How to disassemble the gearbox of an angle grinder
The design of angle grinders does not cause problems in case of repair or maintenance work related to their assembly/disassembly. This is one of the advantages of using this power tool. However, when disassembling, for example, a gearbox, work must be carried out with a great degree of accuracy . This is due to the materials used (aluminum, magnesium alloys, plastic), which are not very durable. Using “hard” methods to work with threaded connections can compromise their integrity, which can create additional problems. Some effective methods for repairing grinder gearboxes are given in this article.
Bosch angle grinder repair
Bosch grinders are a reliable tool that does not cause much trouble to the user. Unfortunately, it is a rare user who treats the instrument correctly. Bosch angle grinder repair most often involves replacing bearings.
Structurally, our client is left with Bosch angle grinders made according to the same design. The spindle shaft pos. 25 is pressed into the driven helical gear pos. 26 and does not rest in the gear housing pos. 821 on the needle bearing pos. 51.
When a bearing is destroyed, a bearing race remains inside the housing, which is not easy to obtain. We recommend two methods for removing the needle bearing race. They are described in the section “How to remove a needle bearing”.
When the teeth of a pair of gears become worn out or licked, both must be replaced, not only in pairs. When dismantling the gears, remember that the drive gear is attached to the rotor shaft on a thread, and the LEFT gear is not secured with a nut. The driven large helical gear, pos. 26, is pressed onto the spindle shaft, pos. 25.
Hitachi angle grinder repair
Hitachi grinders have gained particular popularity among Russian consumers. All this is natural. There are practically no handicraft fakes of Hitachi angle grinders on the economic market. The simplicity of the design makes it easy to carry out repairs of varying complexity.
Hitachi grinders have increased reliability and do not often come to the attention of repairmen. The main reason why a Hinachi angle grinder needs to be repaired is a breakdown of the gearbox, specifically, the wear of gear teeth.
Replacing bearings on an angle grinder. Replacement of bearings angular polishers.
Replacement considered
all
bearings
in
the grinder
, with disassembly and reassembly I tried to maximize the income
The grinder gearbox is easy to disassemble. To disconnect the gearbox housing, pos. 3, from the stator housing, pos. 37, the carbon brushes must be released.
Unscrew the four screws, item 1, securing the gearbox housing and stator housing. Separate the gearbox housing and the stator housing. The gearbox housing will be disconnected together with the rotor, pos. 8.
To remove the gearbox cover pos. 23, you need to unscrew the four screws pos. 24. The driven helical gear pos. 33 is fixed on the spindle shaft pos. 26 using a key pos. 25 and is driven off with a puller. Bearing pos. 21 is removed with a puller.
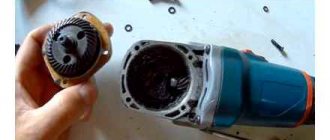
Do-it-yourself Bosch grinder disassembly
For the owner of a power tool, knowledge of its structure and the ability to disassemble it is a mandatory task.
Knowing the procedure for disassembling an angle grinder allows you to independently carry out work such as changing grease, changing bearings and carbon brushes.
To disconnect the gearbox housing pos. 821 from the stator housing pos. 888, you need to disassemble (remove) the body of the grinder handle pos. 24.
This operation must be performed to remove the carbon brushes pos. 810 holding the rotor commutator.
At the second stage, unscrew 4 (four) screws, pos. 61, securing the gearbox and stator housings.
Having pulled out the rotor together with the gearbox, begin disassembling the gearbox.
Repair of a Bosch angle grinder begins with disassembling the gearbox pos. 821. Disassembling the gearbox begins with unscrewing 4 (four) screws, pos. 60. As a rule, the screws are screwed in with sealant at the factory. You will have to make some effort.
Let's note it right away! Low-power Bosch angle grinders use spur gears in the gearbox. Grinders with a power of over 1000 W use helical gears in their gearboxes.
How to remove the driven gear
By removing the gearbox cover, you can get the helical gear assembly, pos. 26.
To remove the gear, you need to use a press or puller. But using a puller is difficult because it requires the use of special thin jaws.
Before removing the helical gear, check the backlash of the gear connection, the integrity of the teeth, and the contact patch.
A bearing, pos. 50, is pressed onto the spindle shaft, pos. 26. If the bearing has a lot of play, is noisy when turning, or the lubricant has dried out, it is preferable to replace it.
To remove the bearing, you need to remove the gear, retaining ring and dismantle the bearing. If, when dismantling the rotor shaft assembly, the bearing remains in the gearbox housing, dismantling the bearing is carried out using a hammer and a soft tool.
How to remove the drive gear of a Bosch angle grinder
The drive gear pos. 27 is removed from the rotor shaft in the following sequence:
- Hold the rotor with your hand and, using an open-end wrench, unscrew the nut pos. 45 counterclockwise;
- remove the washer pos. 59.;
- pull out the drive helical gear pos.27.
Visually check the integrity of the gear teeth and contact patch.
If the gears are heavily worn (licked), or there are chipped teeth, they must be replaced. Moreover, gears are always replaced in pairs.
Low-power Bosch angle grinders use a needle bearing as a support bearing in the gearbox.
Repair your Bosch earmachine guns with your own hands, strictly follow the included instructions. If you need to remove a needle bearing from its housing, some quick thinking is required. Its dismantling is carried out only when destroyed.
To remove a damaged bearing race, you can use a proven method.
Select a tap with a diameter slightly larger than the inner diameter of the damaged needle bearing race
The tap is secured in the screwdriver chuck and carefully screwed into the holder at low speeds. When the tap reaches the bottom of the gear housing, it will begin to lift the cage
In addition to the needle bearing of the spindle shaft, Bosch angle grinders use two more bearings mounted on the rotor shaft.
How to remove bearings from the rotor of a Bosch angle grinder
To remove bearings from the rotor pos. 803 of a Bosch angle grinder, it is recommended to use pullers.
Bearing pos. 15 near the manifold can be easily removed, but removing bearing pos. 14 from the impeller side is complicated by the fact that a number of preparatory operations must be performed.
Bearing pos. 15 is closed with a soft rubber seat. A similar rubber protection, pos. 33, also covers the bearing, pos. 14.
To dismantle the bearing pos. 14, you need to unscrew the nut pos. 45, remove the spur gear pos. 17 and the plastic protection pos. 33. Using a puller, you can easily remove the bearing from the rotor shaft.
What if there is no puller? A vice, two metal strips and a hammer with a soft metal attachment will come to the rescue.
Disassembling a Bosch grinder
Makita angle grinder repair
A special feature of the Makita family of angle grinders is the quick-release protective cover pos. 19.
Makita grinders are more likely than others to be repaired. But the reason is the high percentage of counterfeits that have flooded the Russian market.
A true Makita is a reliable, durable tool. But, like all angle grinders, it suffers from failure of the gearbox and its gears.
Reducer gears are replaced if they become jammed or destroyed.
To repair a Makita 9069 or Makita 9558 HN angle grinder, you need to disassemble the angle grinder.
If the gearbox is faulty, and this is determined by the appearance of play in the spindle shaft, jamming of the gearbox, or slipping of the driven gear, then the gearbox should be disconnected from the stator housing. Release the carbon brushes, pos. 35, unscrew the four screws, pos. 10, and disconnect the gear housing from the stator housing, pos. 37.
At the next stage, unscrew the four screws pos. 18 holding the rotor cover pos. 15. The driven gear pos. 14 is removed using a tool. The drive gear, pos. 43, is secured by a keyed connection and secured with a nut, pos. 42. The rotor shaft bearings pos. 3 are removed using pullers.
How to repair an angle grinder yourself
One of the most common household appliances for repair and construction work is a grinder, or angle grinder (angle grinder).
When operating the machine, there are often cases of heavy loads and careless handling, which leads to wear and tear of parts and breakdown. But it is possible to repair an angle grinder yourself. To do this, it’s worth watching how to repair an angle grinder with your own hands in the video. The device of the grinder
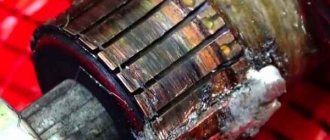
- The angle grinder's anchor (rotor) is the most overloaded element of the angle grinder mechanism. It is subject to thermal, electromagnetic and mechanical damage, so its failure is not surprising. When heated, the armature winding may burn out, leading to a short circuit. Therefore, repairing the anchor of an angle grinder with your own hands is a common practice.
- If the commutator fails during operation due to strong vibration of the brushes, they burn, resulting in very noticeable sparking. The brushes conduct current to the commutator.
- The bearings on the rotor shaft are also subject to severe wear, which can completely collapse if not replaced in a timely manner. They need to be checked if there is any extraneous noise from the operation of the machine.
- The fixed part of the electric motor of the angle grinder is the stator, which contains the winding. The stator itself is quite rarely the reason why the grinder breaks down.
- The gearbox is a rotation transmission mechanism that needs timely cleaning and lubrication.
- The easiest way to replace the brushes on an angle grinder, but this is also the most common repair procedure, because... they are made on the basis of graphite.
Recommendations before starting repairs
It is worth considering that repair technologies for angle grinders of different models and manufacturers may differ. So, repairing an Interskol grinder with your own hands differs from repairing malfunctions of a Bosch machine.
That is, it is important to know the features of your angle grinder and have a diagram from it in your hands, then repairing an angle grinder with your own hands can be done easily and efficiently.
Do-it-yourself grinder repair
Only after reading the detailed description and diagram of the angle grinder can you begin to disassemble it. The repair must have a certain sequence of actions. And most importantly, compliance with safety regulations.
Power cable
A break in the electrical wire at the handle is the most common problem when a device fails to work. To verify this malfunction on the button, you must use a standard voltage tester. Only after this check whether the button itself works.
Bearing replacement
If you notice an increase in spindle shaft play, then the needle bearing needs to be replaced. By the way, it is not available in all models of angle grinders. To dismantle it, you need to disassemble the housing and remove the large gear shaft.
Using a machine tap, the inner race located in the damaged bearing is removed.
The tap must be clamped into the screwdriver chuck and screwed into the bearing race. When the bottom of the housing is reached, you need to continue screwing in slowly so that the collar rises along the threads.
Removing helical gears
Due to damage to the helical gears, the gearbox breaks down. Often the small drive gear attached to the rotor shaft is replaced, which is attached in two ways:
- They resort to a keyed connection with a nut clamping;
- A threaded connection is used.
The driven large gear can also be attached using a keyed connection, but also by pressing onto the shaft.
Differences in the repair of angle grinders Interskol
Subject to the correct operating conditions, repairing an Interskol angle grinder with your own hands can be done very rarely.
In order to replace the gears of the gearbox, its housing is disassembled and the cover is released. Since the driven gear is attached by pressing, it must be removed using a press. Next, remove the bearing with a puller.
If the stator burns out, you need to calculate how many turns the wire has and what its cross-section is.
It would be a good idea to watch the repair of an Interskol angle grinder with your own hands on video.
Features of Bosch angle grinder repair
The design of all models in the Bosch line has an identical design. Repairing a Bosch angle grinder with your own hands usually comes down to replacing the bearings.
The spindle shaft is pressed onto the driven gear. It is supported by a needle bearing in the gearbox housing, which, when worn, leaves only a cage inside. The drive gear is attached to the rotor shaft with a left-hand thread and then secured with a nut.
Makita angle grinder repair
The Makita angle grinder is distinguished by its protective casing, which can be quickly removed. This can be called a plus, because... Grinders from this company are most often prone to breakdowns. This applies mainly to counterfeits that have flooded the domestic market.
The real Makita angle grinder is famous for its durability and reliability. Regardless of whether you get your hands on a fake or a real grinder, the most common cause of failure will still be the gearbox and its gears.
This becomes noticeable when the driven gear slips, the gearbox gets jammed and the shaft play increases.
When repairing, the grinder is first disassembled. The gearbox is disconnected from the stator housing; to do this, the brushes are released and the screws are unscrewed. Next, remove the screws holding the rotor cover.
The driven gear can be removed with a press, and the drive gear is attached by a keyed connection with a locking nut. Pullers remove the rotor shaft bearings.
Thus, no matter what kind of grinder you have, if you properly study the problem, you can fix the main problems yourself with your own hands. The main thing is to correctly understand the circuit and have the necessary equipment for repairs.
Despite this, an angle grinder is a complex mechanical power tool, and cases of damage to more inaccessible parts of the mechanism are not uncommon. In this case, if you have not encountered such breakdowns before, it would be more effective to first consult with specialists specifically about your problem.
Source: https://metall.trubygid.ru/bolgarka/proizvesti-remont-bolgarki
Angle grinder repair Interskol
With proper use, Interskol grinders can work for years.
Along with the infrequent failure of the grinder gearbox, in which the weak link is a pair of gears and a bearing, there have been cases of malfunctions in the stator.
To replace the gears of the gearbox, it is necessary
the gearbox housing, pos. 19, by releasing the cover, pos. 6.
The driven gear pos. 11 is pressed onto the shaft pos. 8 and is removed using a press. The bearing pos.9 is removed with a puller.
You can repair the stator of an Interskol angle grinder yourself if you know the necessary data. When disassembling a burnt stator, you must count the number of turns of the wire used and its cross-section.
How to disassemble an angle grinder gearbox correctly, video
There are many companies specializing in the production of angle grinders. The basic design principles of angle grinders for all companies are practically the same. However, there are some features that should be taken into account when repairing angle grinders of a certain brand. The experience of such repairs is presented by craftsmen in video formats, it is presented below.
Bosch
An overview of one of the household models of an angle grinder from Bosch is presented in the following video. It disassembles the gearbox, after which a visual inspection of the bevel gear . The presence and condition of the lubricant is determined. It is possible to determine the degree of gear wear. In this case, since the angle grinder is new, you can only make sure that there is one support on the spindle in the form of a plain bearing and a bevel gear - it is spur gear . The author classifies these design features of this Bosch angle grinder model as disadvantages. Indeed, the service life of such an angle grinder and the noise level will not be good .
In the following video, after disassembling the gearbox of another model of a Bosch angle grinder, significant contamination of the lubricant with abrasive particles is observed. Conclusion: the internal cavity of the gearbox should be inspected regularly to avoid early failure of the power tool.
The author suggests replacing expensive lubricant from Bosch with another cheaper and more accessible domestic one. Important: the postulate that there is no such thing as too much lubrication is not acceptable here. A large amount of lubricant will lead to its squeezing out through the seals on the gear housing, for example, through the retainer seal. Therefore, a strictly defined amount of lubricant should be placed in the gearbox.
Hitachi
The following video describes in detail the process of disassembling the gearbox spindle of an angle grinder of one of the Hitachi models. This is caused by replacing a stuck bearing located in the gear housing cover. In order to get to it, you must remove the driven gear pressed onto the shaft. Due to the small distance between the gear and the gearbox cover, the puller jaws are modified by grinding their surface to the required thickness in order to fit into this gap. Important: before pressing out the gear, you must remove the retaining ring that secures it.
DeWalt
A design feature of the angle grinder of one of the DeWalt models is the design of the gearbox housing. The lid here does not have any additional functions other than protection against abrasive particles getting inside. The flange where the bearing unit is located is made as a single unit together with the housing.
Usually, when replacing a structural element (in this case brushes), in most cases the lubricant in the gearbox is replaced. To do this, the DeWalt angle grinder is completely disassembled with the rotor removed, so that it is convenient to rinse and clean the gearbox cavity from old grease.
Repair of angle grinder Lepse
Grinders under the Lepse brand are marked with the LPS Lepse Kirov 1.8-230-A. These grinders trace their history back to the famous Soviet-made grinder IZH. An amazingly durable tool with the most vandal-proof design.
The advantages of the Lepse grinder are the ability to replace worn carbon brushes without disassembling the body of the machine.
Repairing Lepse angle grinders in terms of replacing brushes is simple. Through special windows pos. 45, closed with caps pos. 48, carbon brushes pos. 47 are inserted into the brush holder housing pos. 46.
When repairing the gearbox of a Lepse angle grinder, it is necessary to dismantle the gear pair.
The driving small helical gear is mounted on the rotor shaft on a key and secured with a nut.
The driven gear, pos. 15, is screwed onto the spindle shaft, pos. 10, and secured with a nut, pos. 18.
Repair of angle grinder Fiolent
Recently, Fiolent grinders have become especially popular. What attracts us is not only the affordable price, but also the reliability of the tool.
repairing the Fiolent angle grinder with your own hands by studying emerging faults. If you need to disassemble the Fiolent angle grinder, then in order to remove the driven gear, pos. 11, it must be pressed out from the spindle shaft, pos. 8.
To remove the spindle shaft bearing, you must first remove the large helical gear. These are minor inconveniences.
Replacing the rotor bearings requires the removal of the small helical gear, pos. 22.
Video: DIY replacement of grinder bearings
Advanced Search
In the search field in the drop-down list, select the type of occurrence that suits your request
A wide occurrence simply involves entering a substring with the name of the product: The following results are relevant to the query “608”: Bearing AXK 6085 (CX) Bearing EGB0608-E40 (INA) Bearing CRBS 608 A UU (IKO)
This type of entry requires a space before the query string to search for modifications of a certain series. The following results are relevant to the query “608”: Bearing AXK 6085 (CX) Bearing CRBS 608 A UU (IKO) But will not come out Bearing EGB0608-E40 (INA)
This type of occurrence requires a space before and after the query string in order to find ONLY the exact occurrence of the series The following results are relevant to the query “608”: Bearing CRBS 608 A UU (IKO) Bearing SV 608 ZZST (KOYO) But it will not be displayed Bearing EGB0608-E40 (INA) Bearing AXK 6085 (CX)
What repairs can a user make to an angle grinder with his own hands?
Although the grinder is not a particularly complex tool, the user cannot perform repair work on all components.
Along with simply replacing the bearings or gears of the gearbox, there are malfunctions that cannot be made without special equipment or devices.
- To press out the driven gear you will need a press. It will not be possible to wind the rotor without tools.
- Such malfunctions include rotor failure. For the average consumer, such a malfunction ends with a trip to the service center.
- Advanced users can revive a burnt out rotor with certain skills and concepts. But sometimes it’s easier to buy a new one than to rewind.
For most users, repairing an angle grinder with your own hands is limited to a certain range of faults.
How to Change a Bearing on a Grinder
How to change a bearing on an angle grinder
We are successfully promoting
Terms
An armature is a rotating element of an electric motor containing windings. A collector is a place on the armature to which the windings are brought out, which remains to be done by our client. It looks like a series of plates isolated from each other. The stator is the fixed part of the electric motor containing the windings. The brushes are carbon parallelepipeds that supply current to the commutator.
A gearbox is a mechanical device for transmitting rotation with changes in power and rotation speed.
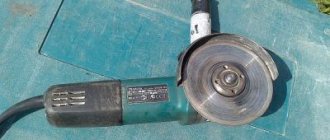
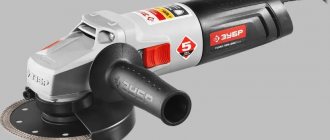
The most necessary equipment in everyday life after a drill is an angle grinder, as it is also called, as it is more often called, an angle grinder.
The grinder is used for cutting metals, wood, concrete, grinding various surfaces, cutting gaps, doors, niches.
If it is natural to use an angle grinder, then you will always find a use for it; it is not particularly sad when the oil stops working normally, jerking, twitching, and a burning smell occur...
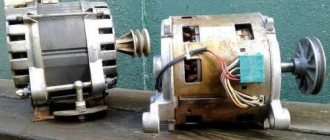
The angle grinders for our client are constructed identically: an oblong body in which the engine is located, not a gearbox, a handle is screwed on the side, not a protective casing.
A sticker with initial data is placed on the body of the angle grinder. Here you can easily find both the personal number of the angle grinder and the supply voltage - 230 V. This means a very permissible voltage in the network. The frequency of the current in the network is 50 Hz. Current consumption – 5 A.
The power consumed from the network is 1100 W, as oil comes out as the product of voltage (220 V) and current (5 A) multipliers. The rotational speed of the disk mounted on the angle grinder is 2800-11000 rpm. Specifically, the anchor itself rotates at a higher speed than the disk. Directly on this grinder you can adjust the rotation speed in stages.
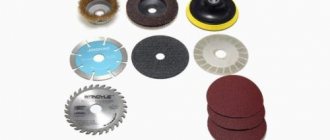
The disk mounted on the grinder has an outer diameter of 125 mm, the disk mounting nut has an M14 thread.
A household tool designed for phase voltage 220 V has an armature winding and not a stator winding. Energy is transferred from the network to the anchor using graphite brushes.
The voltage from the network is supplied to the switch, which is mechanically connected to the power button of the angle grinder. The stator winding consists of two halves that are not electrically connected.
The armature winding consists of many windings, but at any given time the brushes connect only two armature windings.
When the grinder is turned on, current is supplied to the input of half of the stator winding, the output of the stator winding is connected to the brush holder into which the brush is inserted using a spring.
The brush transmits current to half of the armature winding, on the other hand, the other brush receives current and through the brush holder transmits current to the other half of the stator winding. The current entered and exited the grinder.
If the entire electrical circuit is working properly, the armature will begin to rotate.
Reverse, i.e. changing the direction of rotation of the disk can be done by swapping the wires going to the brushes from the stator windings. Just disconnect the wires on the brushes and swap them.
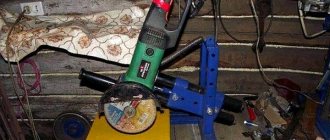
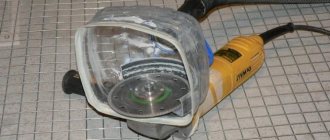
At the end of the angle grinder body there is a red wheel for stepwise regulation of the speed of rotation of the armature and a screw for removing the casing.
In this type of grinder, the brushes themselves are located inside the body and there is no access to them, but the developers have simplified the replacement of brushes when removing the casing. After unscrewing the screw, the plastic plate is removed and the outer casing moves towards the cord, exposing all the insides, including the brush holders.
The speed control mechanism is electronic. The entire circuit is filled with epoxy resin and only the speed control wheel and the radiator are placed outside. What's hidden inside. trade secret of the company. When the block fails.
the speed is no longer regulated, but remains at the maximum level. In any case, you shouldn’t despair, and you can turn on the most ordinary dimmer in series with the angle grinder. dimmer
With its help, you can regulate the speed of any brushed AC motor, the main thing is that the motor power does not exceed the power of the dimmer.
Do-it-yourself grinder repair (Bearing replacement)
Sometimes it is better to carry out preventive maintenance on the instrument in time than to end up with expensive repairs.
Systematization of faults in the electrical part of angle grinders
- The simplest fault that causes the angle grinder to not turn on is a broken power cord. Most often, a break occurs in the power cord near the plug or at the entrance to the instrument. The malfunction can be easily resolved by replacing the power cord or removing the broken piece of wire.
- Increased heating in the area where carbon brushes are installed. Most often, such a malfunction occurs due to shortening the carbon brushes below the nominal size. The length of carbon brushes cannot be shorter than 8 mm.
- The grinder's power button goes down. The malfunction is due to burnout of the internal contacts in the button. Eliminated by completely replacing the switch with a new one.
- Some models of angle grinders use a device that allows you to smoothly regulate the speed of the angle grinder. The angle grinder's speed regulator improves the smooth operation of the angle grinder and prevents the working tool from biting. Repair of the angle grinder speed controller consists of completely replacing it.
Grouping of faults according to the mechanical part of the angle grinder
- The appearance of extraneous noise in the grinder gearbox, heating of the gearbox. The malfunction is associated with the destruction of the support bearing, wear of the gear teeth of the gearbox, and drying out of the lubricant. Eliminated by replacing gears when tooth wear is high. If there is slight wear on the gear teeth, you can try to fix it. The tooth profile is corrected manually by filing using a round file and a drill. The lubricant is replaced with a new one every time the gearbox is repaired. New lubricant is applied to thoroughly washed parts.
- Bearing replacement is required when it is damaged or large play appears. In some models, the bearing is mounted on the spindle with interference. Replacement requires special equipment, in particular a press. Parts need to be cooled or heated.
- Replacing the bearings on the rotor is required when large runout occurs. The presence of increased runout can be easily seen on the rotor commutator and by the wear rate of the carbon brushes.
How to replace bearings
In some cases, when spindle play is detected, complete disassembly of the angle grinder to free the rotor is not required. In the following video, where an Interskol angle grinder is being repaired, it is often enough to replace the bearing units of the spindle - the support ball bearing at the working end of the spindle and the plain bearing on the opposite side. The absence of play in the rotor bearing is assessed by the noise and vibration of an angle grinder (without a spindle), placing its upper part in a plastic bag to eliminate the possibility of lubricant splashing during operation. More detailed information on replacing bearings on angle grinders will be provided at the link.
Source
Simple faults and methods for diagnosing and eliminating them yourself
If your grinder does not turn on when you press the “Start” button, then the test begins by inspecting the power cable at the point of entry into the tool.
Unscrew the lid of the angle grinder and check the integrity of the power cord using a tester or phase. Strictly follow safety rules.
If the power cord is intact and the angle grinder does not turn on, replace the “Start” button.
If the grinder does not work when installing a new button, check the quality of fastening of the carbon brushes and their tight fit to the rotor commutator.
A few words about lubrication
The reliability of the gearbox and its durability largely depend on the timely replacement of lubricant and its correct selection.
The Russian fuel and lubricants market offers a wide range of lubricants. Among them, lubricants from Russian manufacturers stand out.
Modern tool manufacturers strongly recommend using only their own lubricants. This is the manufacturer's policy.
Among Russian lubricants, we recommend using lubricants specially designed for gearboxes.
But the quality of work of an angle grinder is affected not only by correctly selected lubricant, but, to a greater extent, by its timely replacement! Do not delay replacing the lubricant; monitor its condition.