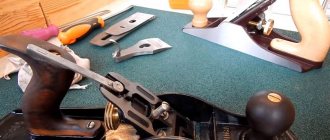
One type of home renovation work is replacing and laying ceramic tiles. Tiles are produced in certain standard sizes and do not always, when covering the surface, completely fit into the geometric parameters of the room. There is a need to shorten the decorative product. A tile cutter is designed to perform such operations. To use the tool correctly, you need to familiarize yourself with the device and its application features.
About the tool
Tile cutter is a generalized name for a device designed to perform straight and shaped cuts on ceramic tiles. Several modifications are made:
- Hand tools - pliers (nippers) equipped with a cutting roller.
- Mechanized with manual control.
- Tile cutter with electric drive.
The power of the device is measured by the effort of one person (hand tool) up to several kilowatts for an electric drive. The last option is the professional series.
Mechanized device
It is used for straight cutting of tiles, porcelain stoneware and rock tiles (marble, limestone) followed by breaking along the groove. Some models are equipped with an additional device (“ballerina”) for making curved lines.
Subdivided:
- Roller tile cutter. Designed to perform cutting in a straight line at the required angle. A special feature of the tool is that the carriage and cutting roller move along smooth guides. Support on bushings.
- Manual tile cutter on bearings. The control cutting carriage slides along power rails through a bearing mechanism. The tool is characterized by increased cutting accuracy and long service life.
The thickness of the cut material reaches 15~20mm. The length of the processed tiles is 300~600 mm.
Mechanical and electric tile cutter
Design
Despite the variety of models produced, they consist of common structural units:
- Bed. The supporting part connecting the individual elements of the tile cutter into a common mechanism. The platform plane is designed to fix the material being processed. The design absorbs the forces arising during the cutting process. Hence, the knot must be strong, rigid, and not deform from the applied forces. These properties affect the quality of the processing performed - deflection of the base and vibration will cause curvature of the cutting line and chipping of the tile edges.
- Guides. They define the cutting line and serve as a support for the movable carriage. Models are available with two tubular components or in the form of a monorail.
- Carriage. Combines the control handle, cutting mechanism and support foot.
- Handle (handle). Transfers forces to the cutter and determines the direction of movement. The assembly must withstand significant forces applied to it during the cutting operation.
- The cutter is a cutting roller in the form of a pointed disk made of carbide steel. It is a replaceable part of a tile cutter; a blunt circle with painted edges destroys the workpiece. It cannot be sharpened, so it is replaced with a quality product.
- Paw. Presses and fixes the tile against possible displacement during processing.
This type of tile cutter design is in demand for solving everyday problems during home repairs. A reinforced device, equipped with bearings and with additional functions (protractor, measuring ruler, fixation to a workbench, etc.) is used by professional tile makers.
Electrically driven
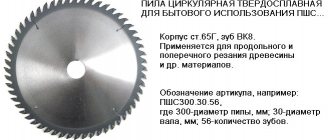
This type of tile cutter belongs to the professional series. It features high performance and power. The depth of cut is determined by the size of the cutting wheel. The tool is a type of circular saw with a narrow task - cutting slab materials.
Basic criteria for choosing a tool
The quality of the work performed largely depends on the quality of the tool used in the work process. The correct choice of a tool, regardless of its design and basic operational characteristics, is ensured by the tile cutter meeting the following criteria:
- No external damage or defects. Controlled by performing a thorough external inspection of the product, test running it and checking adjustments.
- Geometric dimensions of the platform, length of the handle, rigidity of the base.
- Smooth running of moving elements.
- Possibility of cutting at an angle. In addition, you should pay attention to the ease and speed of setting the cutting angle, as well as the accuracy of the final result.
- The quality and material of the cutting disc.
- Includes spare parts and accessories included with the tool.
About tiles
The classic model of a manual tile cutter is designed for cutting ceramic tiles and porcelain stoneware. The listed materials are used for cladding walls and floors in residential and civil premises.
- Ceramic tile. Or tile, in the common name. It is a rectangular plate made of annealed clay. The native color is brown with shades from light to dark tones. The upper part is covered with decorative colored glaze. The average thickness of products is 6~14 mm. Smaller values (6~10mm) correspond to wall-mounted versions, larger values correspond to floor-mounted versions.
- Porcelain tiles. An artificially produced finishing material based on clay, kaolin, sand and spar. It is characterized by high strength and hardness. Technical porcelain tiles resemble natural rock in various color shades. Decorative (artistic) is covered with colored glaze.
Ordinary wall and floor tiles are 1.5~1.7 times inferior in hardness and strength to porcelain tiles. Therefore, when choosing a tile cutter, you need to remember the technical properties of the material being processed.
a way to cut tiles at home
Any process of laying ceramic tiles is not complete without trimming it. There will be a lot of it especially if you use some kind of non-standard layout, for example, diagonally. In the last article we talked about which layout is best to choose in order to get uniform and beautiful trimmings everywhere. Now we will talk about how to properly cut tiles at home.
As you know, tiles are made of baked clay, which is covered with glaze on top. It’s difficult to break it just by hand, but if it lies on some uneven surface, it easily cracks from a small load. To simplify this process and make the required breaking line, you need to weaken the top layer of the glaze - that is, cut it, and therefore apply effort to break it.
There are 3 main ways to do this:
- Special tool - manual, electric tile cutter or special tongs.
- Bulgarian.
- Other sharp tools at hand.
Let's talk in more detail about each method of cutting tiles.
How to cut porcelain tiles
It is believed that porcelain stoneware is the hardest material from which floor tiles are made. You can trim it in the same way as regular tile.
Sometimes simple floor tiles are more difficult to cut than porcelain tiles. There are hardened tiles, on which, after cutting with a tile cutter, the cut in the glaze is almost invisible. And even a diamond disc on an angle grinder doesn’t take it - the cut turns out torn, like after a tractor. In such cases, you need to use a grinder and file a 2-3 mm groove on the back side to mark the location of the break.
Working with a manual tile cutter
The operating principle of a roller tile cutter is based on cutting a groove in the body of the tile. The scratch depth does not exceed 0.1~0.4mm. The process is reminiscent of cutting glass with a manual glass cutter.
Fired clay (ceramics) during the manufacturing process acquires a negative property - sensitivity to stress concentrators. In this case, it is a cut groove in the form of a microtriangle. The application of additional external forces causes cracking along the generatrix - the tile is divided into parts.
Tool preparation
The condition of the tile cutter directly affects the quality of the work performed. Hence, before starting work you need to:
- Check and remove dirt deposits from the platform, guides, carriage and foot. The presence of mechanical inclusions can lead to curvature of the cut line and chipping of the tile edges.
- Inspect the tool to identify possible deformations - the curvature of the frame, guides or handle will disrupt the normal processing process.
- Check the condition of the roller - it must be intact, sharp, and free of potholes and burrs. If necessary, replace with a working one. The cutting disk must be securely fixed - rotation is carried out in one plane, without backlash (free movements).
- Perform an idle run to check the coincidence of the roller movement along the central markings on the frame, and make corrective adjustments.
- It is advisable to lubricate the guides or bearings with machine oil - the carriage will slide easier without jamming.
Straight cut
The stage of cutting tiles begins with marking the tiles - the line of the future cut is drawn on the surface with a pencil or marker. It is outlined using a ruler or a carpenter's square.
Further:
- Place the tiles on the surface of the platform and secure. The marking line must coincide with the central axis of the bed.
- Make a “zero” cut - lightly touching the workpiece with the wheel, check that the direction of movement of the roller coincides with the applied markings. Adjust the position of the tile until the axes completely coincide.
- Place the cutter at the starting point - on the edge of the tile.
- Having created a force on the handle from top to bottom, move the carriage “away from you” from the beginning to the end of the workpiece - a quiet, characteristic scraping-rustling sound will be heard.
- Move the foot to the middle of the tile and press the handle with a fairly sharp movement - the ceramic product will split.
Cutting off small parts
A mechanical tile cutter allows you to confidently cut a part at a distance of 10~20 mm from the edge. For smaller sizes, it is advisable to use a manual device - tongs:
- The workpiece is marked.
- Place the support strip on the surface of the tile along the marking line. You can use a flat wooden block or a metal ruler as a guide.
- Draw a groove with a roller.
- Place the tile on a hard, durable surface with a smooth edge, such as a stool, chair or table. The cut part of the tile should protrude 2~5 mm beyond the reference plane.
- Using gentle movements, break off pieces of ceramic using the jaws of the pliers. Sharp edges and irregularities are dulled with a spatula or abrasive stone.
Curvilinear cut
Some models of tile cutters are equipped with a “ballerina” - a circular drill for creating holes:
- Marking is carried out to determine the center of the future hole. Use a ruler, compass, pencil.
- The workpiece is located on the bed. The marking center must be located on the main axis of the platform.
- The “ballerina” is brought in, the main rod with a pointed end is aligned in the center of the circle being performed.
- The circle line is lightly lubricated with oil, the cut is carried out by rotating the handle clockwise.
- The exit of the central drill means that the tile needs to be turned over and drilled from the reverse side. Correct uneven edges with a grinding tool (file, medium-grained or fine sandpaper).
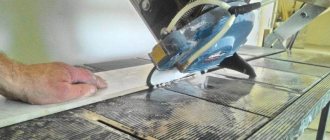
How to use an electric tile cutter
A professional electric tool will help you quickly and evenly cut a part of the required size from the workpiece, as well as make a diagonal or figured cut. Such equipment easily copes with ceramic and floor tiles with a thickness of over 16 mm.
You need to cut tiles with an electric tile cutter using the following technology:
- install the unit on a flat and stable base (workbench, table);
- Apply markings on the glazed side with a marker or felt-tip pen;
- place the workpiece on the working surface of the device, aligning the beginning of the drawn line with the pointer;
- turn on the engine of the unit;
- we cut the tile, carefully pushing it towards the cutting disc (when the cutting element comes into contact with the material being processed, increase the force);
- turn off the device.
If an electric tile cutter model with an overhead motor is used, the part to be cut is firmly fixed to the frame (rests against special clamps), and then the saw head is lowered onto it. The cut starts from the edge of the marking line.
Safety precautions
A tile cutter, even a manual one, is a source of increased danger. Hence, it is necessary to observe safety measures:
- Read the instructions for using the tool and follow the manufacturer's recommendations.
- Use closed clothing made of durable and dense fabric. Use protective gloves and goggles (mask)
Be sure (!) to check the serviceability of the tile cutter before starting work. A faulty tool is a guarantee of injury and damage to the tiles.
- The tile cutter must be installed on a strong and rigid base that does not create vibrations.
- Avoid excessive force when cutting tiles, as this can lead to deformation of the bed, guides and handle. The carriage or foot may break, as well as cracking of the tiles.
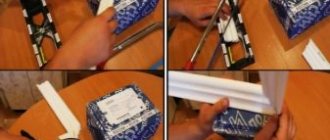
Tile cutter-tongs
Tile cutters - nippers are the cheapest (200–400 rubles), and they are suitable only for small volumes of work with thin ceramic tiles at home.
After making the cut, press the tile down with the breaking pliers.
Cutting tiles with a tile cutter.
- Make markings taking into account all gaps and seams (–5 mm).
- Attach a metal ruler to the marking mowing line and run the cutter along it once. The pressure should be moderate to form a visible strip. Lead him from the far edge towards you.
- Position the pliers with their claws along the crowbar's mowing line near the edge. The lips should be on top of the icing and the straight part at the bottom. The break line should run straight down the middle between the edges of the top jaw.
- Gently press the handles to break off the tiles. However, do not lift it high, otherwise it will break after falling.
READ Chainsaw how to use
We make a cut at 45 degrees
Ceramic pencil skirting is best for protecting sharp outer corners of tiles
If you use a professional electric tile cutter , then the inclined platform there makes it easy to make a 45-degree angle on the bevel of the tile, but not everyone has such a tool. You can easily make such an angle yourself using the same grinder “by eye”. The disc is held along the cutting line of the cut, and it should be slightly inclined inward.
How to cut tiles with the letter "L"
Since a tile cutter can only cut tiles straight, many people have difficulty with L-shaped cuts. The simplest option is to divide this tile into 2 rectangular elements, but then you will end up with an extra ugly seam that will catch your eye.
But this can be avoided if you cut the short side with a grinder, and then the long side with a tile cutter.
Step by step instructions on how to make L-shaped cuts on tiles
The second method: using any method available to you, a cut is made on the glaze, and the excess is gradually broken off with pliers. Irregularities are processed with sandpaper. This option will even allow you to get a rounded cut for connecting to the risers.
How to choose the right disc for tiles
For cutting, metal discs with diamond coating on its edges are used. But they are different: for concrete, brick, stone. Tile disks do not have any holes, the soldering on them is uniform and smooth. Concrete discs have slots on the solder and will create chips when vibrating. If you cut ceramic tiles with it, these chips can fly into your face.
FAQ
- Do you need to wet your tiles? No, dry tiles cut well. Lubricant, in the form of drops of oil, can be added when working with floor tiles or porcelain stoneware.
- Does the cutting speed depend on the force applied? Depends, but partly. Thin, 6~8 mm tiles can simply crack, so clear, uniform movements are more important here. Porcelain tiles will require a lot of effort, but there is a risk of damaging (deforming) the frame or other parts of the tile cutter. It is necessary to choose the “golden” mean, and this comes with work experience.
- Do you need additional support points? Yes, especially when the edge of the tile extends beyond the frame by more than 150~200 mm. In this case, a strong support is placed, comparable in height to the base of the tile cutter, for example, a wooden block or wedges.
- How to cut porcelain tiles? Tiles up to 10~12 mm thick can be cut using a classic tile cutter. This is available to experienced craftsmen who know the behavior of durable materials. For inexperienced users, it is advisable to use a grinder with a diamond wheel.
- How to quickly learn how to use a tile cutter? In general, the operation is quite simple. But here it is important to feel the cutting process itself, learn to control your movements and efforts. For some, one day is enough, for others, a week is not enough. There is only one piece of advice in this case: practice on one or two tiles if you don’t have time for longer practical training.
Mastering the process of cutting tiles yourself is a matter of time and desire. A good helper for this is a manual roller tile cutter. Knowing the properties and geometric characteristics of tiles, you can select the appropriate tool and begin laying ceramics.
What is a tile cutter and why is it needed?
Many people have no idea what a tile cutter is and why such a tool is needed at all. If we consider this issue in more detail, then this is the most common device that allows you to quickly and accurately cut ceramic tiles. Today, both manual and electric tools are actively used in construction. It is worth noting that you can easily cope with the operation only if you use a manual tile cutter, but with the electric version some difficulties may arise.
What to look for when choosing a tile cutter video
Even if we consider that both types of instruments have the same name, they are not at all similar to each other. The only exception, of course, is the final result of using the tool. In order to be able to use a manual tile cutter, you need to use it to make furrows (the unit has very sharp cutters), and then make a break in the tile. In turn, the electric type of tile cutter works with a battery or from an electrical network and, in its appearance and operating principle, can be a little reminiscent of a circular saw. The tiles are cut using a very sharp diamond blade, which has an incredibly high rotation speed.